— 11 —
7 8
64 5
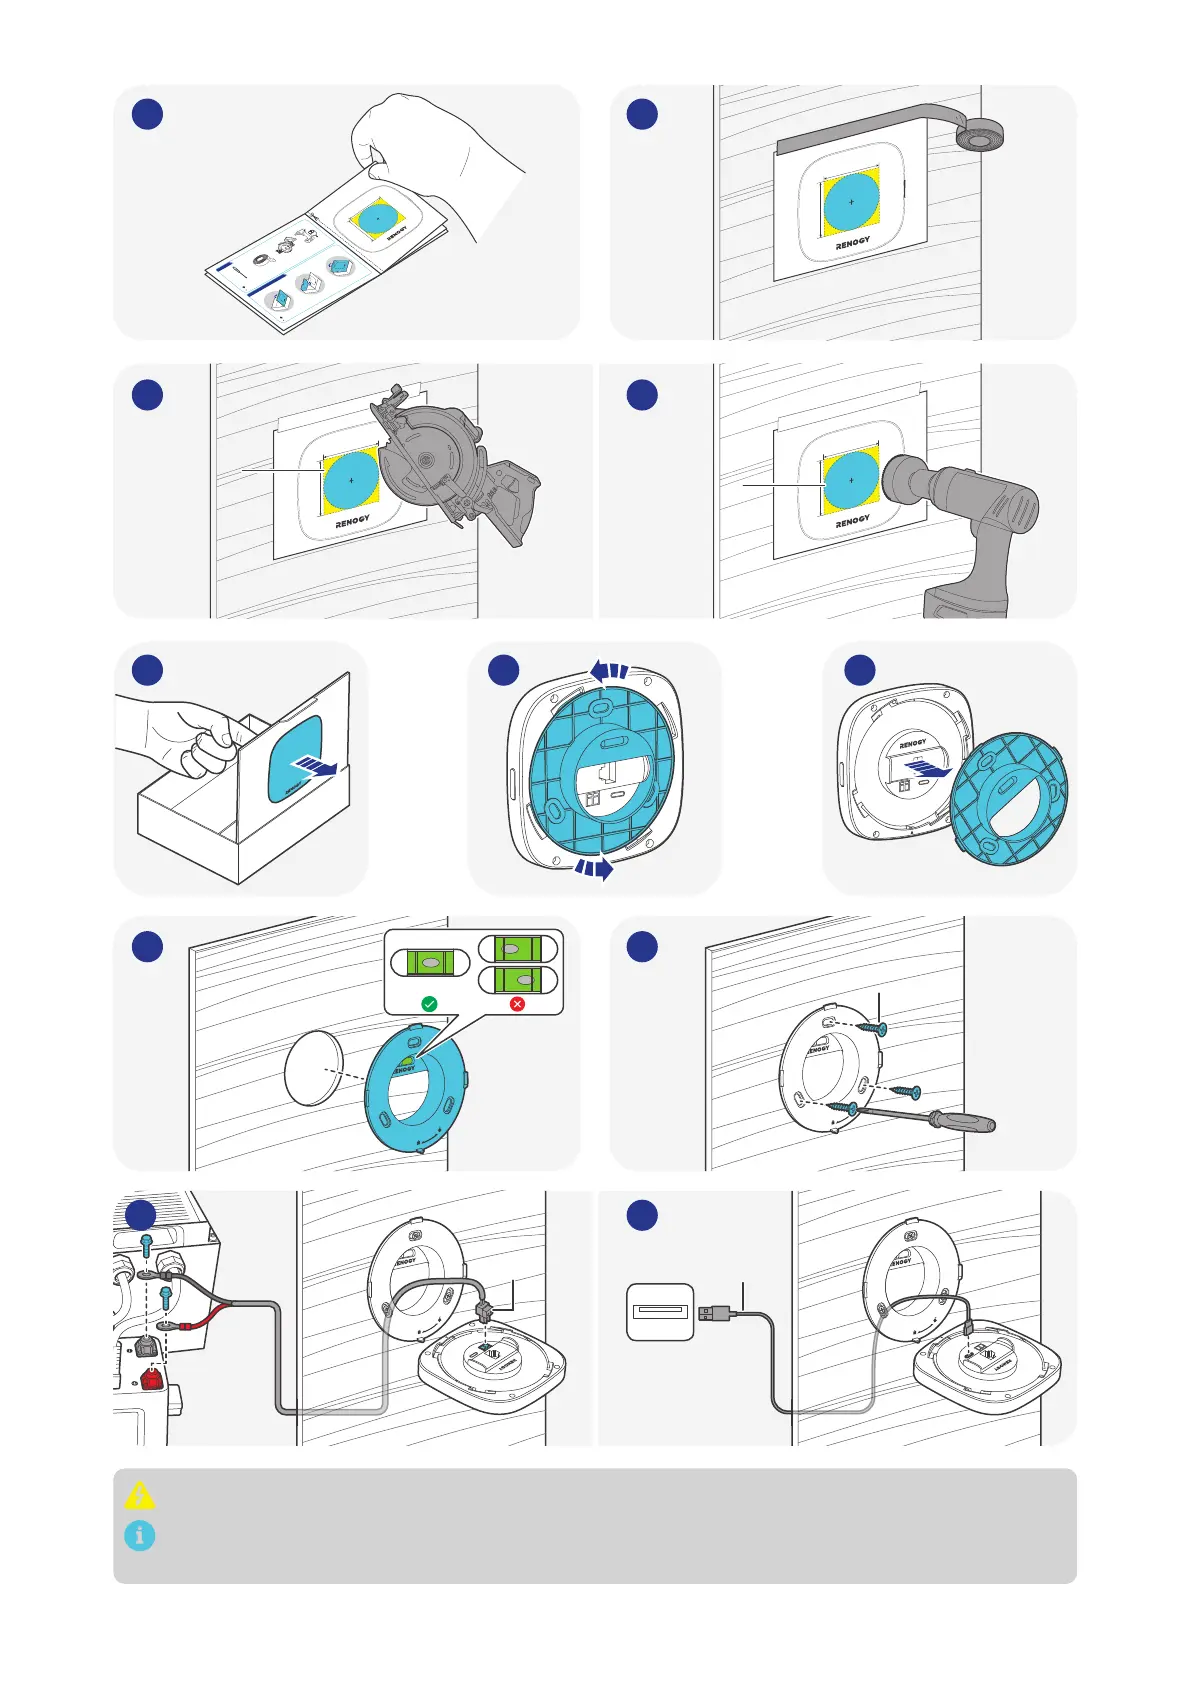
Tools are required only when the Core is flush mounted on a wall.
NOTE
The RV leveling function is unavailable on Core when it is placed on a table.
NOTE
Step 1 (A). Place Renogy ONE Core on a Table
1
2
3
The package box is environmentally friendly. You can use it as a bracket to hold the Core when installing it on the wall is
not required.
Required Tools
Phillips Screwdriver (#1) Insulation Tape
Skill Saw or Electric Drill and Hole Saw (55mm)
Please tear o this piece of paper and paste it to the mounting location for drilling holes.
Mounting Template
2.17in (55mm)
2.17in
(55mm)
Please tear o this piece of paper and paste it to the mounting location for drilling holes.
Mounting Template
2.17in (55mm)
2.17in
(55mm)
Yellow Area
Please tear o this piece of paper and paste it to the mounting location for drilling holes.
Mounting Template
2.17in (55mm)
2.17in
(55mm)
Blue Area
Please tear o this piece of paper and paste it to the mounting location for drilling holes.
Mounting Template
2.17in (55mm)
2.17in
(55mm)
3A 3B
1 2
5V, DC
Type-C Cable
(optional)
9A 9B
When installing the power cable, always connect the negative first, and then the positive.
You can connect Renogy ONE Core to a power supply through the included power cable or a
Type-C cable (not included).

 Loading...