Panel Descriptions
5
Deutsch Français Italiano Español Português NederlandsEnglish
NOTE
• To prevent malfunction and equipment failure, always turn down the volume, and turn o all the units before making any connections.
• When connection cables with resistors are used, the volume level of equipment connected to the inputs (GUITAR CHANNEL, MIC/LINE CHANNEL,
AUX IN) may be low. If this happens, use connection cables that do not contain resistors.
8
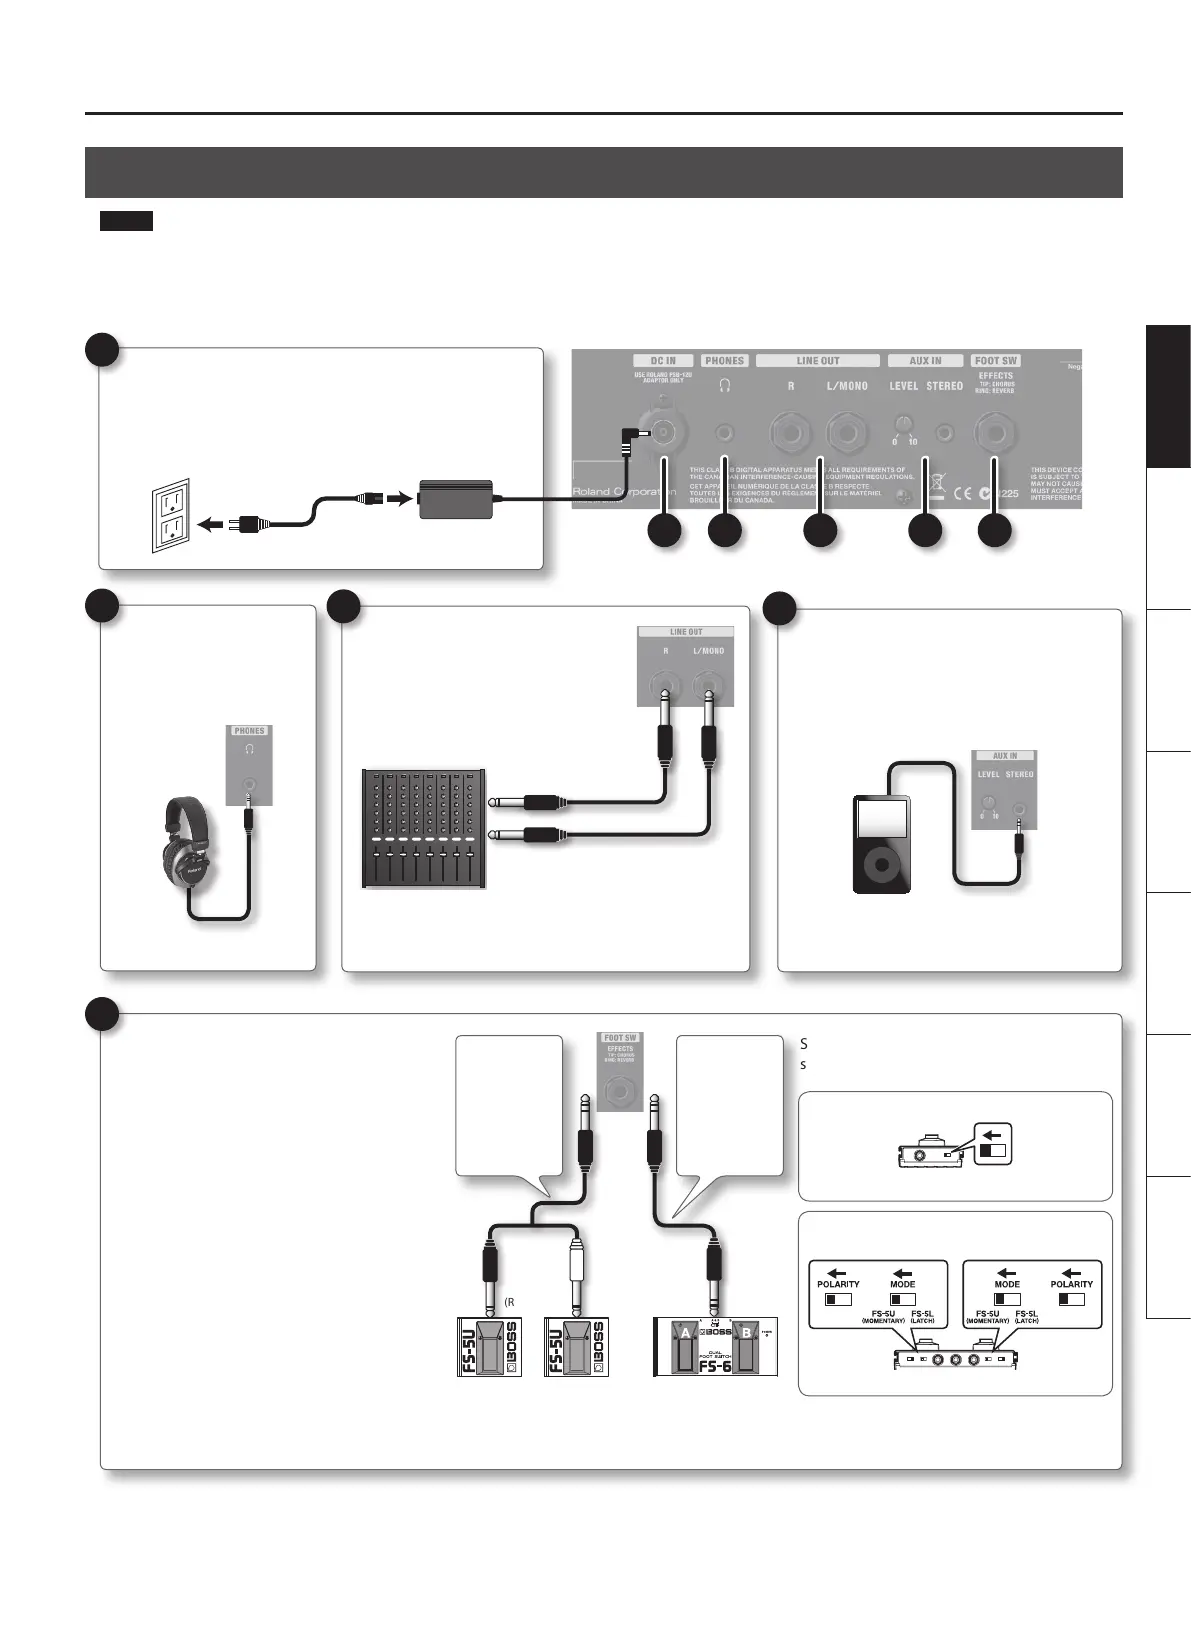
Jack Panel (Connecting Your Equipment)
7 8 9 10 11
11
FOOT SW jack
If footswitches are connected, you’ll be able to
control the turn eects on/o using your foot.
* You’ll need momentary-type footswitches
(BOSS FS-5U or FS-6; sold separately).
• Chorus on/o and Reverb on/o operations
apply in common to the GUITAR CHANNEL
and the MIC/LINE CHANNEL.
• If the [CHORUS] switch is “OFF” or if the
[REVERB] knob is at 0, you won’t be able to
turn chorus or reverb on/o by operating the
footswitch.
• If you use a phone plug (mono) cable to
connect only one footswitch, it will only turn
chorus on/o.
7
DC IN jack
Connect the included AC adaptor here.
* You must use only the AC adaptor that is supplied with
the AC-40.
PHONES jack
Connect headphones
equipped with a stereo
mini-plug.
9
LINE OUT jacks
You can connect your mixer or
recorder here.
Connect to the L/MONO jack if you’re
outputting in mono.
* The [MASTER] knob does not aect the output from
the LINE OUT jacks.
10
AUX IN jack/[LEVEL] knob
Use the stereo mini-cable to connect your
CD player or digital audio player here.
Use the [LEVEL] knob to adjust the volume.
* The chorus/reverb is not applied to AUX
IN jack.
Set the polarity switch of the footswitches as
shown in the illustration.
MODE/POLARITY switches
B A
BOSS FS-6
BOSS FS-5U
Red
(RING)
BOSS FS-5U BOSS FS-6
or
POLARITY switch
Cable:
Stereo 1/4”
phone type
2
Stereo 1/4”
phone type
Cable:
Stereo 1/4”
phone type
2
1/4” phone type
x 2
REVERB
on/o
CHORUS
on/o
REVERB
on/o
CHORUS
on/o
White
(TIP)
 Loading...