17
Getting Ready
Quick Start
1
Before installing the Wave Expansion Board, turn off the
power of the XP-30 and all connected devices, and disconnect
all cables from the XP-30.
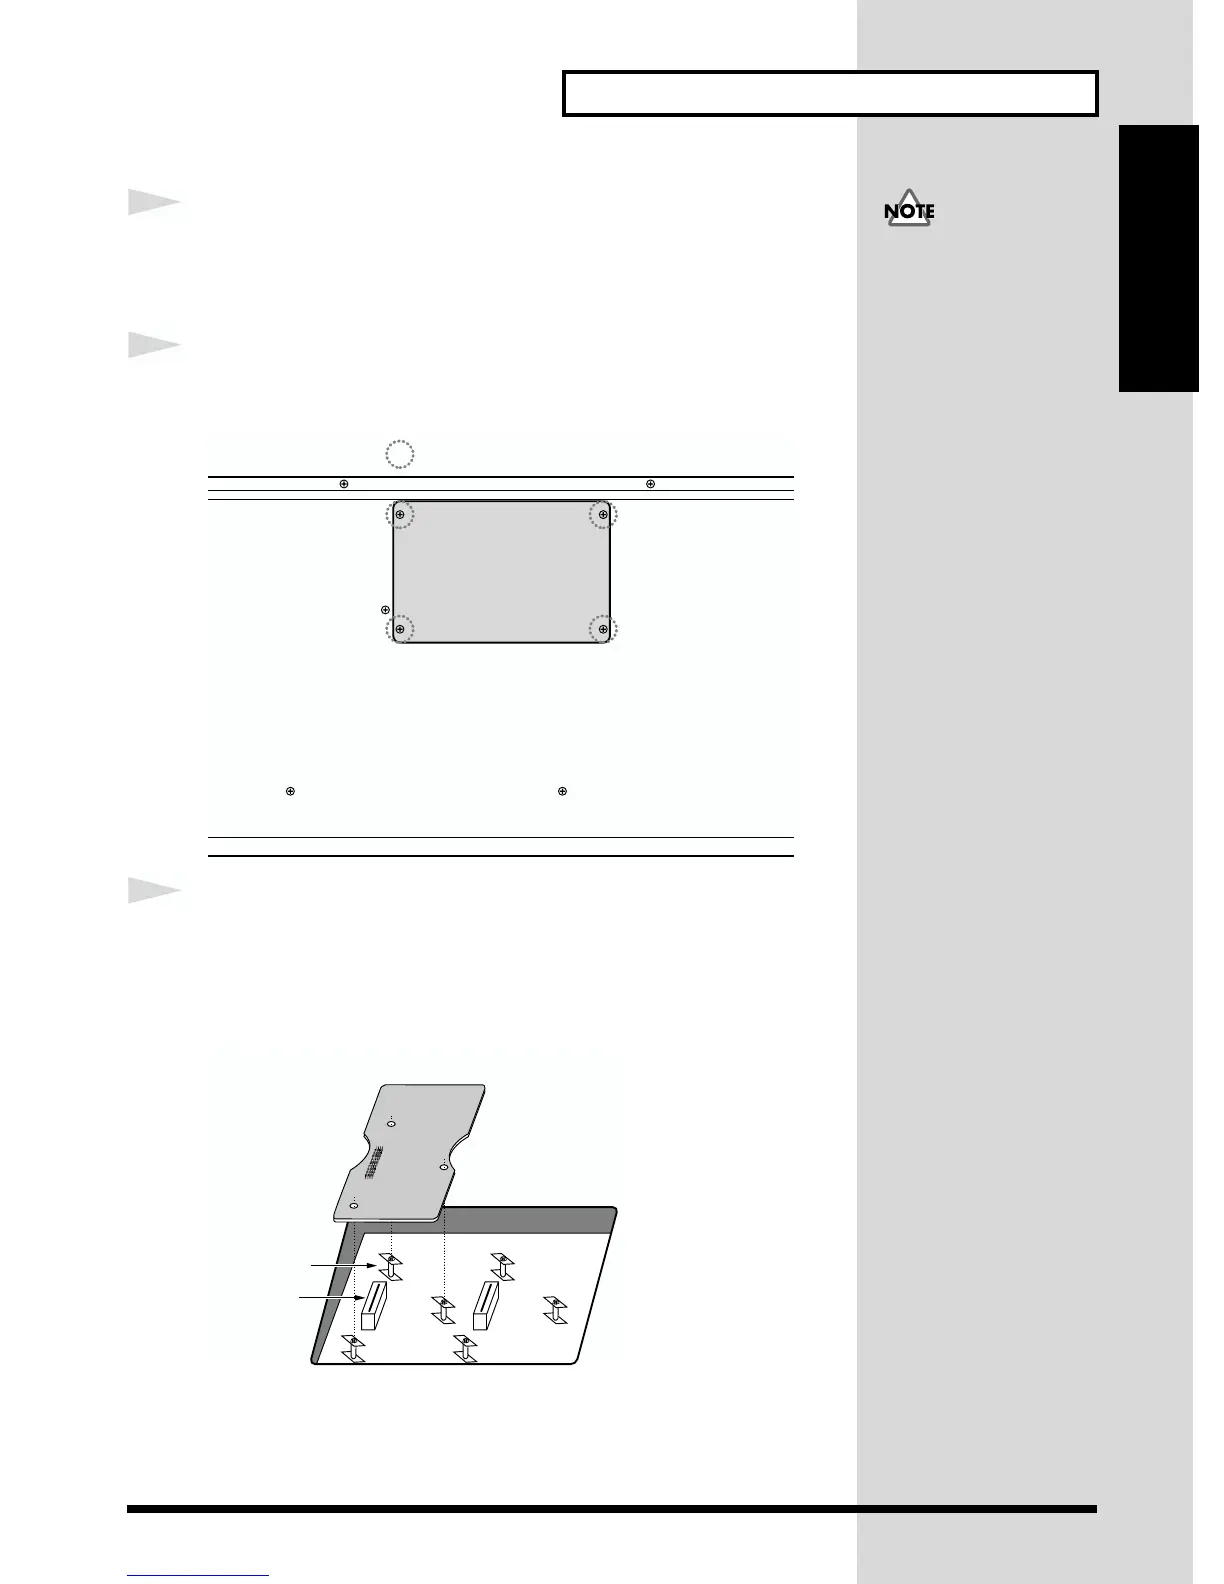
2
Turn the XP-30 on its back, and remove only the screws shown
in the following diagram.
fig.Q-02a.e
3
Inside, there are two connectors and six board holders. Insert
the connectors of the Wave Expansion Board into the internal
connectors, and simultaneously insert the board holders into
the holes of the Wave Expansion Board.
fig.Q-02b.e
If the same type of Wave
Expansion Board is
installed in the EXP-D slot
and the EXP-E slot, it will
only be possible to select
data from the Wave
Expansion Board that was
installed in the EXP-D slot.
Also, the XP-30 already
contains the data of the
following three Wave
Expansion Boards, so if one
of these Wave Expansion
Boards is installed, only the
internal data (XP-A–C) can
e selected.
SR-JV80-09 “Session”
(XP-A)
SR-JV80-02 “Orchestral”
(XP-B)
SR-JV80-11 “Techno
Collection” (XP-C)
Screws to be removed
Wave Expansion Board
Connector
Board holder
EXP D
EXP E

 Loading...