EasyManua.ls Logo

Ryobi 768r User Manual

Ryobi 768r
24 pages
To Next Page IconTo Next Page
To Previous Page IconTo Previous Page
Page #13 background imageLoading...
Page #13 background image
STARTING/STOPPING INSTRUCTIONS
13
Choke Lever
Full Choke Position (A)
Starter Rope
Throttle Control
On/Off Stop Control
Primer Bulb
Fig. 16
STARTING INSTRUCTIONS
WARNING: Avoid accidental starting. Be in
the starting position when pulling the starter
rope (Fig. 16). The operator and unit must be
in a stable position while starting to avoid
serious personal injury.
NOTE: When using the shoulder harness, have it on and
adjusted, but not clipped to the support fitting
prior to starting unit. See Installing the Harnes,
Pg. 9.
1. Mix gas with oil. Fill fuel tank with fuel/oil mixture.
See Oil and Fuel Mixing Instructions on Pg.12.
2. Put the On/Off Stop Control in the ON position
(Fig. 14).
3. Fully press and release primer bulb slowly 5 to 7
times. Fuel should be felt and visible in the bulb
(Fig. 15). If fuel hasn’t entered the bulb, press three
more times, or until it does.
4. Place the choke lever in the
FULL choke position (A)
(Fig. 15).
5. With the unit on the ground, squeeze the throttle
control and hold. Pull starter rope briskly (Fig. 16).
Continue pulling until the engine sounds as though it
wants to run (normally 2 to 5 pulls).
NOTE: Squeeze the throttle control until the engine has
started and warmed up.
6. Place the choke lever in the
PARTIAL choke position
(B) (Fig. 15).
7. Pull starter rope briskly 1 to 3 times to start the
engine (Fig. 16).
8. If the engine does not start, repeat steps
4 through 7.
NOTE: If the engine floods while trying to start, place the
choke lever in the RUN position (C). Squeeze the
throttle control. Pull the starter rope briskly. The
engine should start within three (3) to eight (8)
pulls.
9. Squeeze the throttle control to warm up engine for 5
to 10 seconds. Place the choke lever in the
RUN
position (C) (Fig. 15).
10. Stand in the operating position and clip the shoulder
to the support fitting
NOTE: Choking is unnecessary when starting a warm
engine. Put the On/Off Stop Control in the ON
position (Fig. 14), and start in PARTIAL Choke
position (B) (Fig. 15).
WARNING: Operate this unit only
in a well ventilated area outdoors. Carbon
monoxide exhaust fumes can be lethal in a
confined area.
STOPPING INSTRUCTIONS
1. Release your hand from the throttle control (Fig. 16).
Allow the engine to cool down by idling.
2. Put the On/Off Stop Control in the OFF position
(Fig. 14).
Fig. 14
Fig. 15
Run Position (C)
Partial Choke
Position (B)
Question and Answer IconNeed help?

Do you have a question about the Ryobi 768r and is the answer not in the manual?

Ryobi 768r Specifications

General IconGeneral
BrandRyobi
Model768r
CategoryTrimmer
LanguageEnglish

Summary

California Emission Regulations

Spark Arrestor

Rules for Safe Operation

Important Safety Information

General safety precautions and warnings before operating the trimmer.

Safety Warnings for Gas Trimmers

Specific safety guidelines for handling gasoline and operating gas-powered trimmers.

Flail Head Safety

Other Safety Warnings

Safety and International Symbols

Know Your Unit

Assembly Instructions

Installing the Harness

Steps to attach and adjust the shoulder harness for the trimmer.

Assembling the Flail Head

Detailed instructions for putting together the flail head attachment.

Removing the Cutting Attachment

Installing the Flail Head

Installing the Cutting Attachment

Removing the Flail Head

Oil and Fuel Information

Oil and Fuel Mixing Instructions

Correct ratio and procedures for mixing oil and gasoline for the engine.

Using Blended Fuels

Precautions and recommendations for using blended fuels.

Using Fuel Additives

Guidance on using fuel additives to maintain engine performance.

Starting/Stopping Instructions

Starting Instructions

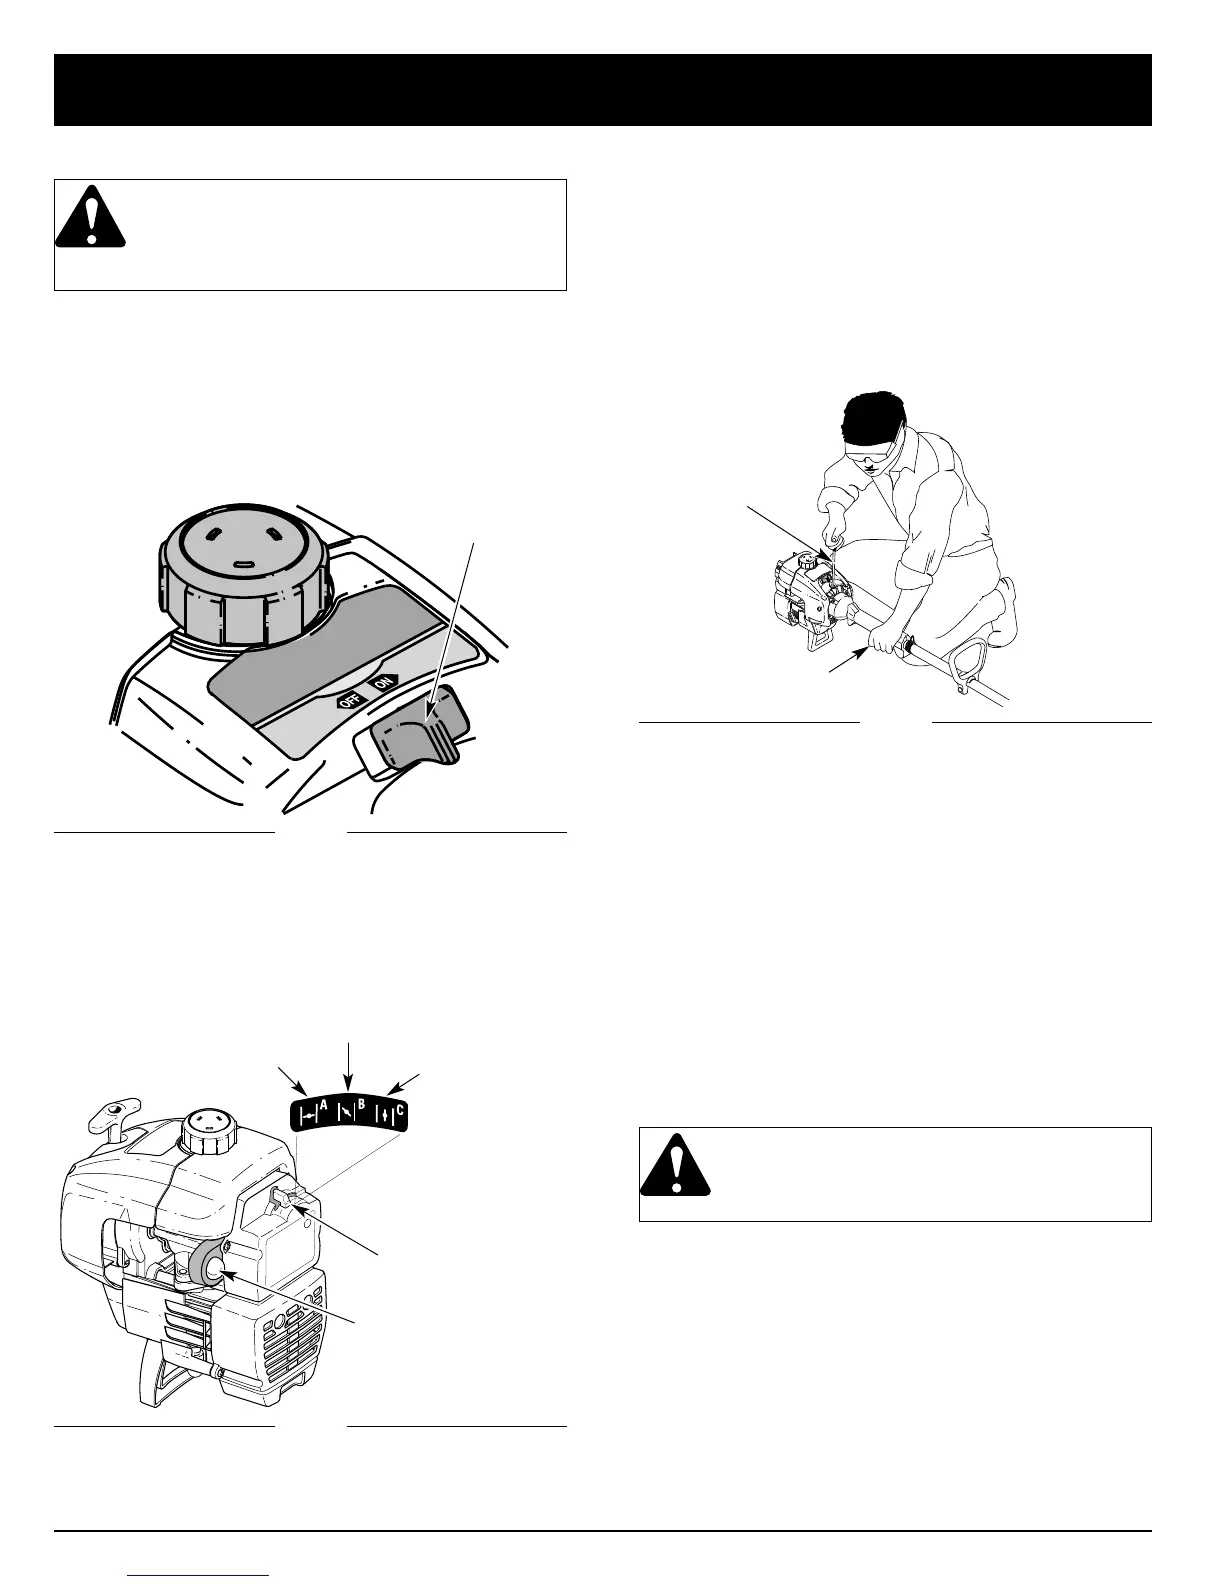
Step-by-step guide on how to start the trimmer engine safely.

Stopping Instructions

Procedures for safely shutting down the trimmer engine.

Operating Instructions

Holding the Trimmer

Proper grip and posture for operating the trimmer safely.

Adjusting Trimming Line Length

How to release and adjust the trimmer line while operating.

Tips for Best Trimming Results

Techniques for efficient and effective grass trimming.

Decorative Trimming

Operating the Flail Head

Maintenance and Repair Instructions

Maintenance Schedule

Recommended maintenance tasks and their frequencies.

Line Installation

Winding the Existing Inner Reel

Installing a Prewound Reel

Air Filter Maintenance

Carburetor Adjustment

Replacing the Spark Plug

Cleaning and Storage

Cleaning

Instructions for cleaning the exterior of the trimmer.

Storage

Guidelines for storing the trimmer properly.

Long Term Storage

Procedures for storing the trimmer for extended periods.

Transporting

Safety precautions for transporting the trimmer.

Troubleshooting

Engine Will Not Start

Common causes and actions for when the engine fails to start.

Engine Will Not Idle

Solutions for issues with the engine's idle speed.

Engine Will Not Accelerate

Troubleshooting steps for acceleration problems.

Engine Lacks Power or Stalls When Cutting

Diagnosing and fixing power loss or stalling during operation.

Cutting Attachment Will Not Advance Line

Steps to resolve issues with the trimmer line not feeding.

Specifications

Engine

Technical specifications for the trimmer's engine.

Driveshaft & Cutting Attachment

Technical specifications for the trimmer's driveshaft and attachments.

California Emission Control Warranty Statement

Owner's Warranty Responsibilities

Owner's duties regarding maintenance and care for warranty.

Manufacturer's Warranty Coverage

Details of what the manufacturer covers under the emission warranty.

Limited Two-Year Warranty

Related product manuals