18
TEST / PAIRING
SELECT
SET
TEST / PAIRING
SELECT
SET
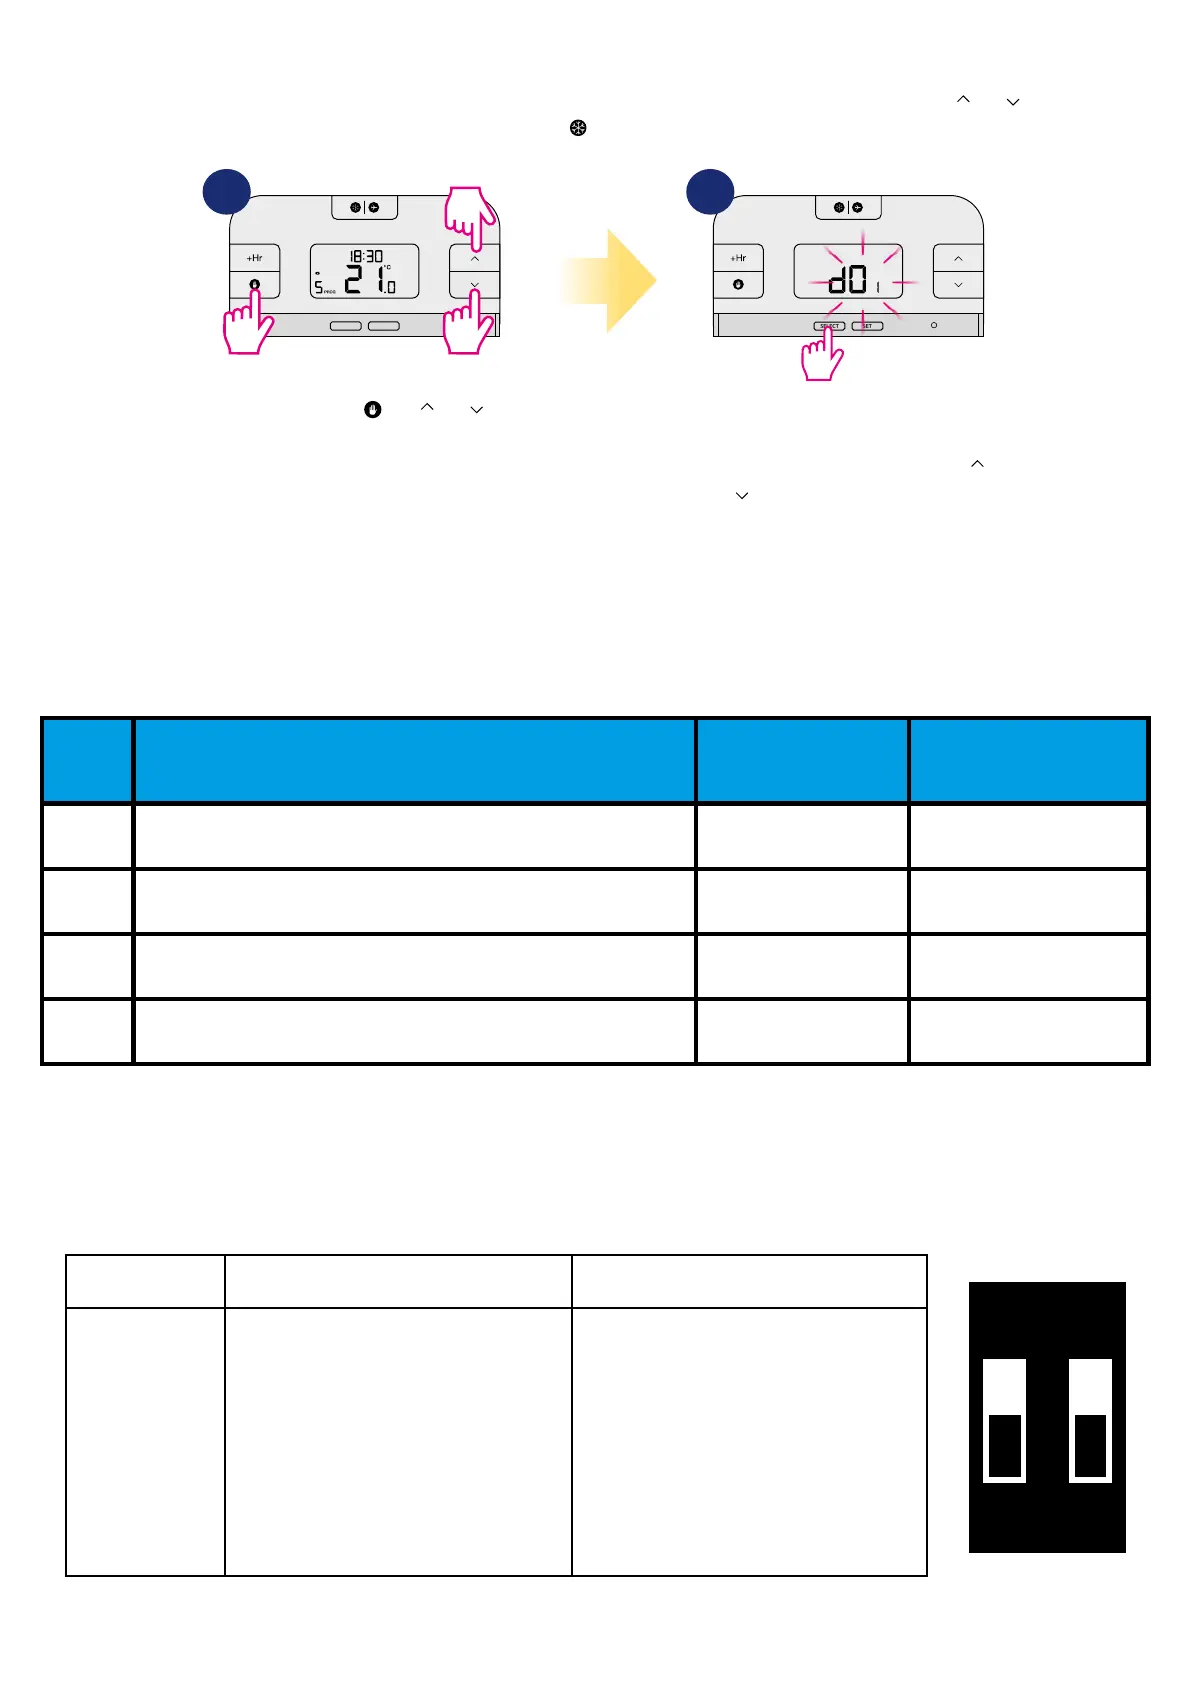
7. Installer mode
7.1 DIP switches parameters
To enter installer parameters please follow steps below. Please refer to parameters table description before any changes. Use or buttons to move
up or down between all parameters. Every change/selection conrm by button.
DIP switched are used to set chosen control algorithm. They are under back cover of the thermostat (please refer to the picture below):
DETAILED TABLE WITH ALL INSTALLER PARAMETERS:
Press and hold
+ +
simultanously for about 3 seconds to
enter the installer mode.
Use SELECT button to choose parame-
ter, conrm selection by SET button.
To change parameter value use
or buttons and conrm selection
by SET button. To exit the installer
mode, wait 10 seconds - thermostat
will re-turn automatically to the main
screen.
1 2
3 sec
3 sec
3 sec
dxx Function Parameter
Default
value
d01 Temperature display accuracy 0.1°C or 0.5°C 0.5°C
d02 Temperature oset +/- 3.0°C 0.0°C
d03 Frost Protection setpoint temperature 5.0°C - 17.0°C 5.0°C
d04 Schedule type 5/2 or 24 hr (7d) 5/2 d
9CPH
±0.25°C
6CPH
Span
TPI
ON
1 2
Type of control TPI Hysteresis
How it works
When TPI is selected on DIP switch № 2, then
DIP switch № 1 is functional. You can choose
the Cycles Per Hour between a lower
comfort level (6CPH) and a higher comfort
level (9CPH).
When Span is selected on DIP switch № 2, then
DIP switch № 1 is not functional. The SPAN
value is set to ± 0.25°C.
 Loading...