S&C Instruction Sheet 765-500 9
Installation
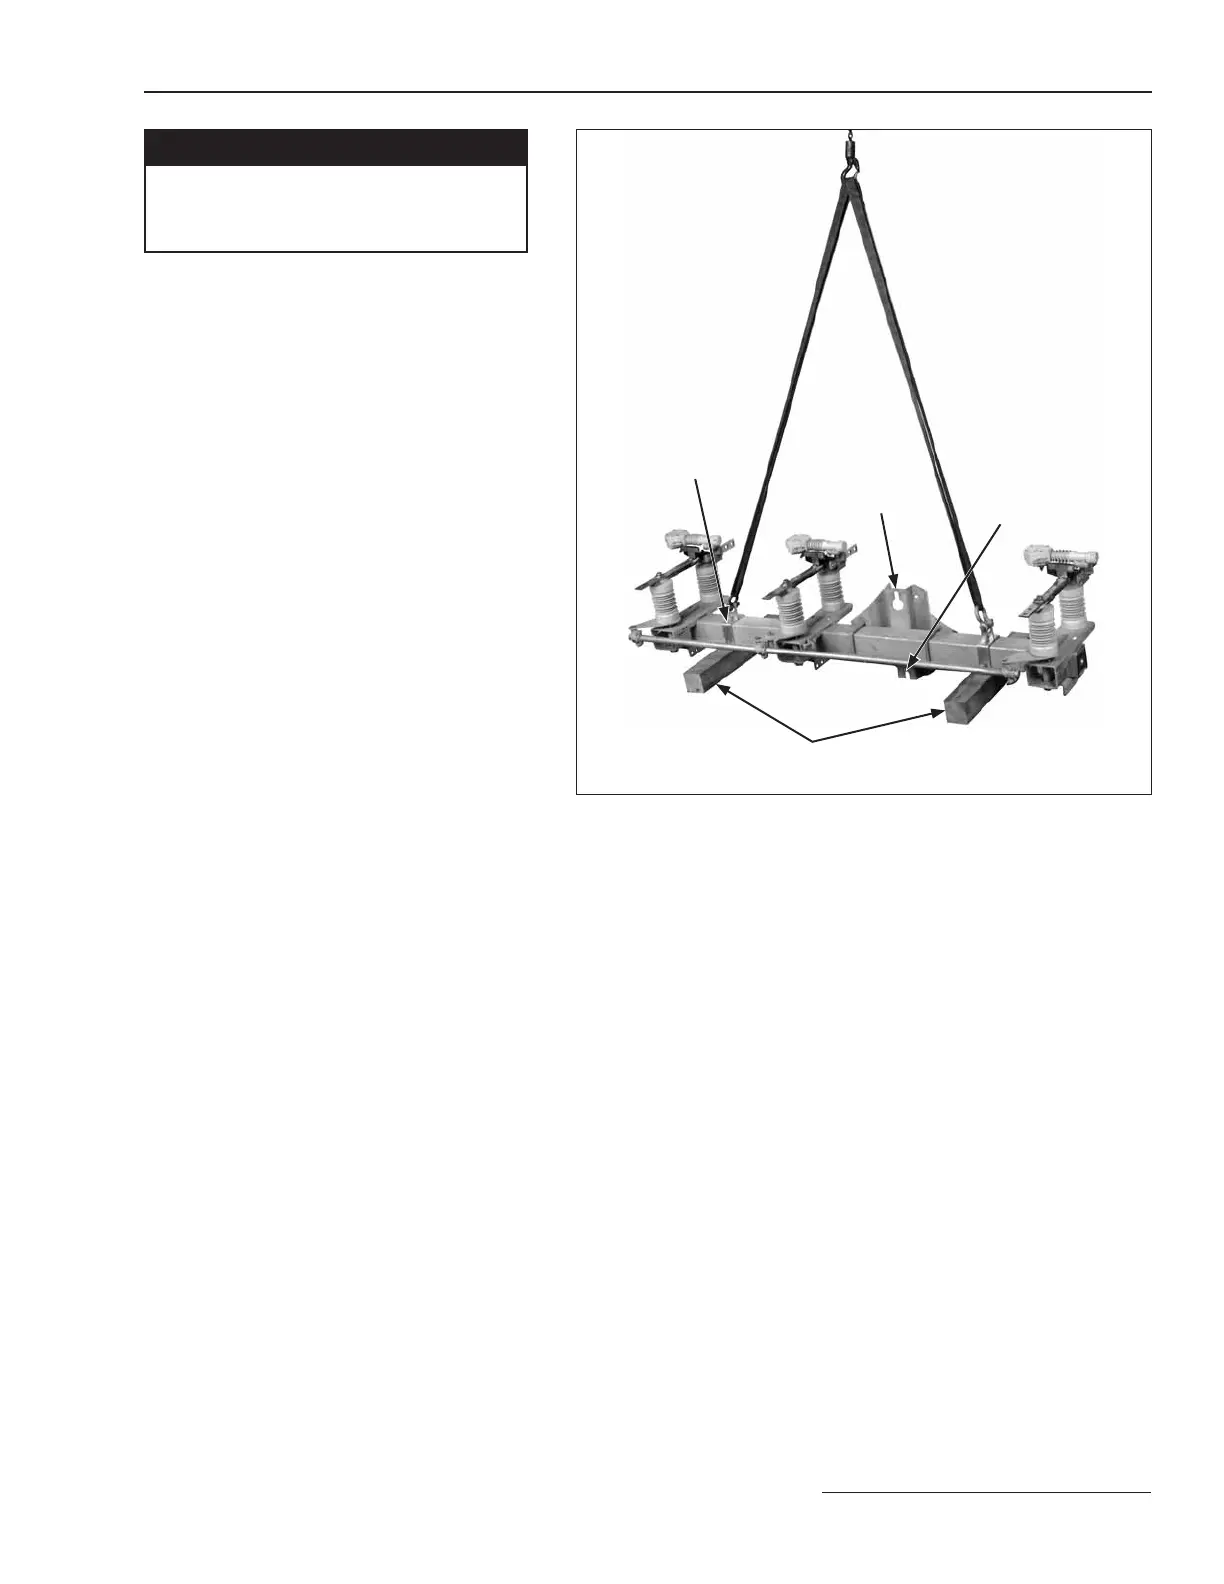
Figure 1. Hoisting upright mounting configuration Omni-Rupter switch
into position.
Keyhole
Lifting bracket
Slotted hole
Wood support members attached to switch base
(remove and discard after switch is mounted)
NOTICE
DO NOT remove the lifting brackets until
the switch has been lifted into place and
bolted to the pole.
Switches in the upright mounting configuration
are provided with two lifting brackets bolted
to a 44 wood support member which is, in
turn, attached to the switch base. See Figure 1.
Since the wood support member is also a part
of the shipping skid, use care to avoid damage
to it during unpacking.
a. Make sure that the switch is fully closed.
b. Attach lifting slings ONLY to the lifting brack-
ets bolted to the wooden support members.
c. Lift the switch as shown in Figure 1 until the
lifting slings are just taut.
d. Unbolt the wooden supports from the ship-
ping skid.
e. Slowly and carefully lift the switch to the
proper mounting height.
f. Guide the switch so that the through bolts
projecting from the utility pole slip into the
holes in the switch’s pole-saddle. (The pole-
saddle is provided with a keyhole and an
open slotted-hole for ease of installation.)
g. Lower the switch so that the pole-saddle
bears down on the through bolts.
h. Securely tighten the through-bolts.
i. Remove wooden supports and lifting
brackets.
If desired, a crossarm brace (user-furnished)
may be attached to the base. Mounting brackets
for crossarm braces must be specified sepa-
rately. Contact your local S&C Sales Office for
details
 Loading...


