www.scheppach.com
GB
|
21
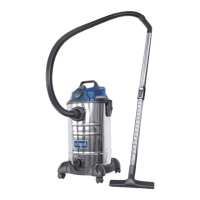
Installing the plastic extension tubes (b), suction
hose (a) and nozzles (e/f) (g. 10)
•
them together.
• Connect the assembled plastic extension tubes with
the bent end of the suction hose (a).
•
end of the assembled plastic extension tubes (b).
10. Start up
Warning! Switch the device o if liquid or foam
emerges with the exhaust air during wet vacuum-
ing.
Switching on/o (g. 11)
•
•
Dry vacuuming
Wet vacuuming
Ensure that
valve (13) closes the suction port and suction operation
is interrupted.
m Attention!
liquids.
(d) provided.
Water drain plug (g. 12)
The stainless steel container (8) is equipped with
a water drain plug (7) in order to make it easier to
drain. -
ter-clockwise and drain out the liquid.
11. Electrical connection
for operation. The connection complies with the appli-
The customer‘s mains connection as well as the ex-
-
ulations.
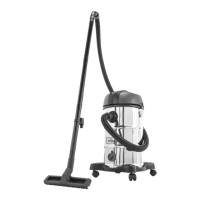
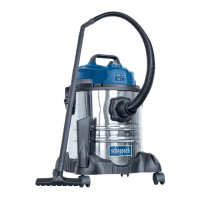
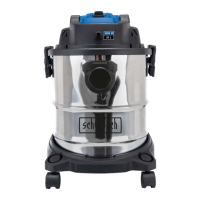
Installing the castors (5) (g. 4)
• Press the four castors (5) into the holes in the castor
mounts (5a).
Installing the machine head (2) (g. 5)
• Place the machine head (2) on the stainless steel
container (8). Secure the machine head (2) with the
locking hooks (3).
(2), ensure that the locking hooks (3) latch into place
Installing the foam lter (d) (g. 6)
•
Installing the paper lter bag (c) (g. 7)
•
in the stainless steel container (8).
The paper
collected.
Installing the extraction hose (a) (g. 8)
Connect the suction hose (a) to the corresponding port,
-
uum.
Vacuuming (g. 8):
Connect the suction hose (a) to the suction hose port
(9). To do so, slide the end of the suction hose (a) with
the two nipples into the suction hose port (9) (A).
the two nipples into the recesses. Once the suction
Blowing (g. 9):
Connect the suction hose (a) to the blowing function
connection port (12). Slide the end of the suction hose
(a) with the two nipples into the blowing function con-
nection port (12). -
es.
clockwise.
 Loading...