6 english
4.Veryhardorknottywoodmightleadtoblocking,i.e.the
log will not be split.
Important:Aborttheprocesswithin5sectoavoidover-
loading.
Inmostcasesthelogcaneasilybesplitafterrotatingit
or turning it over through 180°.
Therefore make sure that you insert the log with the
knots on the side of the pressure plate. This way the
splitting blade can penetrate the log more easily.
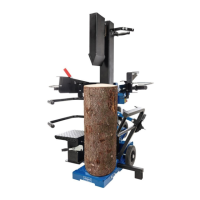
Wrongly placed log (Fig. 4)
Always set logs firmly on the log retaining plates and work
table.Makesurelogswillnottwist,rockorslipwhilebeing
split. Do not force the blade by splitting logs on the upper
part. This will break the blade or damage the machine.
Do not attempt to split 2 pieces of logs at the same time.
Oneofthemmayyupandhityou.
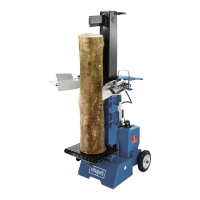
Jammed log (Fig. 5)
Donottry toknock thejammedlog off.Knocking about
will damage the machine or may launch the log and cause
accident.
1. Release both controls.
2. After the log pusher moves back and completely stops
atits startingposition,insertawedge woodunder the
jammed log as shown in fig. 5.
2. Start the log splitter to push the wedge wood under the
jammed one.
2. Repeat above procedure with sharper slope wedge woods
until the log is completely freed.
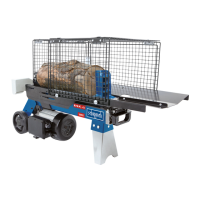
Back-run safety device
Usetheback-runstop(17)forsplittingshorterpiecesof
wood.
To install the stop move the pressure plate towards the
splitting wedge.
Once the final position is achieved only hold down the hy-
draulic lever with the lever locking to avoid a return move-
ment of the pressure plate.
Now you can insert the stop plate using the pin at the bear-
ing surface of the tube.
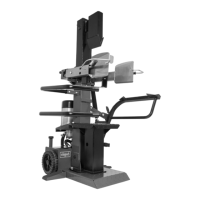
Adjustment of the pressure plate
Thepressureplate(2)canbesetto3positions.
Lift the pin on the left of the pressure plate and pull out
thepressureplate.Then,reinsertthepin.
Pos. Max. distance to the splitting wedge approxi-
mately 201/2”/min.:approximately77/8”
Pos. B Max. distance to the splitting wedge approxi-
mately 181/2”/min.:approximately57/8”
Pos. C Max. distance to the splitting wedge approxi-
mately 161/2”/min.:approximately315/16”
The device must not be operated if the pressure plate is
not properly secured.
Oil Change (Fig. 3.1, 3.2)
Thehydraulicsystemisaclosedsystemwithoiltank,oil
pump and control valve.
Check hydraulic connections and fittings regularely for air
tightness. Tighten when necessary.
Theoiltankhasbeenlledwithhighqualityoil(ISOvis-
cositylevel20)atthefactory.
Replacing hydraulic oil after 150 hours of use (Fig. 3)
1. Make sure all moving parts stop and the log splitter is
unplugged.
2.Unscrewoildrainscrew(16)toremoveit.
3. Turn the log splitter on the support leg side as shown
in fig. 3.1 over a 4 liter capacity container to drain the
hydraulic oil off. Recycle carefully!
4. Turn your scheppach machine on the motor side as
showning.3.2torellabout5/8galfreshoil.
5. Clean the surface of the dip stick on the oil drain bolt
and put it back into the oil tank while keeping the log
splitter vertically. Make sure the level of the refilled oil is
just between 2 grooves around the dip stick.
6. Clean the oil drain bolt before threading it back. Make
sure it is tightened to avoid leakage before placing the
logsplitterhorizontally. Afterwardsstart splitting with-
out actually splitting log several times.
Maintenance and Repair
Carryoutretting,settingandcleaningworkonlywhenthe
motor is switched off. Pull the power plug.
An experienced worker can carry out minor repairs on the
machine alone.
Repair and maintenance work on the electrical system may
only be carried out by a qualified electrician.
All protective and safety devices must be reattached im-
mediately after completed repair and maintenance work.
We recommend:
• Thesplittingwedgeisawearingpartthatneedstobe
sharpened or replaced after wear.
• Thecombinedgrippingandcontrollingdevicemustre-
main smooth running. Lubricate with a few dropsof oil
when necessary.
• Keepsplittingwedgedrivecleanofdirt,woodshavings,
bark,etc.
• Lubricatesliderailswithgrease.
 Loading...