7
The Simplicity sewing machine has many conversion options for a multitude of sewing
applications.
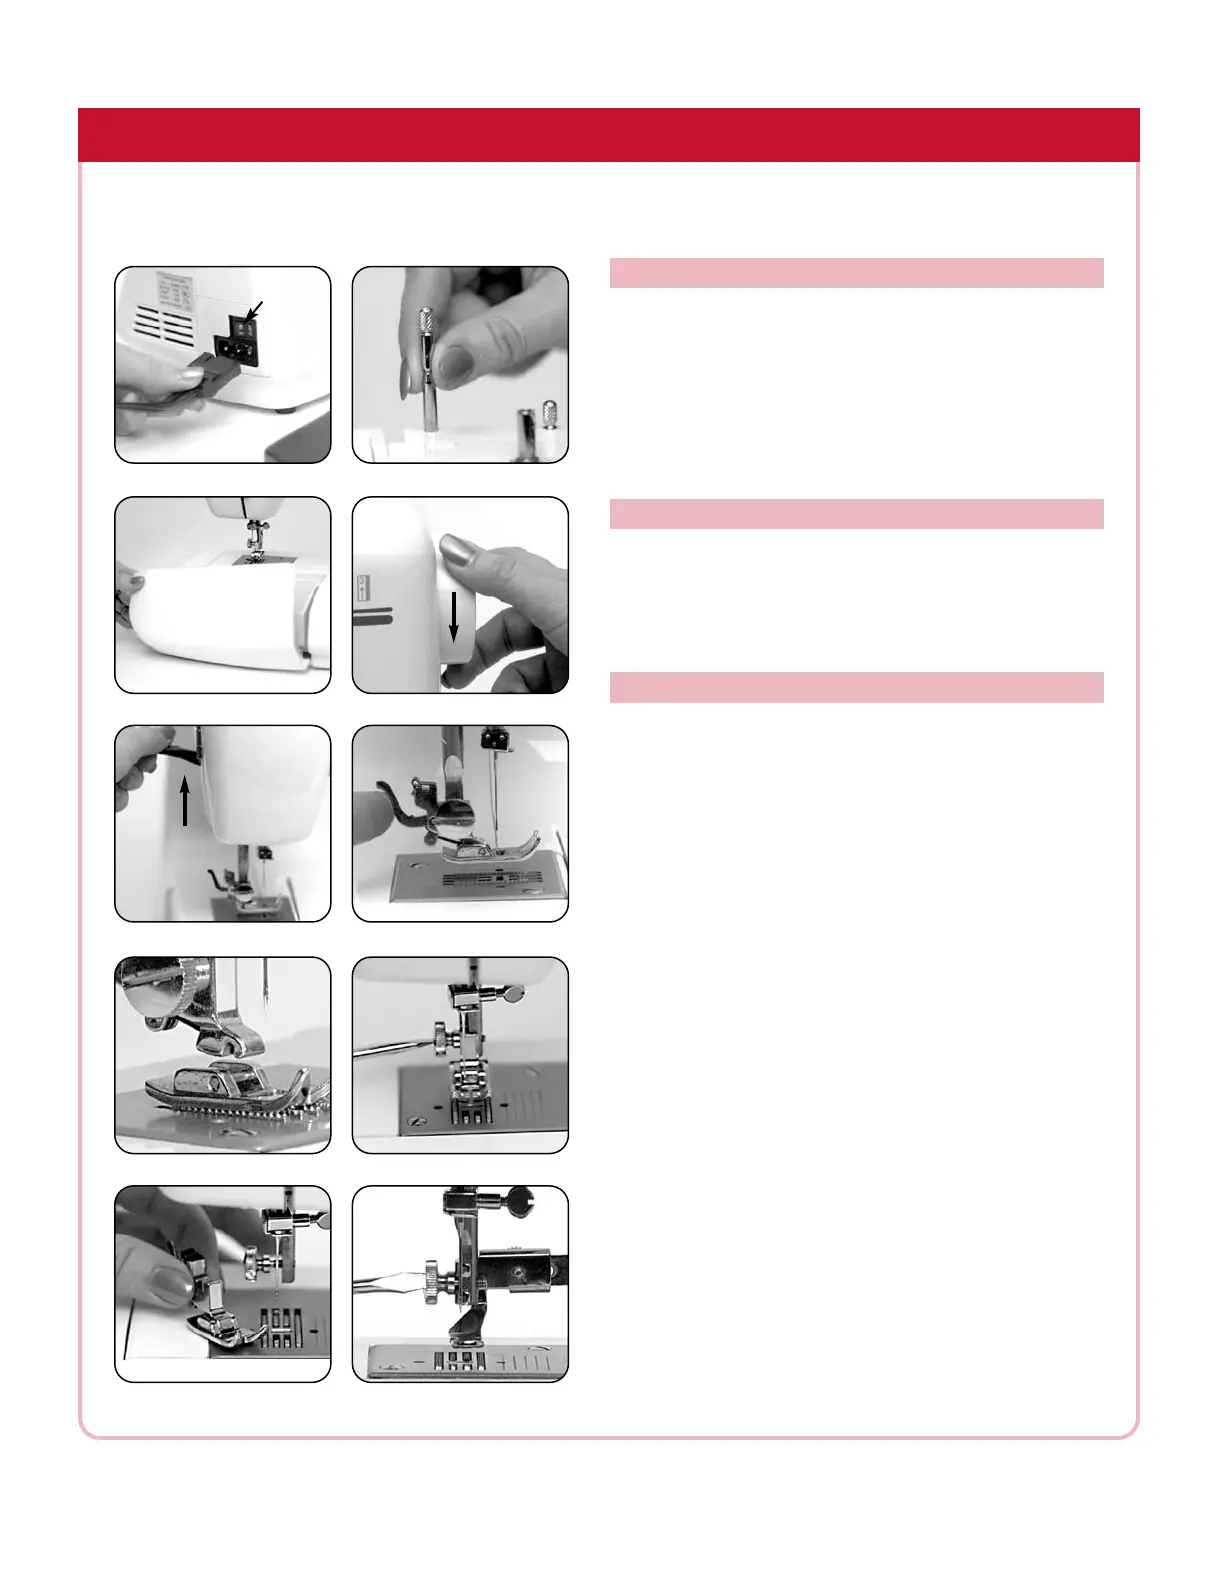
SIMPLICITY SEWING MACHINE SET-UP
The po
wer cord and foot control are one unit.
Insert the three-prong plug into the machine [Fig. 1].
Insert the power supply plug into a wall outlet. Turn the
power switch to “on” [Fig.1].
Raise the left retractable thread spool pin for most sewing
[Fig. 2]. Raise both the left and right retractable thread
spool pins for twin needle or dual thread sewing.
Accessories and presser feet are conveniently stored in
the free-arm cover.
Grasp the free-arm cover with your left hand and gently
pull up and toward you to open the storage tray [Fig.3].
Your Simplicity sewing machine comes with both snap-
on and screw-on presser feet. They're easy to change
and each foot helps make a specific se
wing task easier.
Removing and Attaching Snap-on Presser Feet
1. Turn the handwheel toward you [Fig. 4] to bring the
needle to its highest position.
2. Raise the presser foot lever [Fig. 5].
3. Release the foot by pushing the presser foot release
lever located behind the presser foot holder [Fig. 6].
4.
Place the desired foot on the needle plate, aligning
the metal bar on the presser foot with the groo
ve of
the presser foot holder [Fig. 7].
5.
Lower the presser foot lever to snap the foot in place.
Remo
ving and Attaching Screw-on Presser Feet
1. Loosen the thumb screw located on the left side of the
presser foot on the presser foot bar [Fig. 8]. You may
need to use the screwdri
ver. It is not necessary to
remove the screw all the way.
3. Remove the presser foot holder and foot [Fig. 9].
4. Attach the desired screw-on presser foot onto the
presser bar.
5. Tighten the thumb screw with the screwdriver to hold
the presser foot securely in place [Fig. 10].
Note: After attaching a presser foot, select the desired
stitch and turn the hand-wheel toward you several times to
make sure the needle clears the opening in the foot. Some
presser feet require a straight or narrow width stitch only.
PREPARATION FOR SEWING
ACCESSORY STORAGE
CHANGING PRESSER FEET
Fig. 1
Fig. 3
Fi
g. 4
Fig. 5
Fig. 6
Fig. 7
Fig. 2
on/off
Fig. 9
Fig. 10
Fig. 8
 Loading...