EasyManuals Logo

Singer 4411 User Manual

Singer 4411
63 pages
To Next Page IconTo Next Page
To Previous Page IconTo Previous Page
Page #56 background imageLoading...
Page #56 background image
49
A
C
B
A
B
C
D
1
2
Change the needle regularly, especially if it is showing signs
of wear and causing problems. For best sewing results
always use SINGER Brand Needles.
Insert the needle
A. Loosen the needle clamp screw and tighten again after
inserting the new needle. (1)
B. The flat side of the shaft should be towards the back.
C/D.Insert the needle as far up as it will go.
Turn power switch to off ("O") before inserting or removing
the needle.
Needles must be in perfect condition. (2)
Problems can occur with:
A. Bent needles
B. Damaged points
C. Blunt needles
®
Attention:
as illustrated as follows:
Inserting & Changing Needles
EN

Table of Contents

Other manuals for Singer 4411

Questions and Answers:

Question and Answer IconNeed help?

Do you have a question about the Singer 4411 and is the answer not in the manual?
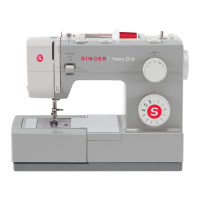
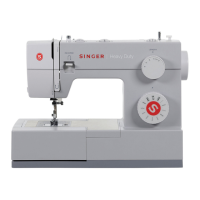
Singer 4411 Specifications

General IconGeneral
Stitch Applications69
Built-in Stitches11
Stitch Length4 mm
Motor60% stronger motor
Needle Positions3
Free ArmYes
Weight14.5 lbs
Dimensions15.5 x 6.25 x 12 inches
TypeMechanical
Adjustable Stitch LengthYes
Adjustable Stitch WidthYes
Drop FeedYes
Heavy Duty Metal FrameYes
Presser FeetAll-Purpose Foot, Zipper Foot, Buttonhole Foot, Button Sewing Foot
Voltage110V
Warranty25-year limited
Stitch Width5 mm
Sewing Speed1100 stitches per minute
Buttonhole Styles1-step

Related product manuals