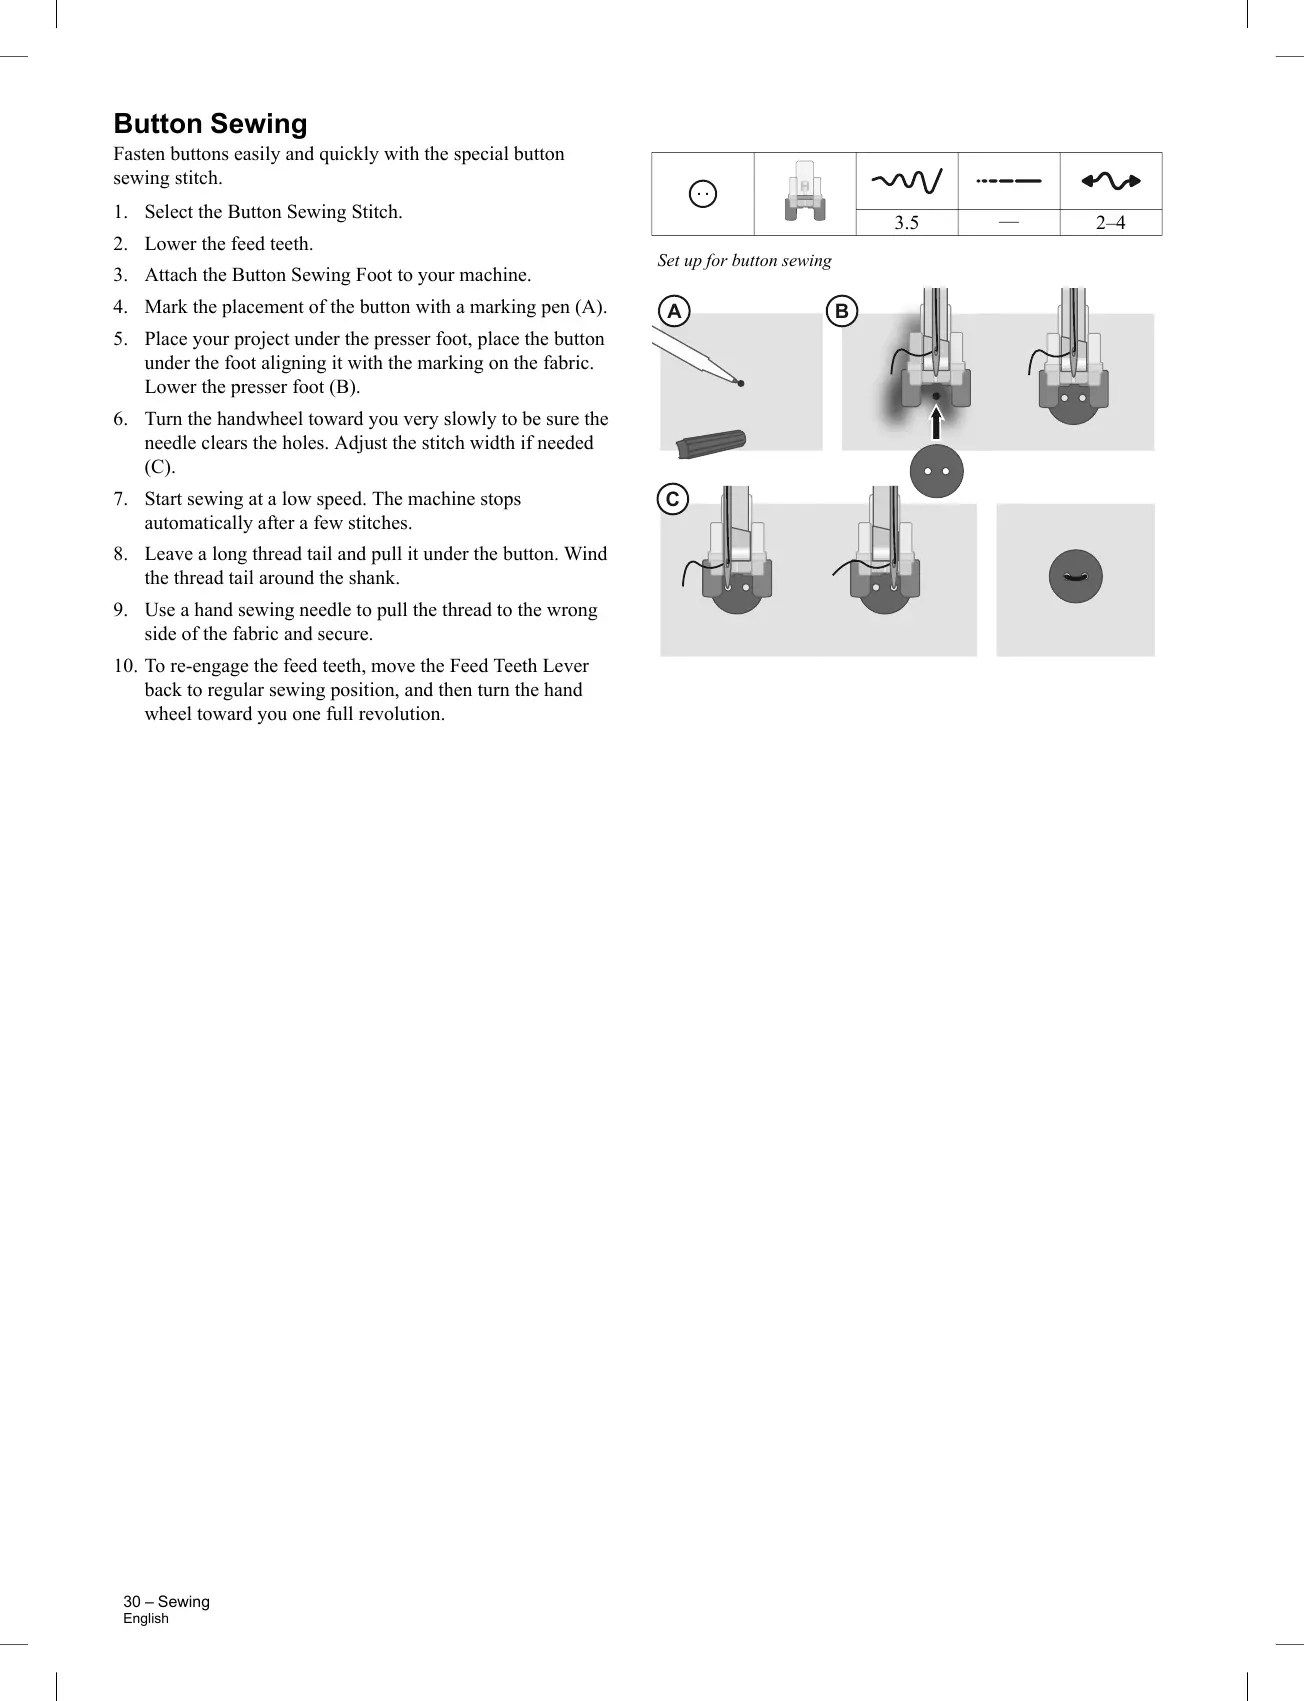
Fasten buttons easily and quickly with the special button
sewing stitch.
1. Select the Button Sewing Stitch.
2. Lower the feed teeth.
3. Attach the Button Sewing Foot to your machine.
4. Mark the placement of the button with a marking pen (A).
5. Place your project under the presser foot, place the button
under the foot aligning it with the marking on the fabric.
Lower the presser foot (B).
6. Turn the handwheel toward you very slowly to be sure the
needle clears the holes. Adjust the stitch width if needed
(C).
7. Start sewing at a low speed. The machine stops
automatically after a few stitches.
8. Leave a long thread tail and pull it under the button. Wind
the thread tail around the shank.
9. Use a hand sewing needle to pull the thread to the wrong
side of the fabric and secure.
10. To re-engage the feed teeth, move the Feed Teeth Lever
back to regular sewing position, and then turn the hand
wheel toward you one full revolution.
30 – Sewing
English
 Loading...