4
PART I: SETTING UP THE EQ6-R MOUNT
2. Align the metal dowel on the tripod top with the gap between the two azimuth adjustment
knobs; then put the mount on the tripod top. (Fig. 1.2b)
3. Once the mount is seated, slightly tighten the two azimuth adjustment knobs.
4. While supporting the mount with one hand, gently push the primary locking shaft up against
the underside of the mount and turn the shaft counter-clockwise to secure the mount to the
tripod top. Tighten the shaft with the knurled knob on the primary locking shaft. (Fig. 1.2b)
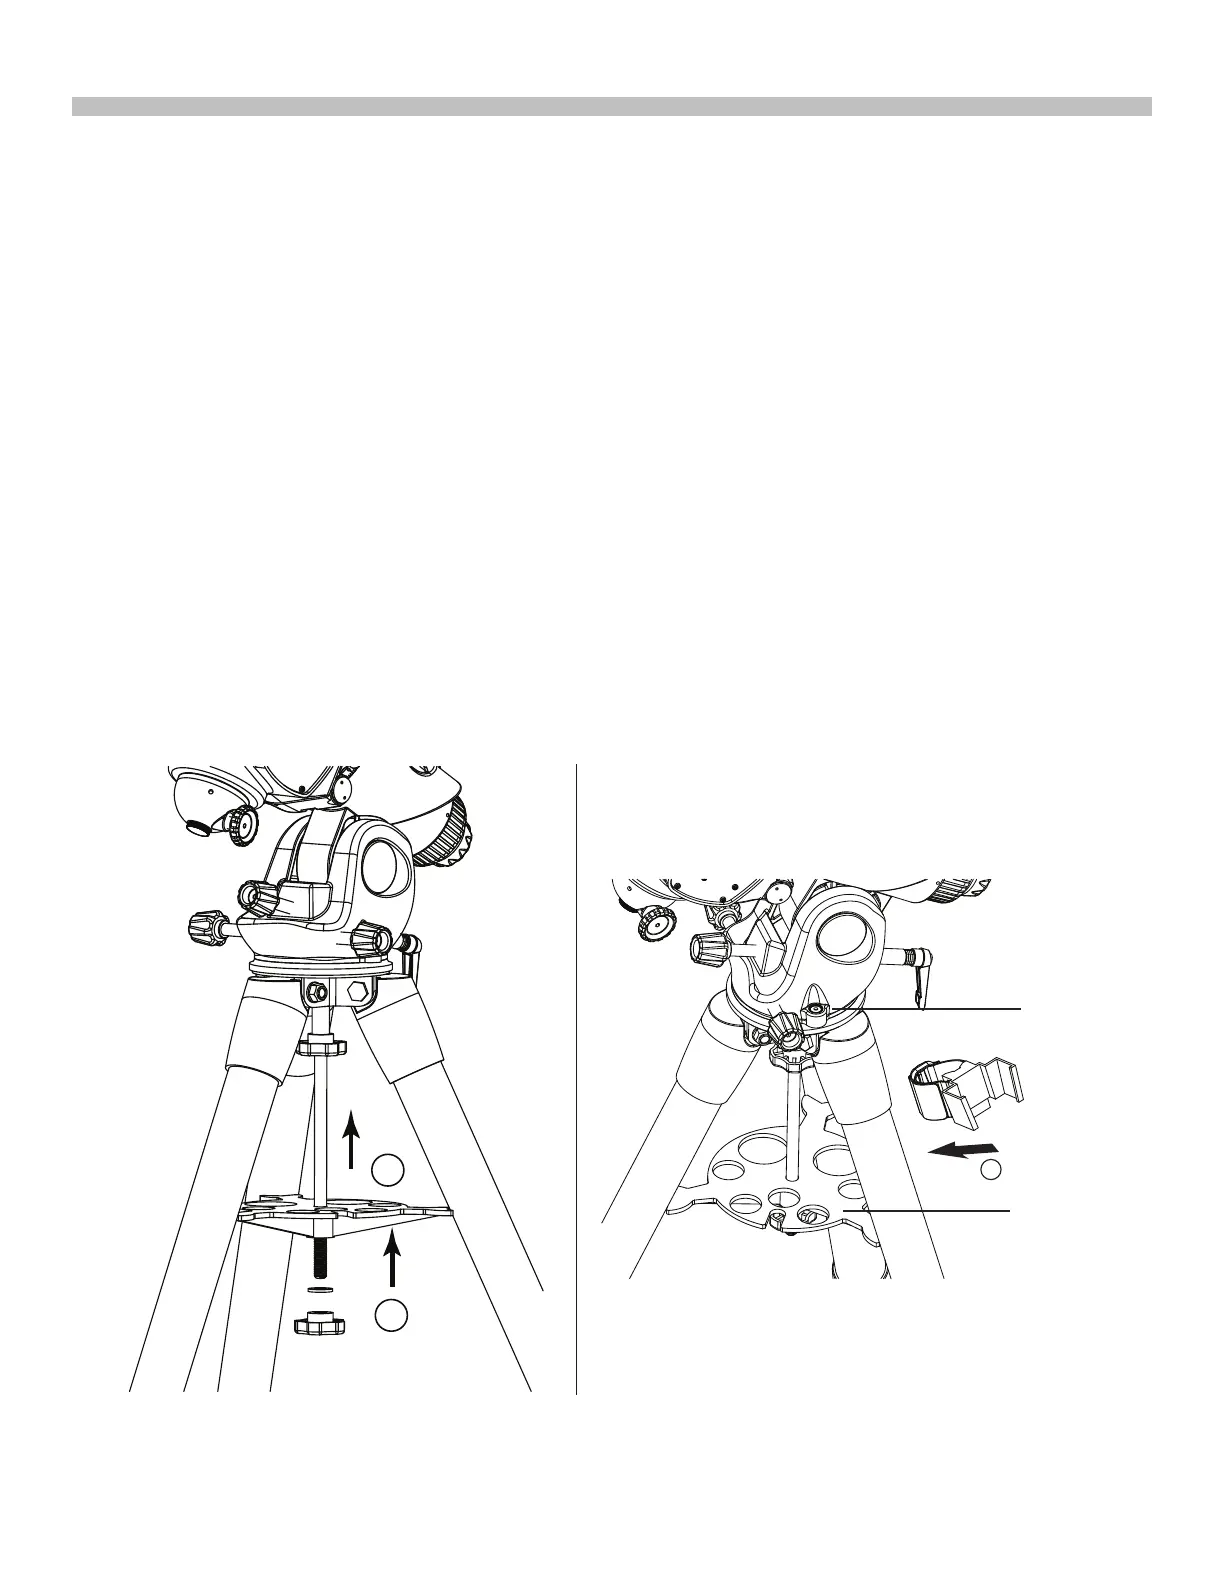
1.3 Attaching the Accessory Tray and the Hand Controller Holder
1. Slide the accessory tray along the primary locking shaft until its three tips push against the
tripod legs, and then secure the tray with the washer and the locking knob. (Fig. 1.3a)
2. By referring to the bubble leveler on the mount, level the mount by adjusting the length of
the tripod legs. (Fig. 1.3b)
3. Tie the hand controller holder on one of the tripod leg at a position between the accesso-
ry tray and the tripod head. (Fig. 1.3b)
Warning: The accessory tray will ensure the tripod legs remain rmly expanded, which will
prevent the tripod from accidentally toppling over. When using the EQ6-R mount, an accesso-
ry tray should always be used to ensure stability.
Fig. 1.3a Fig. 1.3b
3
1
2
Bubble
Leveler
Accessory
Tray
 Loading...