32
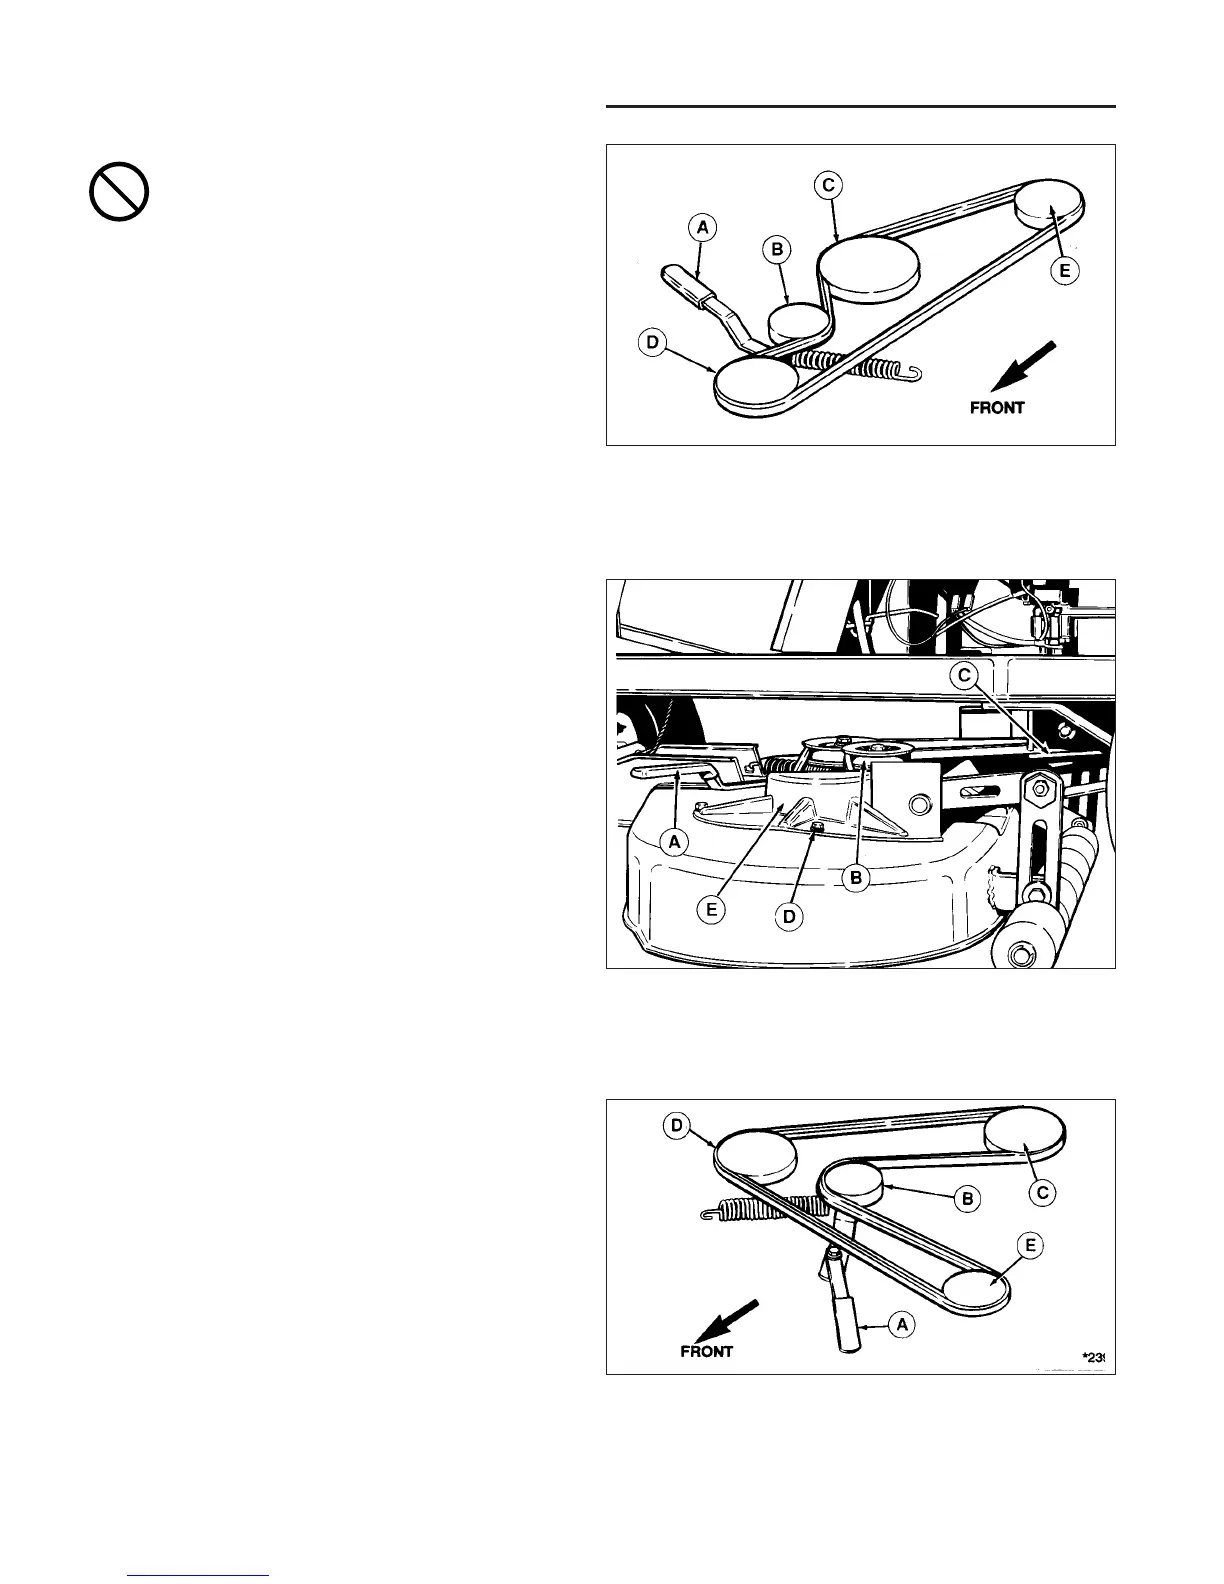
Figure 32. Mower Belt Replacement - 34”
A. Idler Pulley Arm D. Capscrews
B. Idler Pulley E. Arbor Cover
C. PTO Pulley
RIDER DRIVE BELT REPLACEMENT
Replacement of the rider drive belt requires removal of
the transmission and carrier frame. Should the drive belt
ever fail, contact your dealer for replacement.
MOWER BELT REPLACEMENT - 30”
See Figure 31.
1. Mower does not need to be removed to install a new
belt. However, for easier access, mower can be
removed following steps in “Mower Removal and
Installation.”
2. If mower is not removed, place mower in lowest cut-
ting position. Pull idler pulley arm (A) towards you to
relieve belt tension. Remove belt from idler pulley (B)
and center arbor pulley (C).
3. Remove belt from front idler pulley (D) and PTO pul-
ley (E).
4. Replace old belt with new belt. Make sure V-side of
belt runs in all pulley grooves except for idler pulley
(B). Check belt pattern as shown.
5. Install mower if it was removed, and install belt on
PTO pulley (E).
MOWER BELT REPLACEMENT - 34”
See Figure 32.
1. Mower does not need to be removed to install a new
belt. However, for easier access, mower can be
removed following steps in “Mower Removal and
Installation.”
2. If mower is not removed, place mower in lowest cut-
ting position. Push idler pulley arm (A, Figure 32)
away from you to relieve belt tension. Remove belt
from idler pulley (B) and PTO pulley (C).
3. Remove the three capscrews (D, Figure 31) securing
the left-hand arbor cover.
4. Remove old belt from arbor pulleys and replace with
new belt. Make sure V-side of belt runs in all arbor
pulley grooves and flat side of belt runs against idler
pulley. See Figure 33 for belt pattern.
5. Install mower if it was removed, and install belt to
PTO pulley (C, Figure 32). Push idler arm and install
belt around idler pulley.
Figure 33. Belt Pattern - 34” Mower
A. Idler Arm Pulley D. Right Arbor Pulley
B. Idler Pulley E. Left Arbor Pulley
C. PTO Pulley
Figure 31 Belt Pattern - 30” Mower
A. Idler Pulley Arm D. Front Idler Pulley
B. Idler Pulley E. PTO Pulley
C. Center Arbor Pulley (Electric Clutch)
*2391
To avoid damaging belts, DO NOT PRY
BELTS OVER PULLEYS.
Troubleshooting, Adjustments & Service
 Loading...