27
Getting Started
Step 5: Inserting a disc or a “Memory Stick
Duo”
A new 8 cm DVD-RW, DVD+RW, DVD-
R, or DVD+R DL is required for recording
(p. 15).
b Notes
• Remove dust or fingerprints from the disc
beforehand, using a soft cloth (p.106).
1 Check that the power of your
camcorder is on.
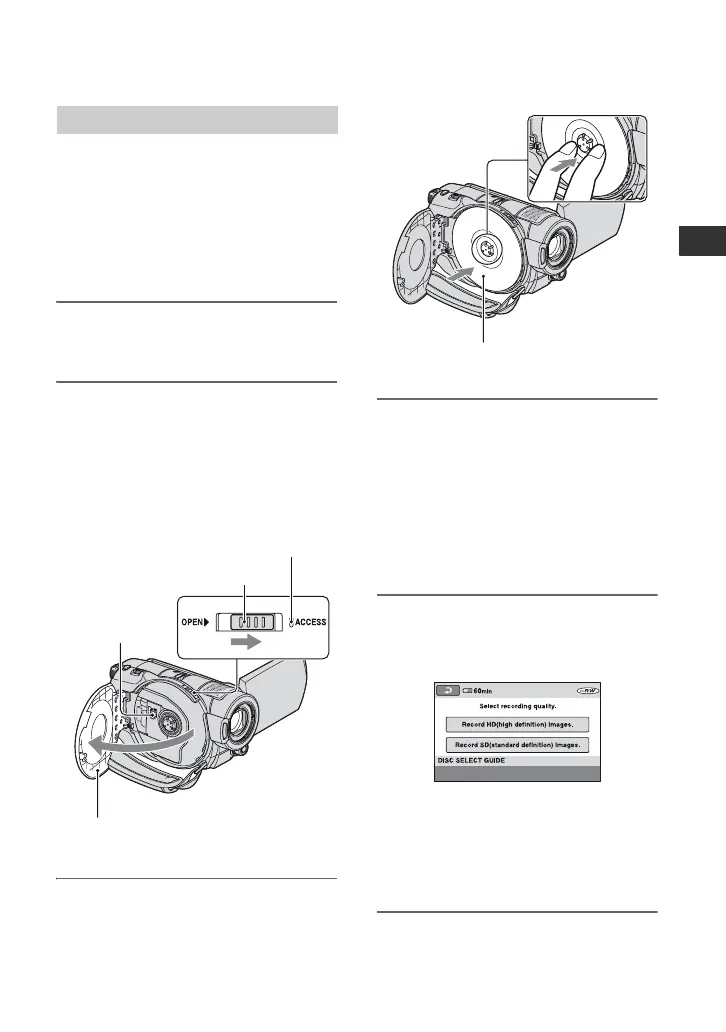
2 Slide the disc cover OPEN switch
in the direction of the arrow
(OPEN B).
[PREPARING TO OPEN] appears on
the LCD screen, then the disc cover
opens slightly, automatically.
3 Set the disc with the recording
side facing your camcorder, then
press the center of the disc until it
clicks.
4 Close the disc cover.
[DISC ACCESS] appears on the LCD
screen.
It may take some time for the camcorder
to recognize the disc, depending on the
disc type and condition.
Skip to step 7 when you use a DVD-R/
DVD+R DL.
5 When you use a DVD-RW/
DVD+RW, touch [Use DISC
SELECT GUIDE].
b Notes
• You cannot use [Use DISC SELECT GUIDE]
during Easy Handycam operation (p. 30).
Format the disc, following the instructions on
the screen.
6 Touch [Record HD (high
definition) images.].
Disc
Disc cover OPEN switch
Pickup lens
When the disc cover opens slightly,
open it further.
ACCESS lamp (Disc)
Set the disc with the label side facing
out when using a single-sided disc.
Continued ,
 Loading...