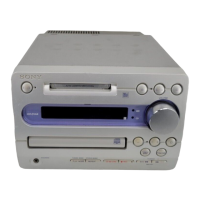
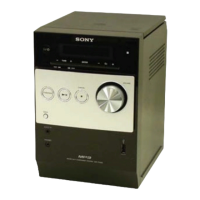
HCD-F200/F500
23
1. TEST MODES OTHER THAN THE TEST MENU
These are executable test mode even if not entering the test menu.
1-1. Cold Reset
The cold reset clears data except DVD data stored in the RAM to
initial conditions. Execute this mode when returning the set to the
customers.
Procedure:
1. In the standby state, the [
?/1
] button on the set is pressed for 5
seconds or more.
2. The messages “MEMORY CLR” and “PUSH POWER” are
displayed on the fl uorescent indicator tube.
3. When the [
?/1
] button is pressed in the state of step 2, the
messages “CLEARING” → “CLEARED!” are displayed, then
becomes standby states.
1-2. DVD Version View
Procedure:
1. Connect the set with the TV screen.
2. In the standby state, press the button in order of the [
DISPLAY] → [ENTER] → [
?/1
] on the remote commander,
the DVD version appears on the TV screen.
3. To release from this mode, press the [
?/1
] button.
1-3. Color System Change (Except Canadian, AEP, UK
and Russian models)
This mode let you change the color system of the video output
from PAL to NTSC or vice versa.
Procedure:
1. Connect the set with the TV screen.
2. In the standby state, press the [
?/1
] and [VOL –] button on the
set simultaneously.
3. The messages “PAL” or “NTSC” are displayed on the fl uores-
cent indicator tube when the color system is set to “PAL” or
“NTSC”.
1-4. Disc Slot Lock
This mode let you lock the disc slot. When this mode is activated,
the disc will not eject when the [
Z] button is pressed. The message
“LOCKED” will be displayed on the fl uorescent indicator tube.
Procedure:
1. Press the [
?/1
] button to turn the power on.
2. Press the [FUNCTION] button on the remote commander to
select the “DVD”.
3. Press the [x] and [Z] button on the set simultaneously and hold
down until “LOCKED” or “UNLOCKED” displayed on the
fl uorescent indicator tube (around 5 seconds).
1-5. Demo Disc Play
Mode to prevent theft of the demonstration disc.
Setting Procedure:
It automatically enters the mode when the demonstration disc is
inserted.
Releasing Procedure:
1. Press the [
?/1
] button to turn the power on.
2. Press the [FUNCTION] button on the remote commander to
select the “DVD”.
3. Press the [x] and [N] button on the set simultaneously and
hold down until “DEMO OFF” displayed on the fl uorescent
indicator tube (around 5 seconds).
1-6. S-AIR ID Select (F500 only)
When shifting to the ID selection mode of S-AIR, this mode is
used.
Procedure:
1. Connect EZW-RT10 (P/N: A-1368-101-A) (Canadian model),
(P/N: A-1512-377-A) (Australian model) and (P/N: A-1512-
377-A) (240V AC area E, Iranian, Singapore and Russian
models) with the EZW-RT10 connector (CN701) on the AMP-
DSP board from SA-WSF500.
2. Press the [
?/1
] button to turn the power on.
3. Press the [N], [FUNCTION] and [VOL –] button on the set
simultaneously.
4. The message “S-AIR ID X” displayed on the fl uorescent indi-
cator tube.(X is A or B or C)
1-7. S-AIR PEARING
Not used for the servicing.
SECTION 4
TEST MODE