9
US
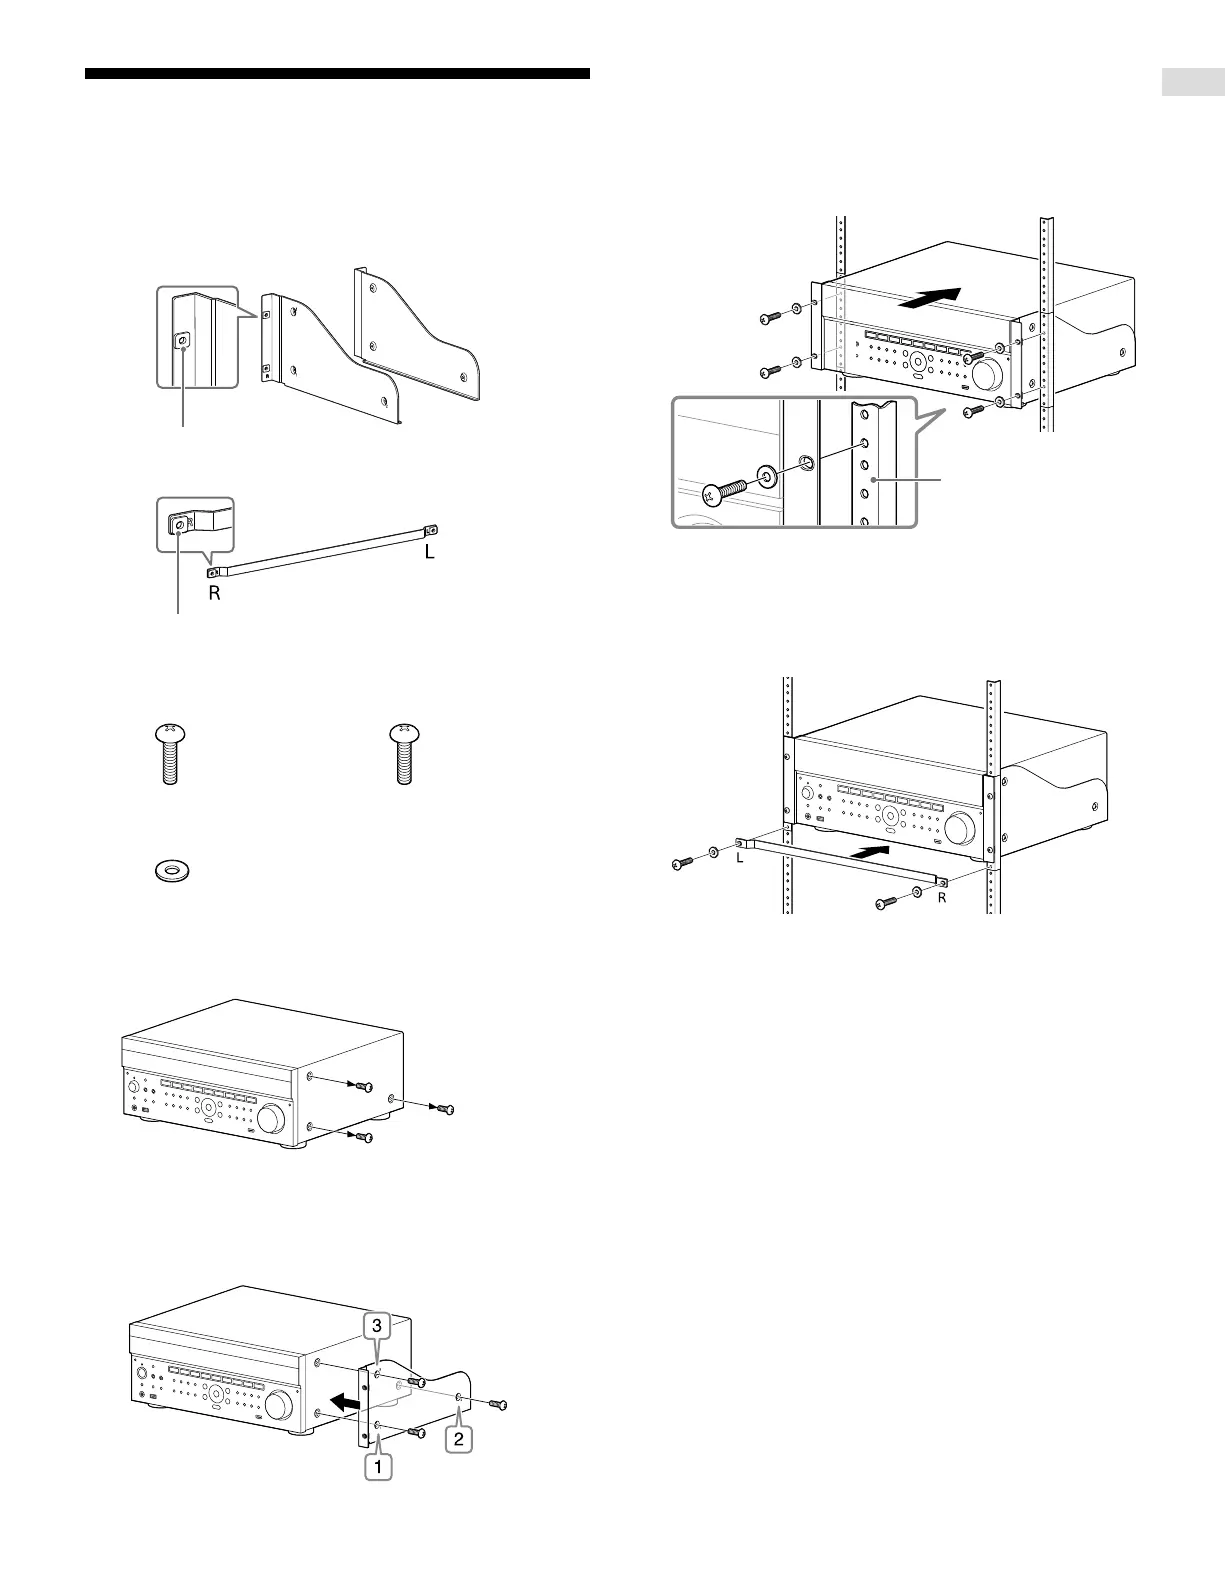
Preparations
Mounting the receiver using the rack
mount kit
Make sure to use a “WS-RE1” dedicated rack mount kit for
this receiver when mounting the receiver on a rack mount.
1 Check that all parts are included.
Bracket × 2
Insulator
Blank panel × 1
Insulator
Screw
+P U10-32×3/4 (inch)*
× 6
Screw
+T M5×18 (mm)*
× 6
* Select the correct screws according to the type of rack.
Washer × 6
2 Remove screws from the right side of the
receiver. Do not remove screws other than those
specified.
3 Mount the bracket on the right side of the
receiver in the order of the step numbers
printed on the bracket using the screws
removed in step 2.
4 Repeat steps 2 and 3 for the left side to mount
the bracket.
5 Mount the receiver to the rack system. Make
sure to perform this step with more than one
person.
Rack mount
6 Mount the blank panel.
(The blank panel hides the legs of the receiver to
give it a cleaner look. Aligning the height of the
receiver and blank panel lets it fit into a 4U size
space.)

 Loading...