EasyManuals Logo

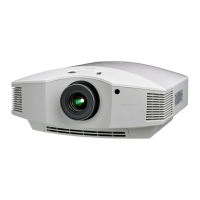
Sony VPL-HW45 User Manual

Sony VPL-HW45
119 pages
To Next Page IconTo Next Page
To Previous Page IconTo Previous Page
Page #13 background imageLoading...
Page #13 background image
13
GB
1 Position the unit so that the lens is
parallel to the screen.
2 After connecting the AC power cord to
the unit, plug the AC power cord into
a wall outlet.
After connecting the AC power cord to the unit,
the ON/STANDBY indicator may blink in
orange.
You may not be able to control the unit while
the indicator is blinking, but this is not a
malfunction. Wait until it stops blinking and
remains lit in red.
3 Press the ?/1 (ON/STANDBY) button
to turn on the unit.
4 Press the PATTERN button to display
a test signal for performing
adjustments.
a Move both lens shift dials to
adjust the picture position.
b Adjust the picture size using the
zoom lever.
Installing the Unit
Step 2
Note
Lights in red.
Top of the unit
Flashes in green for a
while (tens of seconds)
and then lights in green.
Top of the unit
To adjust the vertical
position
To adjust the horizontal
position
Zoom lever

Questions and Answers:

Question and Answer IconNeed help?

Do you have a question about the Sony VPL-HW45 and is the answer not in the manual?

Sony VPL-HW45 Specifications

General IconGeneral
Display TechnologySXRD
Resolution1920 x 1080
Brightness1800 lumens
Contrast Ratio120, 000:1
Zoom Ratio1.6x
Lens ShiftVertical: ±71%, Horizontal: ±25%
3DYes
Dimensions407.4 x 179.2 x 463.9 mm
Lamp Life6000 hours
Inputs2 x HDMI
Weight9 kg
Lens Throw Ratio1.36 - 2.16:1
Throw Ratio1.36:1 - 2.16:1
Projection Size40" to 300"
Lamp TypeUltra high pressure mercury lamp

Related product manuals