5
ASSEMBLY AND OPERATION
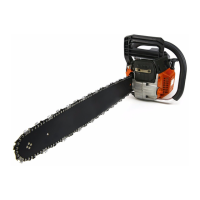
GUIDE BAR AND SAW CHAIN PARTS LIST
A standard chainsaw unit package contains the items illustration in Figure F1. Open the box and install the
guide bar and the saw chain on the power unit as follows.
1. Power Unit
2. Bar Protector
3. Guide Bar
4. Chainsaw
5. Plug Wrench
6. Screwdriver for Carburetor Adjustment
7. Spike and Mountain Screws
WARNING: The features include on your chainsaw are to help prevent the hazard of kickback; however,
such features will not eliminate this danger. As a chainsaw user, do not rely only on safety devices alone.
You must follow all safety precautions, instructions and maintenance in this manual to help avoid kickback
and other forces which can result in serious bodily injury.
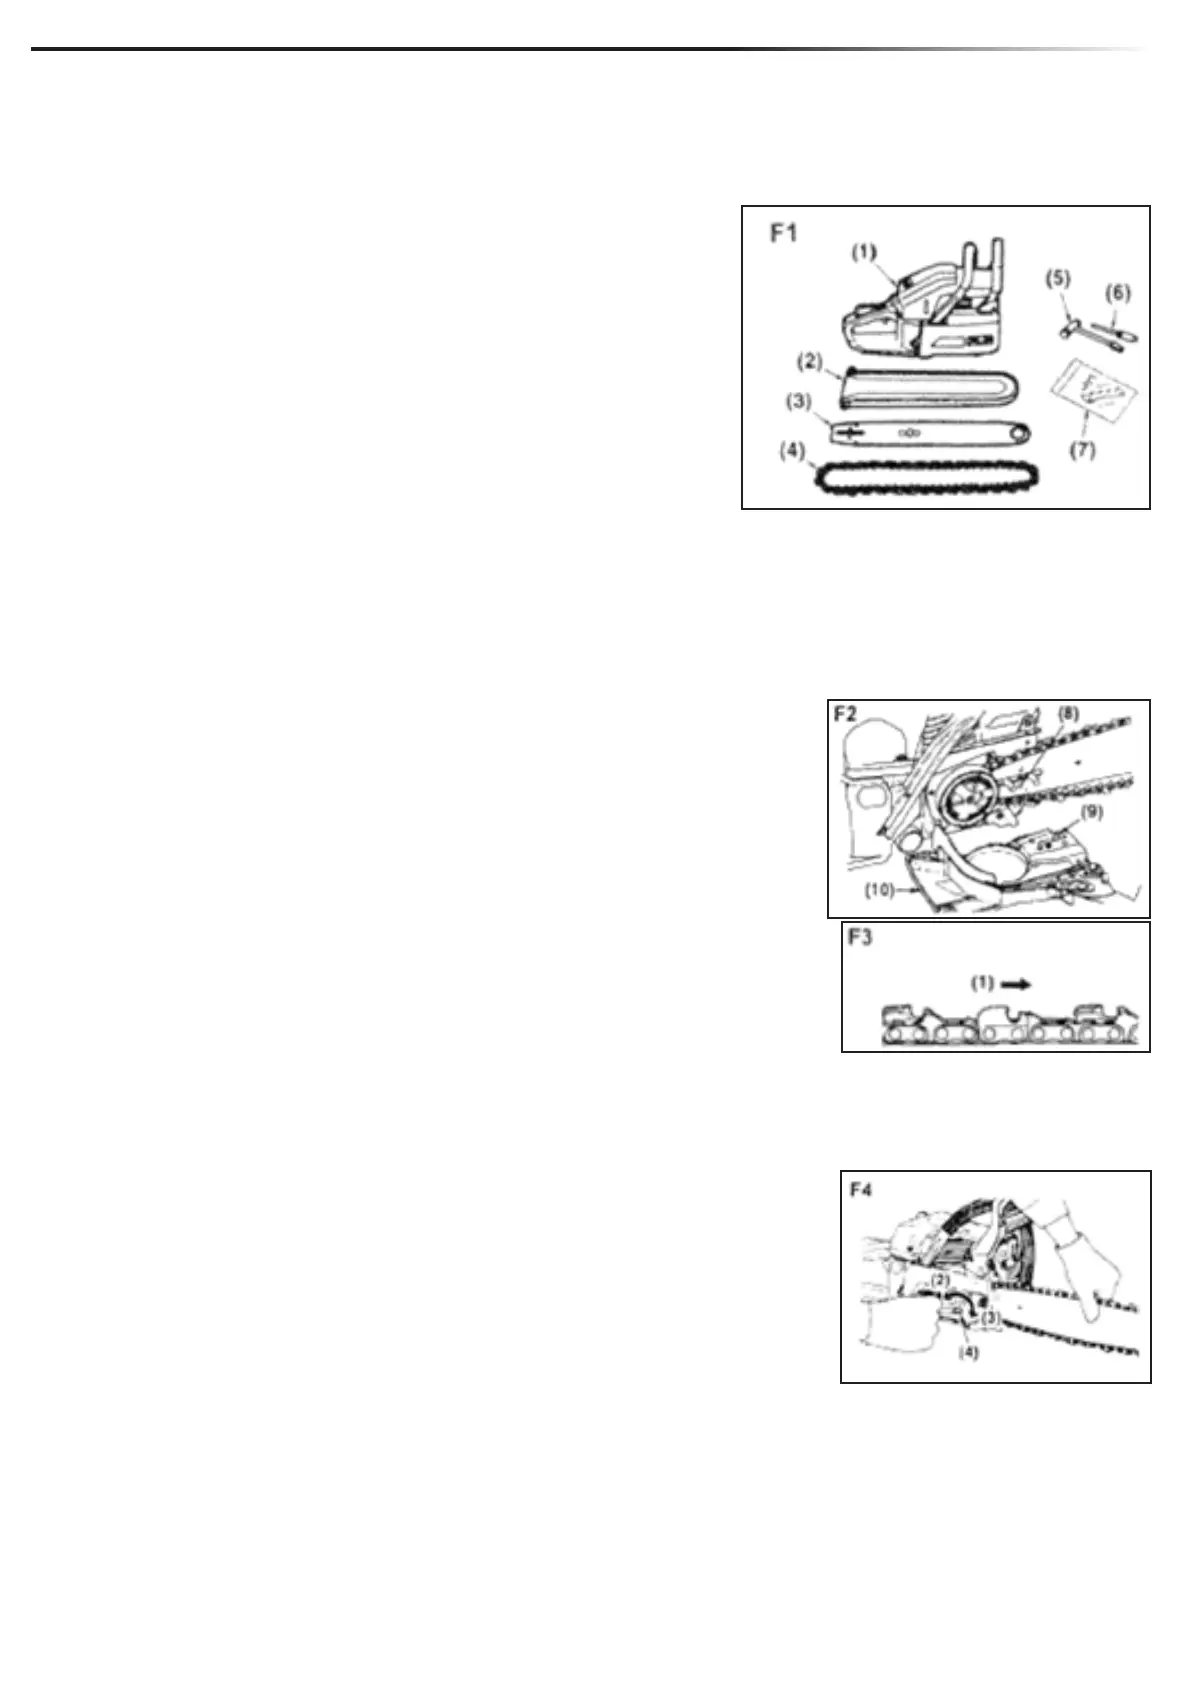
1. Pull the guard towards the front handle to check the chain brake is
not on.
2. Loosen the nuts and remove the chain cover.
3. Install the attached spike to the power unit.
4. Gear that chain to the sprocket and while tting the chain saw around
the guide bar, mount the guide bar to the power unit. Adjust the position
of the chain tensioner nut on the chain cover to the lower hole of the
guide bar. (F2) (8) Hole (9) Tensioner Nut (10) Chain Cover
1. Moving direction
2. Fit the chain cover to the power unit and fasten the nuts to nger
tightness.
3. While holding up the tip of the bar, adjust the chain tension by turning
the tensioner screw until the tie straps just touch the bottom side of the bar
rail. (F4)
4. Tighten the nuts securely with the bat tip held up (12-15N.m). Then
check the chain for smooth rotation and proper tension while moving it by
hand. If necessary, readjust with the chain cover loose.
5. Tighten the tensioner screw. (2) Loosen (3) Tighten (4) Tensioner
Screw
A new chain will expand its length in the beginning of use. Check and readjust the tension frequency as a
loose chain can easily derail or cause rapid degradation of the chain as well as the guide bar.
 Loading...