• Lift and remove the guard (15:B)
Villa
• Slacken and remove the screw (18:B).
• Lift and remove the guard (18:A)
Follow the indications provided in hea-
ding 3.7.
2. If the cutting-means assembly has electric
cutting height adjustment, disconnect the ca-
ble from the machine. See g. (9:A)
3. Remove the rear section of the cutting-
means assembly from the right and left as
follows:
• Slightly lift the cutting-means assembly
to ease the load on the cotter pin or peg
(4:A).
• Remove the cotter pin or peg (4:A) and
the washer (4:C) on both cutting-means
assembly arms.
4. Slacken the belt as follows:
Park 2WD:
• With your left hand take hold of the
tensioner lever (12:A) and pull it outwards.
• With your right hand remove the belt from
the pulley (12:B).
Park 4WD:
• With your left hand take hold of the
tensioner lever (11:A) and pull it outwards.
• With your right hand remove the belt from
the pulley (11:B).
5. Remove the belt from the pulley (11:B, 12:B)
on the machine.
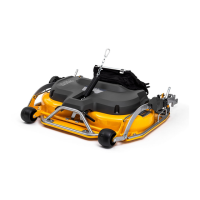
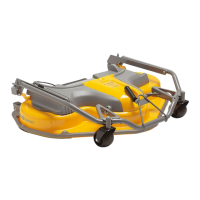
6. Lift the cutting-means assembly from the
front side and continue to lift until the cutting-
means assembly is completely vertical. Rest
the rear end on the ground. See g. 19.
Villa:
• Remove the belt from the tensioner pulley
(13:C).
• Remove the belt from the pulley (13:B).
• Lift the cutting-means assembly from the
front side until it is completely vertical and
rest the back end on the ground. See g.
25.
7. Once cleaning/maintenance operations have
been completed, lower the cutting-means
assembly to the ground following the above
instructions in reverse.
8. Restore the cutting-means assembly to its
original position as specied in heading 5.2.2
from point 8 onwards.
8.3.2
Example of quick-release supports, see g. 10.
1. Apply the parking brake.
2. Set the maximum cutting height.
Follow the indications provided in hea-
ding 3.7.
3. Remove the belt guard as follows:
• Slacken and remove the screw (15:A).
• Lift and remove the guard (15:B)
4. If the cutting-means assembly has electric
cutting height adjustment, disconnect the ca-
ble from the machine. See g. 9.
5. Remove the rear section of the cutting-
means assembly from the right and left as
follows:
• Slightly lift the cutting-means assembly
to ease the load on the cotter pin or peg
(4:A).
• Remove the cotter pin or peg (4:A) and
the washer (4:C) on both cutting-means
assembly arms.
6. Slacken the belt as follows:
Park 2WD:
• Take hold of the belt tensioner lever (12:A)
with your left hand.
• Pull the lever and remove the belt from the
tensioner (12:C) with your right hand.
Park 4WD:
• Take hold of the belt tensioner lever (11:A)
with your left hand.
• Pull the lever and remove the belt from the
tensioner (11:C) with your right hand.
7. Open the quick-release supports by turning
them to the rear position.
-
port.
8. Remove the belt as follows:
Park 2WD:
• Remove the belt from the pulley (12:B).
Park 4WD:
• Remove the belt from the pulley (11:B).
9. Extract the belt from the machine pulley.
10. Close the quick-release supports by turning
them back to their front position.
-
port.
 Loading...
