4. INSTALLATION
IMPORTANT The safety regulations to
be followed are described in chap. 2. Adhere
strictly to the indications provided to avoid
serious risks and/or hazards.
For storage and transport purposes, certain
machine components are not installed
in the factory but must be assembled
when the machine is removed from the
packaging. To so so, proceed as follows:
Unpacking and completing the assembly
should be done on a at and stable surface,
with enough space for machine handling
and its packaging, always making use of
suitable equipment. Do not use the machine
until all the indications provided in the
“ASSEMBLY” section have been carried out.
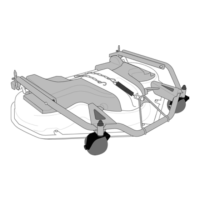
4.1
The packaging holds the components needed
for assembly (g. 4) as listed in the table below:
Pos. Description Qty
A Arms 2
B Cross beam 1
C Screws for arms fastening 2
D Screws, washers and nuts for
fastening the cross beam
6
E Belt protection guard 1
4.1.1 Unpacking
1. Open the packaging carefully, taking
care not to lose any parts.
2. Consult the documentation found in the
box, e.g. including this User Manual.
3. Remove all unassembled parts from the box.
4. Remove the machine from the box.
5. Dispose of the box and all packaging
materials in compliance with local legislation.
4.2
MEANS DEVICE
1. Position the arm with the “Quick Flip”
knob (g. 5.C) on the side indicated in
the gure and fasten it inside the bracket
(g. 5.H) with the screw (g. 5.A).
2. Position the second arm (g. 5.B) on
the opposite side and secure in place
with the screw (g. 5.A).
3. Fit the second arm (g. 5.B) to the opposite
side and fasten it inside the bracket
(g. 5.H) with the screw (g. 5.A)
4. Position the hook-up brackets (supplied with
the ride-on lawnmower with front cutting) in
the seats on the cross beam (g. 5.G) and
fasten the screws and nuts (supplied with
the ride-on lawnmower with front cutting).
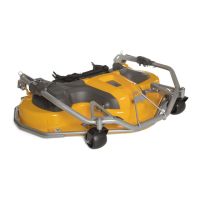
4.3 HOOKING UP THE CUTTING
The cutting-means assembly must be hooked
up to the the ride-on lawnmower by means of
the mounts attached to the front wheels and the
lifting pulley (supplied with the ride-on lawnmower
with front cutting) and the cutting-means drive
belt (pre-installed on the cutting-means assy).
For correct installation, follow the steps below
in the indicated sequence, starting with the
maximum cutting height adjustment, in order
to ease the subsequent assembling phases.
4.3.1
cable connector
If the cutting-means assembly have
electrical cutting height adjustment,
connect the cable to the socket (g. 8.A).
4.3.2
In order to ease the assembling phases,
adjust the maximum cutting height (par. 5.1).
4.3.3
IMPORTANT For the following
operations, see the relative instructions
provided in the machine’s manual and on
the manual accompanying the support.
1. Check that the quick-release supports
are installed on the ride-on lawnmower
and that the hook-up brackets are
fastened in the seats on the cross beam
of the cutting means assembly.
2. Position the cutting means assembly to
the front of the ride-on lawnmower.
3. Turn the quick-release supports
to the open position (g. 6.A)
4. Lift the bottom part (g. 6.B) of the
hook-up sta and rest it on the peg (g.
6.C) on both sides of the machine.
5. Couple the hook-up bracket (g. 7.A)
to the pin (g. 7.B) on both sides.
 Loading...