EN - 6
4.3.4
means drive belt
1. Adjust the minimum cutting height (par. 5.1).
2. Stand in front of the ride-on lawnmower.
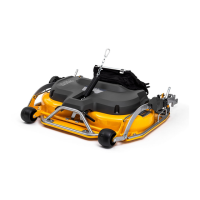
3. Pass the belt over the pulley (g.
9.A) on the ride-on lawn mower.
4. Pull the tensioner (g. 9.B) towards
the front of the machine.
5. Pass the belt over the pulley (g.
9.C) of the tensioner while gently
releasing the tension and your grip.
6. With your foot, turn the quick-release
supports to the closure position (g. 7.C)
and insert the peg or cotter pin (g. 7.D).
4.3.5
1. Adjust the minimum cutting height (par. 5.1).
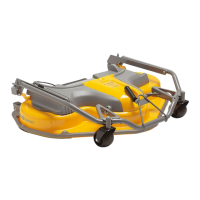
2. Insert the guard (g. 10.A) on the left side
(as seen from the front of the machine).
3. Insert the forks (g. 10.B) on
the wheel axle (g. 10.C).
Make sure that the safety guards is
correctly installed as shown in (g. 10).
4. Screw in and tighten the screws (g. 10.D).
4.3.6
This component is supplied with the ride-
on lawnmower with front cutting.
1. Set the maximum cutting height (par. 5.1).
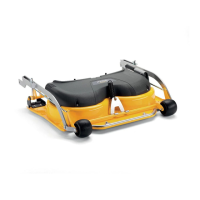
2. Thread the cable (g. 11.A) of the ride-
on lawnmower with front cutting into
the lifting pulley guide (g. 11.B).
3. After having assembled the cutting
means assembly on the ride-on
lawnmower with front cutting, position
the lifting pulley (g. 11.C) in the groove
on the cross beam (g. 11.D). Secure
in place by turning the relative knob.
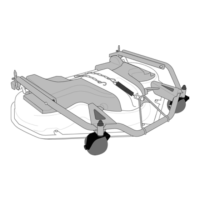
4.4 UNOOKING THE CUTTING
For correct disassembly, follow the steps
below in the indicated sequence.
1. If the cutting-means assembly has electric
cutting height adjustment, disconnect
the cable from the machine (g. 8.B).
2. Unscrew and extract the lifting pulley from the
cross beam on the cutting means assembly.
3. Remove the belt guard as follows:
– Slacken and remove the
screws (g. 10.D).
– Remove the guard (g. 10.A)
4. Remove the pin or cotter pin (g. 7.D)
and turn the quick-release supports
to the open position (g. 6.A).
5. Slacken the drive belt as follows:
– With your right hand take hold of the
tensioner lever (g. 9.B) and pull it
towards the machine front side.
– With your left hand remove the
belt from the pulley (g. 9.C).
– Remove the belt from the pulley
(g. 9.A) on the machine.
6. Lift the quick-release supports hook-
up brackets (g. 7.A) and detach the
cutting means assembly from the ride-
on lawnmower with front cutting.
5. CONTROL COMMANDS
5.1 CUTTING HEIGHT ADJUSTMENT
Make adjustments with the
cutting means stopped.
5.1.1
The cutting height is fully adjustable with
minute precision by acting on the electric
cutting height adjustment switch found on
ride-on lawnmower with front cutting.
The cutting height indicato (g. 1.G)
shows the height it is adjusted to.
IMPORTANT To activate electric
adjustment it is necessary to connect the
electric cable connector on the cutting
means assembly to the socket (g. 8.A) on
the ride-on lawnmower with front cutting.
5.1.2
The cutting height can be adjusted
to a number of pr-dened positions
using the lever (g. 12.A).
The cutting height indicator (g. 12.B)
shows the height it is adjusted to.
5.2
The "Quick Flip" knob makes it possible to take
the machine from the transport position to the
 Loading...