0458-807-8621-A
17
English
12 LED Diagnostics
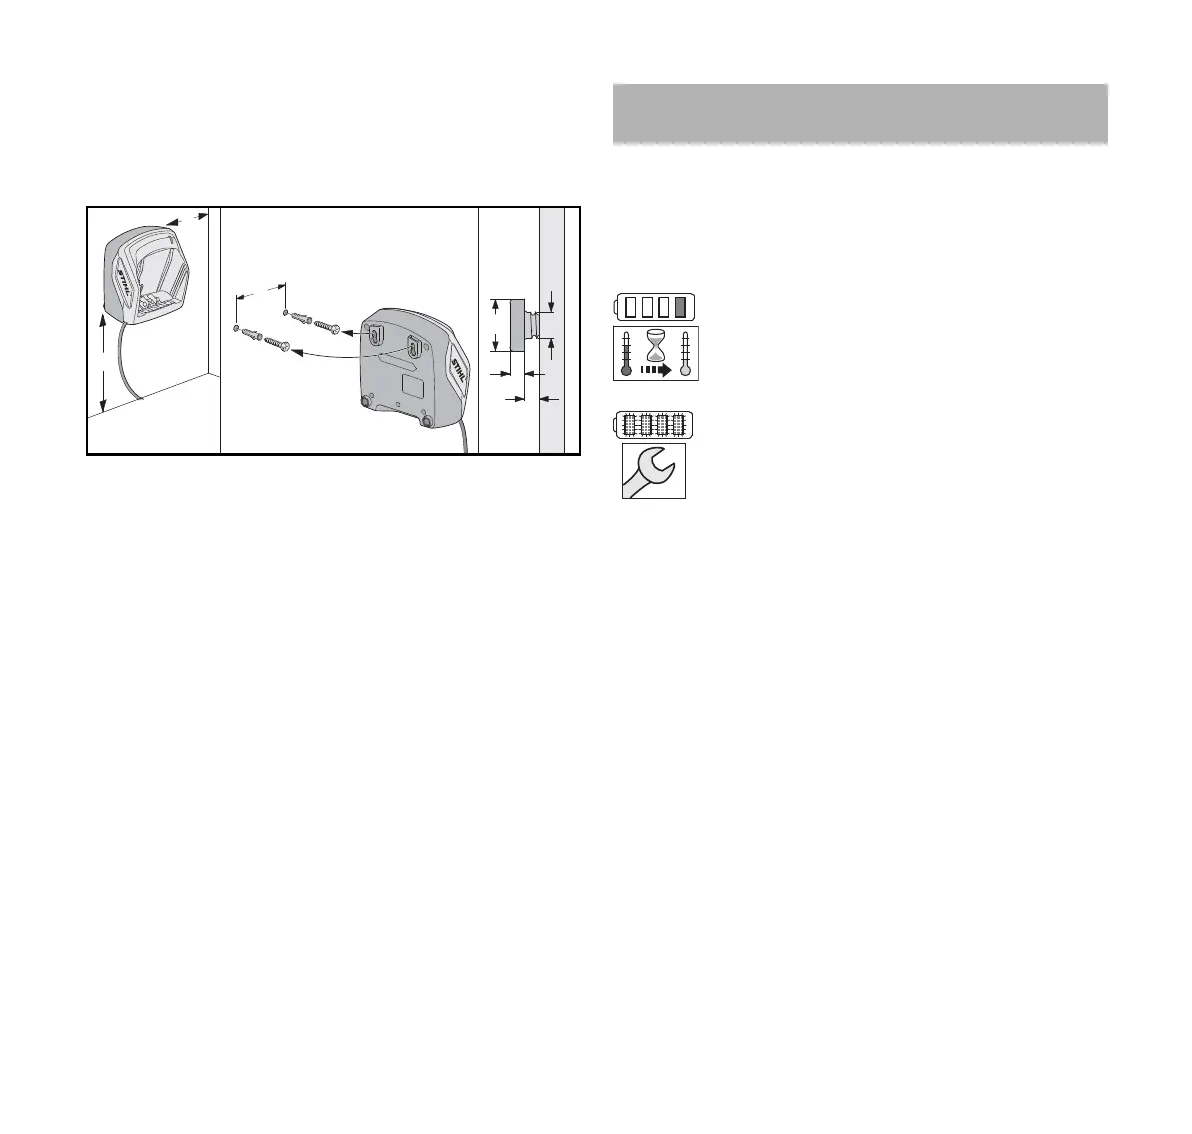
11.3 Mounting the Charger on a Wall
Before mounting, ensure that no electrical cables, pipes or
other service lines run in the wall behind the charger.
To mount the wall charger:
► Mount the charger indoors in a dry room near an electrical
outlet.
► Sink the screws into a wall stud. Use appropriate screw-in
wall anchors or other similar mounting devices if an
appropriate wall stud is not available.
► Align the charger as shown above. Mount to a wall with the
following dimensions:
– a = minimum 18 in. (450 mm)
– b = minimum 3.9 in. (100 mm)
– c (for AL 101) = 3.0 in. (75 mm)
– c (for AL 300 and AL 500) = 4.7 in. (120 mm)
– d = 0.2 in. (4,5 mm)
– e = 0.4 in. (9 mm)
– f = 0.1 in. (2,5 mm)
12.1 LEDs on the Battery
12.1.1 Battery Status
Four LEDs show the status of the battery. These LEDs can
glow or flash green or red.
12.1.2 Blower Status
When the battery is inserted in the blower, the same LEDs
on the battery will indicate the status of the blower.
If three LEDs glow red continuously: the blower motor is too
hot. Allow the motor to cool down.
If three LEDs flash red when you activate the trigger switch:
the blower has an electrical malfunction. Do not operate the
blower. Have it checked by an authorized STIHL servicing
dealer before use or storage.
For troubleshooting information, @ 23.
12.1.3 Charge Status
The LEDs on the battery also show the battery's state of
charge.
e
a
1
2
0000-GXX-0609-A0
b
f
f
c
3
d
12 LED Diagnostics
If one LED glows red continuously: the battery
is either too hot or too cold. Allow the battery
to warm up or cool down gradually at an
ambient temperature of about 50 °F to 68 °F
(10 °C to 20 °C).
If all 4 LEDs flash red: the battery has a
malfunction and must be replaced. Do not
attempt to charge, use or store the battery.
 Loading...