0458-662-0121-A
18
English
8 Adjusting Trimmer for User
7.6 Removing and Installing Metal Cutting
Attachment
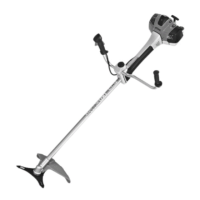
7.6.1 Mounting the Metal Cutting Attachment
► Switch off the brushcutter and remove the battery.
► Place the thrust plate (5) on the shaft (6) so that its smaller
diameter faces up.
► Place the metal cutting attachment (4) on the thrust
plate (5). If you are fitting a circular saw blade or a grass
cutting blade with more than 4 cutting edges: Its cutting
edges must face in the same direction as the arrow on the
deflector.
► Place the thrust washer (3) on the metal cutting
attachment (4) so that its raised side faces up.
► Place the rider plate (2) on the thrust washer (3) so that its
closed side faces up.
► Insert the stop pin (7) in the bore up to the limit stop and
hold it depressed.
► Rotate the metal cutting attachment (4) counterclockwise
until the stop pin (7) engages in position.
The shaft (6) is now blocked.
► Fit the nut (1) counterclockwise and tighten it down firmly.
► Remove the stop pin (7).
7.6.2 Removing the metal cutting attachment
► Switch off the brushcutter and remove the battery.
► Insert the stop pin in the bore up to the limit stop and hold
it depressed.
► Rotate the metal cutting attachment clockwise until the
stop pin engages in position.
The shaft is now blocked.
► Unscrew the mounting nut clockwise.
► Remove the rider plate, thrust washer, metal cutting
attachment and thrust plate.
► Remove the stop pin.
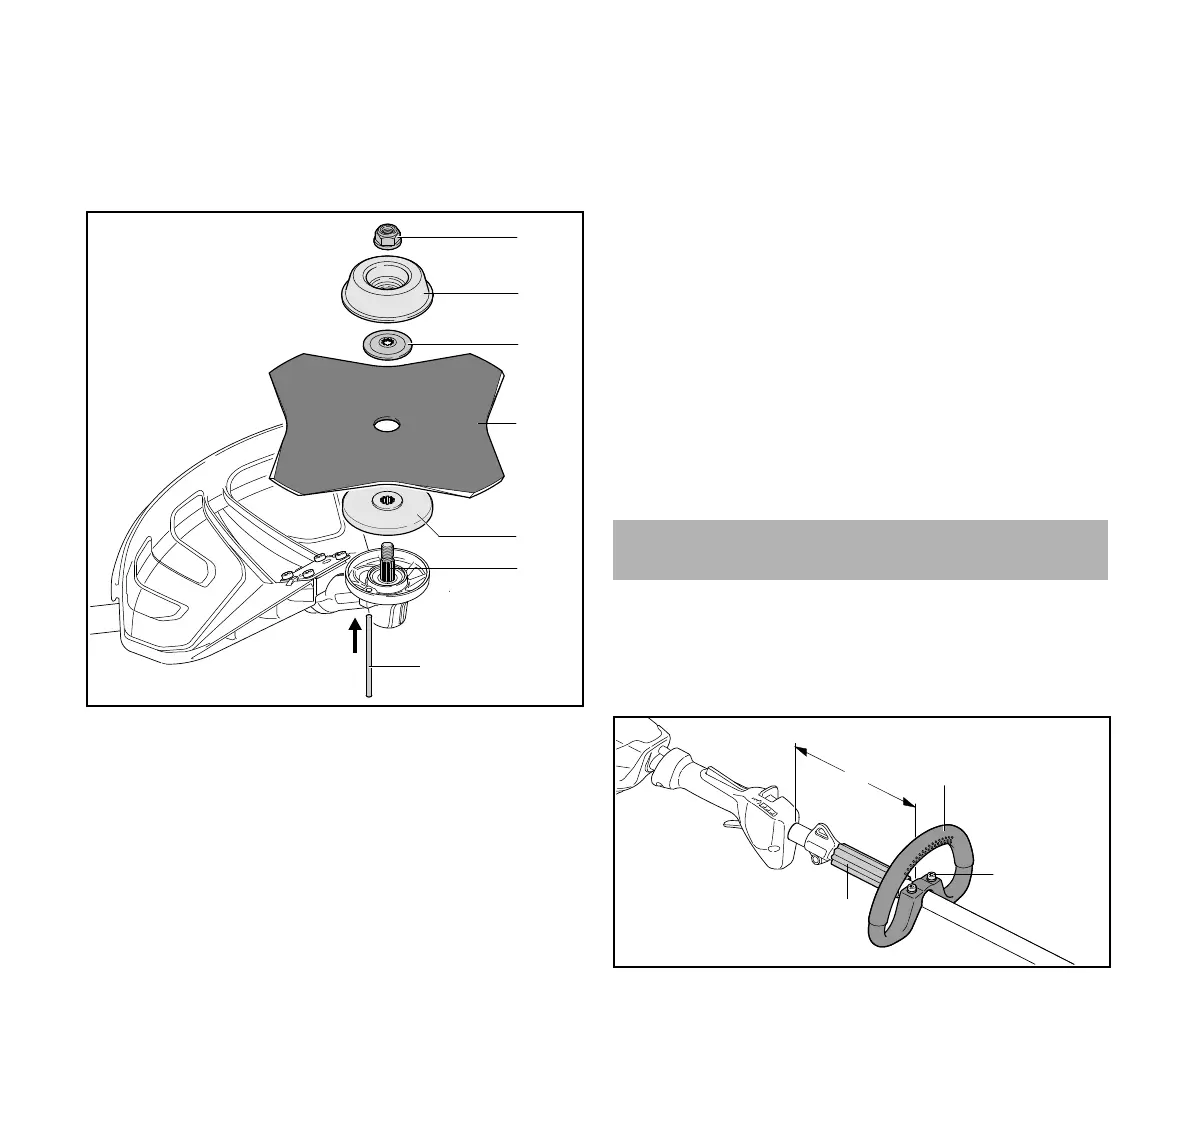
8.1 Adjusting and Setting the Loop Handle
The loop handle can be set to different positions to suit the
height and reach of the user.
► Switch off the brushcutter and remove the battery.
► Undo the screws (2).
8 Adjusting Trimmer for User

 Loading...