► Hold the brushcutter firmly with one hand on
the control handle – wrap your thumb around
the handle.
► Hold the brushcutter with the other hand on
the loop handle such that your thumb holds
the loop handle.
► Depress the lockout lever (1) with your thumb
and hold it there.
► Squeeze and hold the trigger (2) with your
index finger.
The brushcutter accelerates and the cutting
attachment rotates. The locking lever (1) can
be released.
10.2 Switching off the brushcutter
► Release the trigger.
► Wait for the cutting attachment to stop rotat‐
ing.
► If the cutting attachment continues to rotate:
Remove the battery and contact a STIHL
authorized dealer.
The brushcutter is defective.
11 Testing the Trimmer and
Battery
11.1 Checking the controls
Lockout lever and trigger
► Remove the battery.
► Try pressing the trigger without pressing the
locking lever.
► If you can press the trigger: Stop using your
brushcutter and contact a STIHL authorized
dealer.
The locking lever is defective.
► Depress the locking lever and hold it in that
position.
► Press and release the trigger.
► If the trigger is stiff or does not spring back to
its idle position: Do not use your brushcutter
and contact your STIHL authorized dealer for
assistance.
The trigger has a malfunction.
Switching on the brushcutter
► Insert the battery.
► Depress the locking lever and hold it in that
position.
► Depress and hold the trigger.
The cutting attachment rotates.
► If 3 LEDs are flashing red: Remove the battery
and consult a STIHL authorized dealer.
The brushcutter has a malfunction.
► Release the trigger.
The cutting attachment stops rotating after a
short period of time.
► If the cutting attachment continues to rotate:
Remove the battery and contact a STIHL
authorized dealer.
The brushcutter is defective.
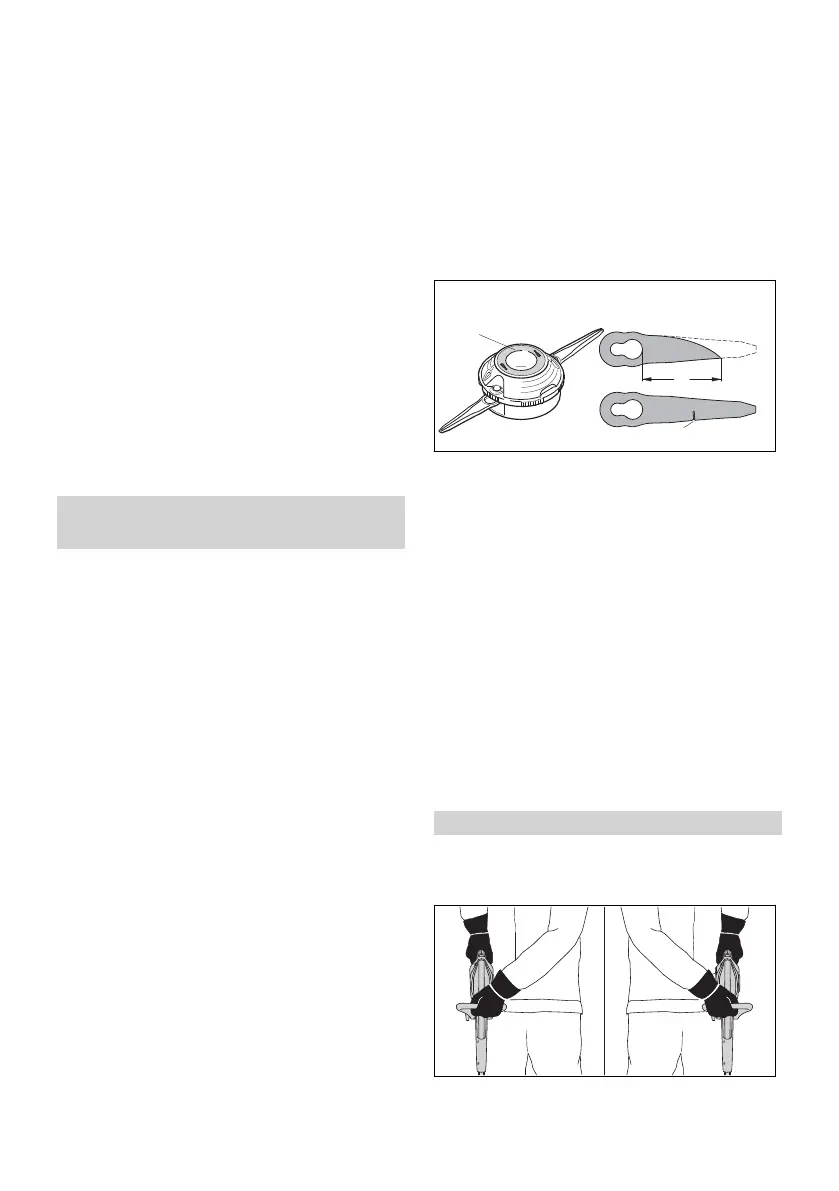
11.2 Inspecting the cutting attach‐
ment
► Switch off the brushcutter and remove the bat‐
tery.
► If the wear mark (A) on the underside of the
PolyCut 3-2 mowing head is visible: Do not
use the brushcutter and replace the PolyCut
3-2 mowing head.
► If the length of one of the blades, measured
from the large bore to the tip of the blade, is
less than ‘a’ = 45 mm: Replace both blades.
► If one blade is damaged (B): Replace both
blades.
11.3 Checking the battery
► Insert the battery.
► Depress the pushbutton on the brushcutter.
The LEDs light up steady or flash.
► If the LEDs do not glow or flash: Do not use
your brushcutter and battery and contact your
STIHL servicing dealer.
Malfunction in brushcutter or battery.
12 Operating the Trimmer
12.1 Holding and Controlling the
Trimmer
English 11 Testing the Trimmer and Battery
16 0458-039-0101-A
 Loading...