14 Series 4144 Powerhead
The new flange 5910 850 4200
replaces the previous flange 1128
850 4200. The new flange has an
additional recess (arrow) in its
sealing face. The previous flange
1128 850 4200 can be modified
accordingly.
Modify the test flange
1128 850 4200 as shown.
: Fit the test flange (1)
5910 850 4200.
938RA097 TG
3
O 16
296RA009 TG938RA018 TG
1
: Fit the nuts (arrows) and tighten
them down firmly.
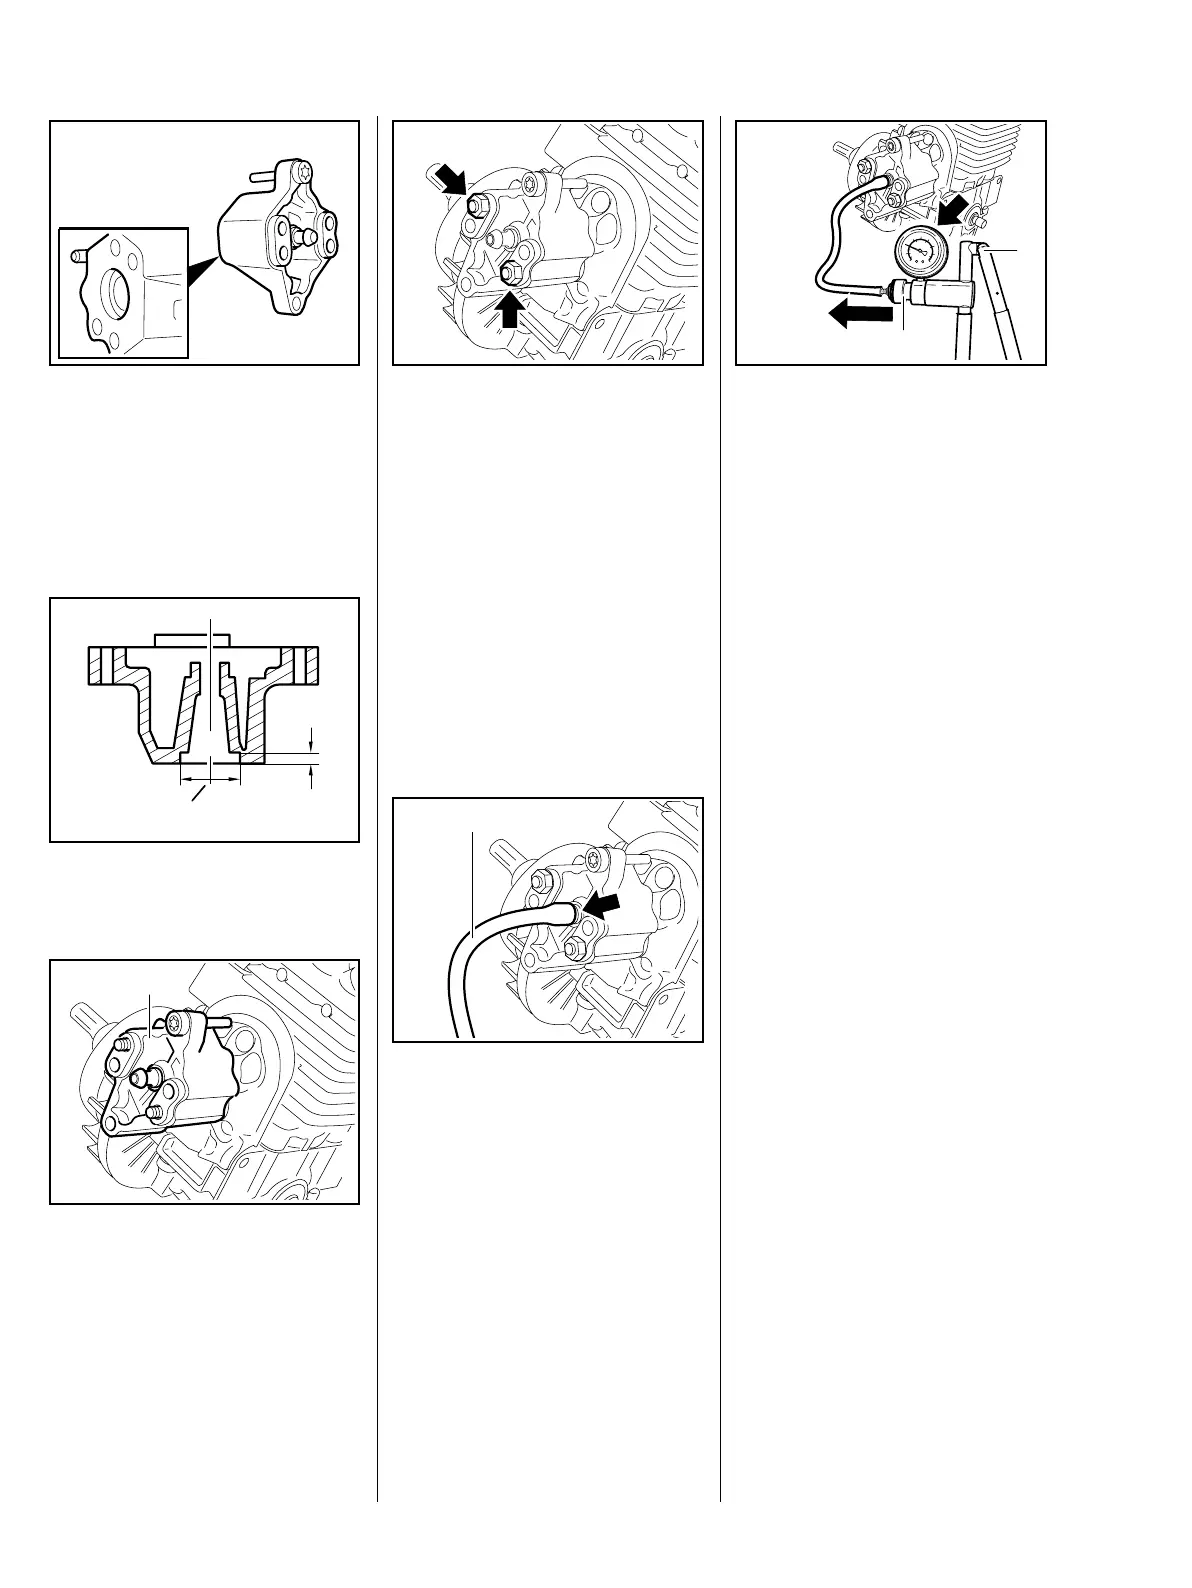
6.1.2 Vacuum Test
Oil seals tend to fail when subjected
to a vacuum, i.e. the sealing lip lifts
away from the crankshaft during the
piston's induction stroke because
there is no internal counterpressure.
A test can be carried out with pump
0000 850 1300 to detect this kind of
fault.
: Connect suction hose (1) of
pump 0000 850 1300 to
nipple (arrow).
938RA019 TG938RA020 TG
1
: Push ring (1) to the left.
: Operate the lever (2) until the
pressure gauge (arrow) indicates
a vacuum of 0.5 bar.
If the vacuum reading remains
constant, or rises to no more than
0.5 bar within 20 seconds, it can be
assumed that the oil seals are in
good condition.
However, if the pressure continues
to rise (reduced vacuum in the
engine), the oil seals must be
replaced, b 6.2.
– After finishing the test, push the
ring to the right to vent the pump.
– Continue with pressure test,
b 6.1.3
938RA021 TG
1
2
 Loading...