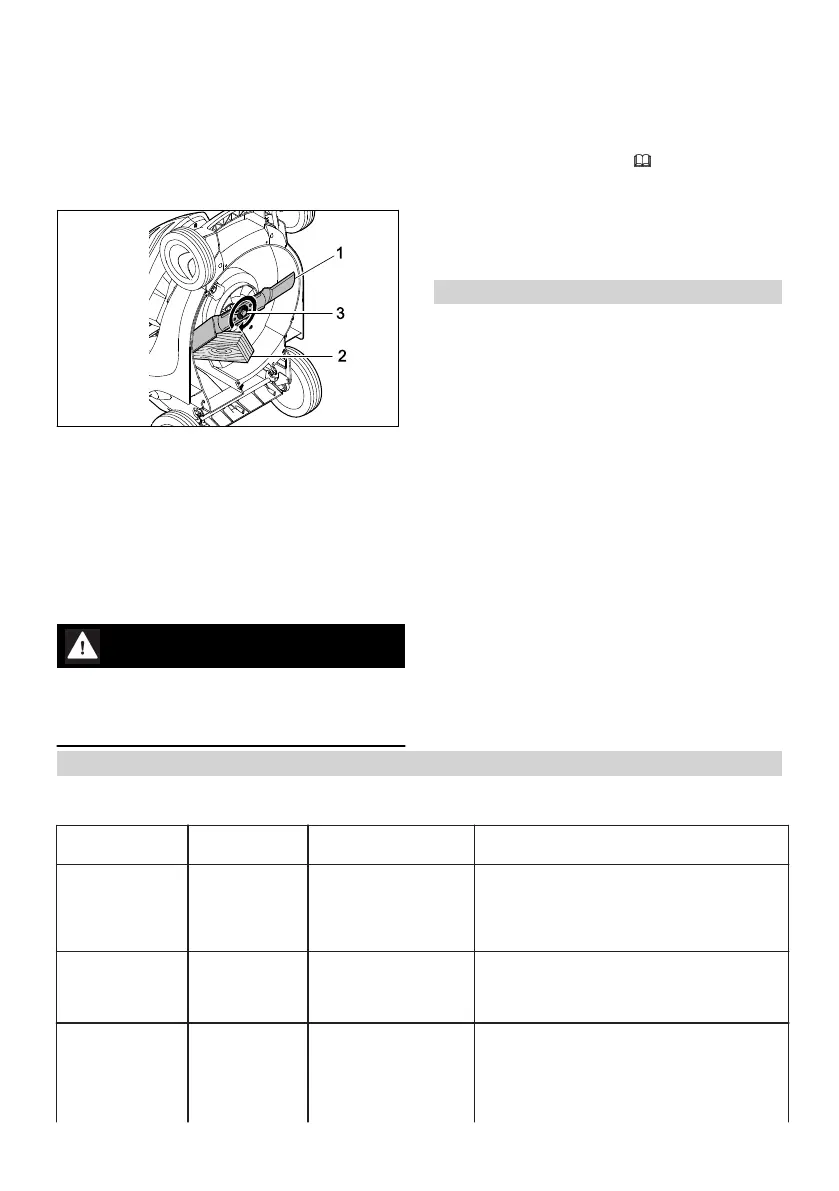
► Lay new washer (1) on new screw (2) with the
convex side facing outwards.
► Apply Loctite 243 thread locker to the thread
of screw (2).
► Position blade (3) so that the raised areas on
contact area (4) engage in notches (5).
► Screw in screw (2) together with washer (1).
► Block blade (1) using a piece of wood (2).
► Tighten screw (3) to 65 Nm.
18.2 Sharpening and Balancing the
Blade
Sharpening and balancing the blade correctly
requires a lot of practice.
STIHL recommends having the blade sharpened
and balanced by a STIHL specialist dealer.
WARNING
■ The cutting edges of the blade are sharp. This
may result in the user cutting themselves.
► Wear work gloves made from resistant
material.
► Switch the lawn mower off, pull out the activa‐
tion key and remove the battery.
► Upend the lawn mower.
► Remove the blade.
► Sharpen the blade. Observe the sharpening
angle and cool the blade, 21.2.
Bluing of the blade during sharpening is not
permitted.
► Attach the blade.
► If anything is unclear: consult a STIHL special‐
ist dealer.
19 Repairing
19.1 Repairing the Lawn Mower
The user should not repair the lawn mower or
blade themselves.
► If the lawn mower or blade is damaged: do not
use the lawn mower or blade and consult a
STIHL specialist dealer.
► If warning signs are illegible or damaged: have
the warning signs replaced by a STIHL spe‐
cialist dealer.
20 Troubleshooting
20.1 Remedying Lawn Mower or Battery Faults
Fault LEDs on the
battery
Cause Remedy
The lawn mower
does not start
when switched
on.
1 LED flashes
green.
The battery charge
state is too low.
► Charge the battery.
1 LED illumina‐
tes red.
The battery is too
warm or too cold.
► Pull out the activation key.
► Remove the battery.
► Allow the battery to cool down or warm
up.
3 LEDs flash
red.
There is a fault in the
lawn mower.
► Pull out the activation key.
► Remove the battery.
► Clean the electric contacts in the battery
compartment.
► Fit the battery.
► Switch the lawn mower on.
19 Repairing English
0478-131-9946-D 37
 Loading...