EasyManua.ls Logo

Suzuki GP-3 User Manual

Suzuki GP-3
100 pages
To Next Page IconTo Next Page
To Previous Page IconTo Previous Page
Page #16 background imageLoading...
Page #16 background image
16
CONNECTOR PANEL
1. VIDEO OUTPUT - This jack will send the NTSC video signal of the
Karaoke Lyrics to your TV. It is located to the left of the Connector
Panel. Please use the included cord or similar RCA type cord to plug
the GP-3 video output jack to the similar style Video Input Jack on your
TV.
2. PHONE 1 / PHONE 2 - You can play in total silence, without disturbing
others in the room, by plugging a set of headphones into one of the
appropriate sockets. When headphones are plugged into either of these
jacks the main speaker system is turned off. Two sets of headphones
may be used simultaneously.
3. LINE IN - These stereo audio input jacks will amplify the supplied signal
through the internal sound delivery system. They can be used to hook
up items such as CD players, MP3 player or Cassette player.
LINE OUT - These stereo audio output jacks supplies the piano’s output
signal to external amplification, such as home stereo, PA system or
other stand alone amplifiers.
4. MIDI IN / MIDI OUT - This piano contains MIDI in and MIDI output ports.
MIDI jacks allow communication with other products equipped with MIDI
interfaces. Please see the MIDI section of this manual for further details.
5. USB - The USB connector allows you to connect the piano directly to
your computer’s USB port. This allows you to update your piano’s
software if necessary. Do not turn on piano with USB cable connected
to the computer to avoid having to restart your computer.
6. MICROPHONE INPUT - The Microphone Input is for use of the micro-
phone.
The Volume Knob controls the Microphone Volume.
The Echo Knob controls the amount of Microphone output echo.
This connector panel, with its various jacks, is located on the bottom left of the piano, under the keybed.
VIDEO USB
1
2
3 4 5
6
PHONES
2 1
LINE
IN OUT
PHONES
2 1
LINE
IN OUT IN OUT
MIDI
MICROPHONE
ECHO INVOL
IN OUT
MIDI
MICROPHONE
ECHO IN
VOL
USB
VIDEO
Question and Answer IconNeed help?

Do you have a question about the Suzuki GP-3 and is the answer not in the manual?
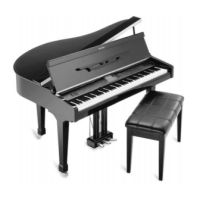
Suzuki GP-3 Specifications

General IconGeneral
Number of Keys88
Built-in SpeakersYes
Headphone JackYes
MIDI CompatibilityYes
PedalDamper

Summary

Welcome to Your New Piano

General Precautions and Safety

Electrical Shock and Fire Warnings

Safety warnings regarding electric shock, fire hazards, and proper servicing.

Maintaining Your Digital Piano

Important Safety Instructions

Basic safety precautions for using electrical products and the piano.

Handling, Transport, and Cleaning

Guidelines for careful handling, transport, and proper cleaning of the instrument.

Location and Power Usage

Recommendations for piano placement and safe power cord usage.

Piano Assembly Guide

Unpacking Your Grand Piano

Step-by-step instructions for safely unpacking the main piano unit.

Unpacking Piano Legs & Pedal Assembly

Procedure for unpacking the piano legs and pedal assembly components.

Attaching the Legs to the Piano

Instructions on how to securely attach the piano legs to the main body.

Pedal Assembly Attachment

Steps for connecting the pedal assembly to the piano base.

Installing the Left Leg

Detailed instructions for installing the final piano leg.

Positioning Your New Grand Piano

Guidance on safely moving and positioning the assembled piano.

Connector Panel Overview

Panel Controls and Functions

Basic Panel Controls

Description of Power, Volume, EQ, Demo, and Setup buttons.

Rhythm Control Buttons

Explanation of Tempo, One Touch, and Accompaniment controls.

Rhythm Performance Buttons

Functions of Sync, Intro/Ending, and Start/Stop buttons.

Rhythm Variation Controls

Usage of Fill-In, Fill to Var, and Fade buttons for rhythm patterns.

Rhythm Style Selection

How to select rhythm styles using quick select buttons and modes.

Display Navigation Controls

Controls for navigating the LCD screen: Cursor, Escape, Screen, Value, Enter.

Piano and Effect Buttons

Functions of Grand Piano, Reverb, and Effects control panel buttons.

Voice and Registration Controls

Controls for Sound Group selection and Registration Memory.

Composer and Recorder Controls

Buttons for the Music Recorder: Accompaniment, Melody tracks, Reset.

Recorder Playback Controls

Controls for recording playback: Play/Pause, Stop, Mark buttons.

Metronome and Media Controls

Buttons for Metronome, Card/Disk, MIDI, and Song functions.

Disk Drive Component

Piano Pedals Explained

Display Screen Navigation

Demonstration Songs Guide

Piano Voices: Sound Channel Modes

Piano Voices: Voice Selection

Piano Voices: Quick Selection

Piano Voices: Selecting All Voices

Piano Voices: Effects and Reset

Rhythm Section: Selecting a Rhythm

Rhythm Section: Playing the Rhythm

Auto Accompaniment: How it Works

Auto Accompaniment: Chord Types

Auto Accompaniment: How to Use

Setup Function Overview

Setup - Performance Menu: Velocity & Split Point

Adjusting touch sensitivity and keyboard split point settings.

Setup - Performance Menu: Transpose & Screen Hold

Configuring pitch transpose and LCD screen display hold time.

Setup - Performance Menu: Tune & Fixed Level

Adjusting piano tuning and fixed touch response level.

Setup - Performance Menu: Fade Time & Octave Shift

Setting accompaniment fade time and octave transposition.

Setup - Harmony Menu

Selecting and configuring harmony types (Trio, Duet, Octave).

Setup - Key Mode Menu

Configuring Manual Bass and Lower Hold key modes.

Setup - Sustain Menu

Configuring sustain pedal effects for different sound channels.

Setup - Reverb Menu

Adjusting reverb settings and selecting reverb types.

Setup - Effects Menu

Applying and adjusting chorus, flanger, and delay effects.

Setup - Chord Menu

Selecting auto accompaniment chord fingering modes.

Setup - Pedal Menu

Assigning functions to the center pedal.

Setup - Percussion Menu

Selecting drum kits for piano percussion.

Setup - Metronome Menu

Configuring metronome settings: time signature, tempo, sound, volume.

Registration Memory Guide

Record Functions Overview

Recording Process

Recording Playback

Recording Mark Feature

Song - Play Along Song

Song - Lesson Feature

SD Memory Card Operations

SD Memory Card: Load Song

Instructions for loading songs from an SD memory card.

SD Memory Card: Save Song

Instructions for saving performances or songs to an SD card.

SD Memory Card: Play Card

How to play MIDI song files stored on an SD memory card.

SD Memory Card: Play Card Menus

Options for viewing file data, lyrics, and playback controls.

SD Memory Card Utility: Format and Copy

Using the utility function to format cards and copy files.

SD Memory Card Utility: Delete and Rename

Using the utility function to delete and rename files on the card.

Disk Operations

Disk: Load Song

Instructions for loading songs from a floppy disk.

Disk: Save Song

Instructions for saving performances or songs to a floppy disk.

Disk: Play Disk

How to play MIDI song files stored on a floppy disk.

Disk: Play Disk Menus

Options for viewing file data, lyrics, and playback controls.

Disk Utility: Format and Copy

Using the utility function to format disks and copy files.

Disk Utility: Delete and Rename

Using the utility function to delete and rename files on the disk.

Karaoke Features

MIDI and Video Out Jacks

MIDI Features and Operations

MIDI Channels and Basic Setups

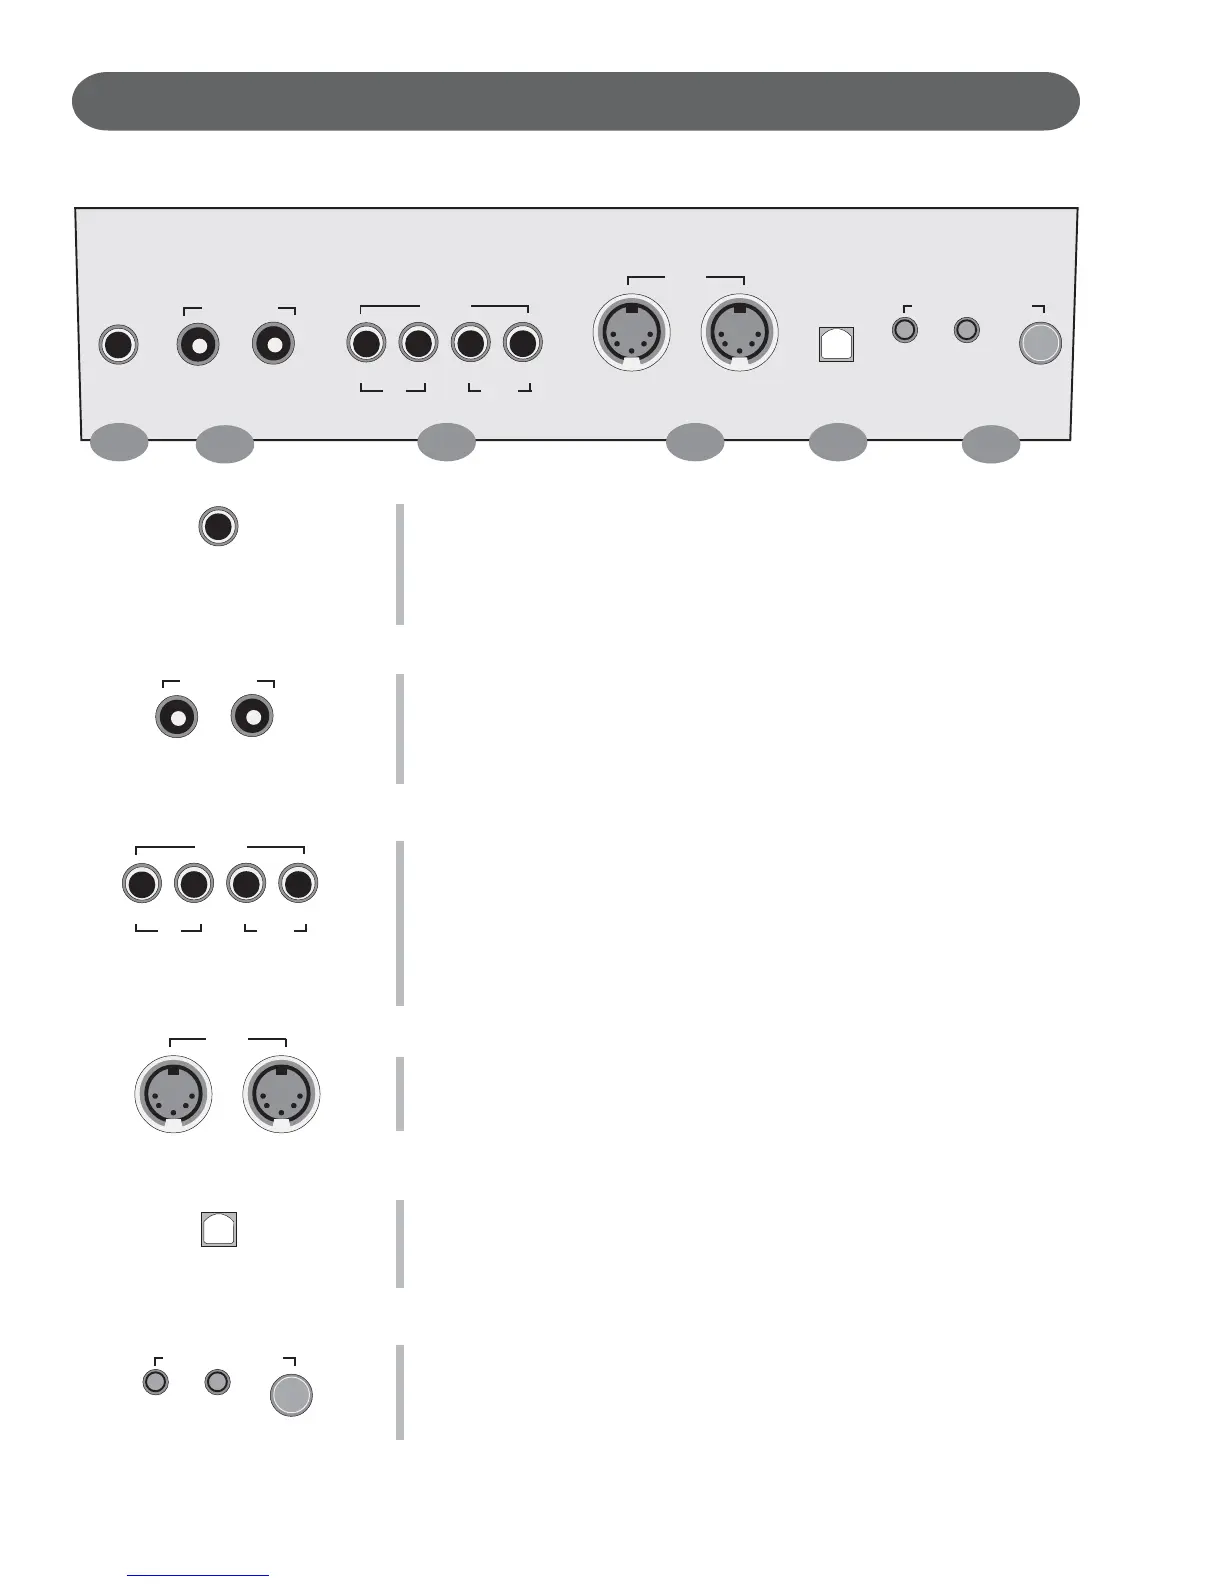
Explanation of MIDI channels and basic connection setups.

MIDI Local Control and Channel Selection

Configuring local control and MIDI input/output channels.

MIDI Implementation Chart

Voice List

Style List

Drum Kit Lists

Specifications

Questions and Troubleshooting

Warranty Information

Related product manuals