TM9300/TM9400 Installation Guide Installing the Radio 29
© Tait Limited December 2015
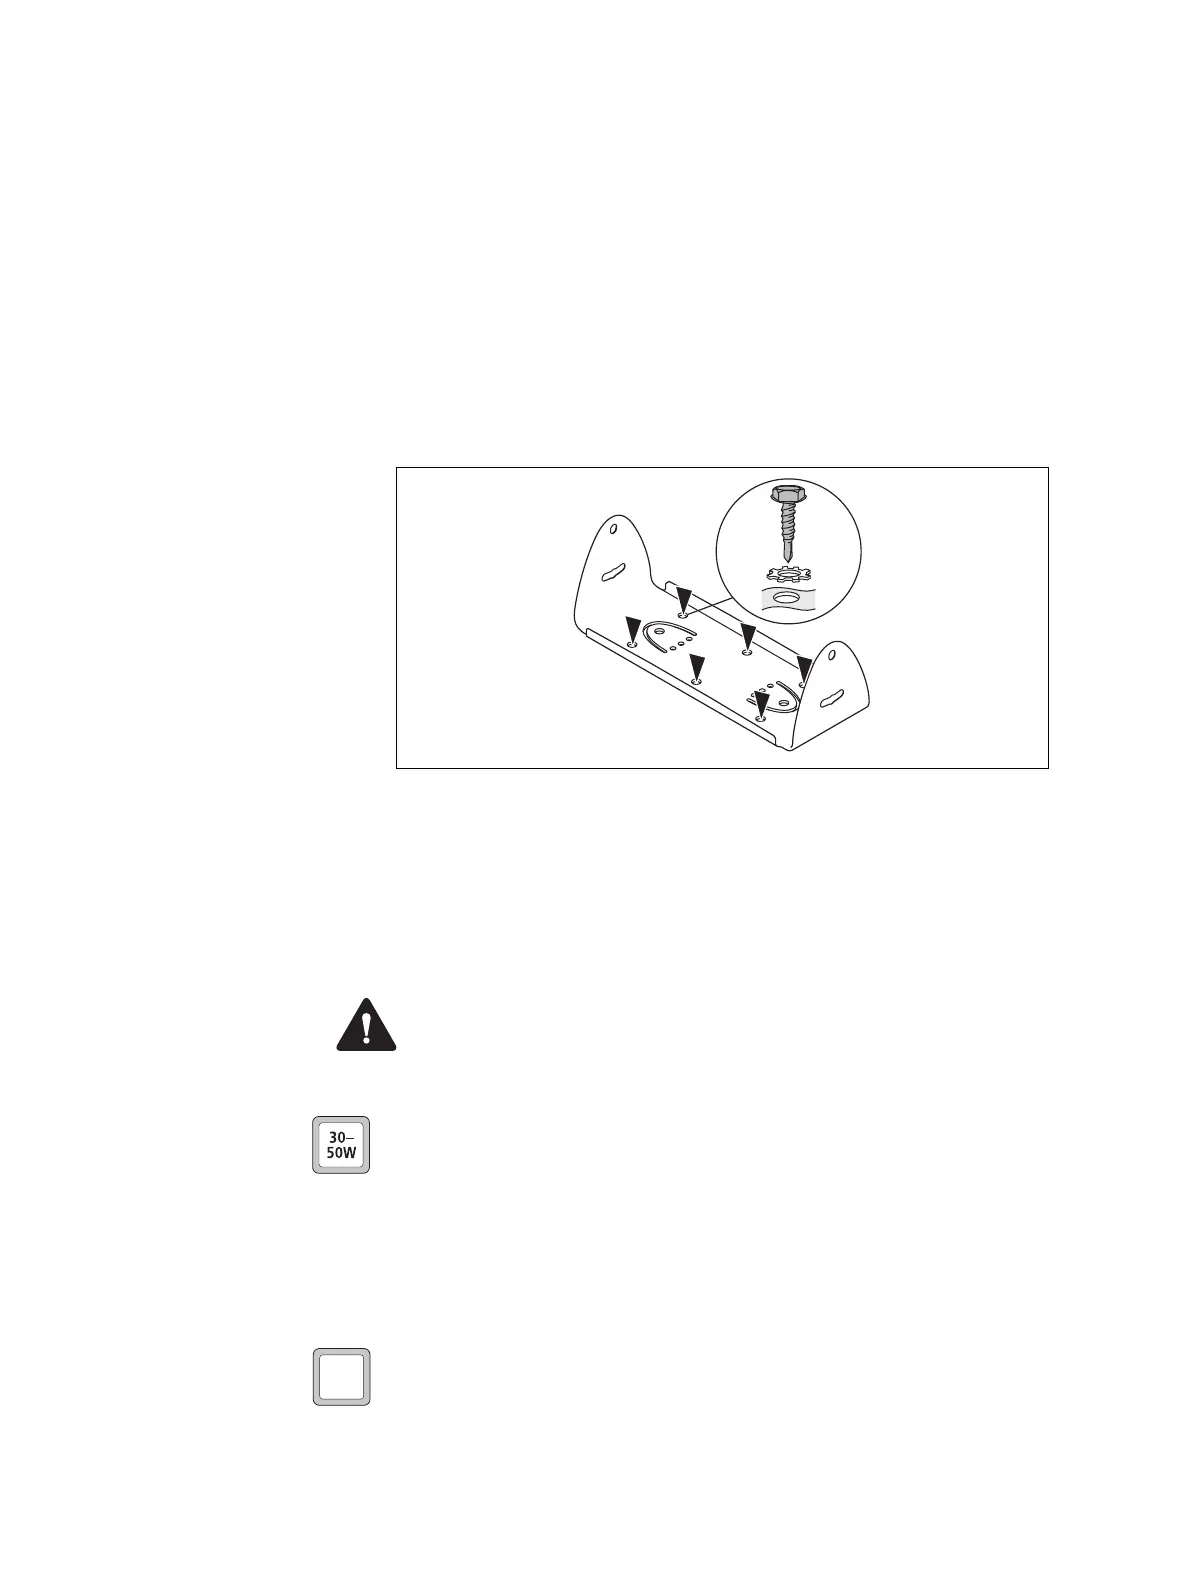
Notice Ensure that drilling at the selected points will not damage
existing wiring.
The screws provided are self-drilling. For more precise positioning,
predrill ∅1/8 inch (3 mm) pilot holes for self-drilling screws.
Reduce the hole size in metal that is less than 1/32 inch (1mm) thick.
3. Drill any holes required for cables and install suitable grommets or
bushings in the holes.
4. Screw the U-cradle in the chosen mounting position using the self-
drilling screws and washers provided. When tightening the screws,
ensure that this does not distort the U-cradle.
4.6 Installing the Antenna
This section provides information on installing an external antenna within
the RF exposure limits.
Warning RF exposure hazard!
To comply with FCC RF exposure limits, mount the antenna at
a location such that no person or persons can come closer than
35 inches (0.9m) to the antenna.
For 30-50W radios:
■ VHF radios must be installed using an antenna mounted
centrally on the vehicle roof, with a gain of 2.15dBi or
5.15dBi.
■ UHF and 800MHz radios must be installed using an antenna
mounted either centrally on the roof with a gain of 2.15dBi or
5.65dBi, or centrally mounted on the trunk with a gain of
5.65dBi.
For 25W radios:
■ The radio must be installed using an externally mounted
antenna with a gain of either 2.15dBi or 5.15dBi.
Figure 4.3 Mounting the U-cradle
25W
 Loading...


