2. Using the SET key to move into the “Time setting” mode. To exit the programming
mode, press the SNOOZE /LIGHT key anytime or wait around 15 seconds to
automatically return to normal display mode.
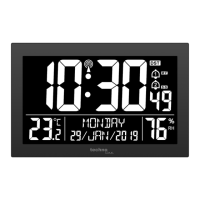
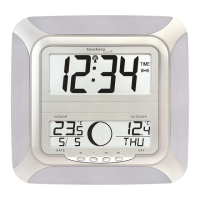
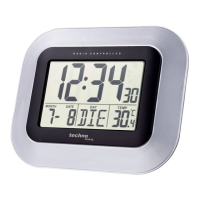
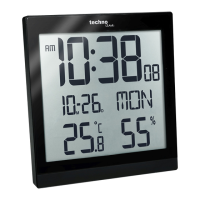
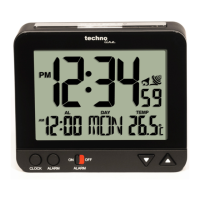
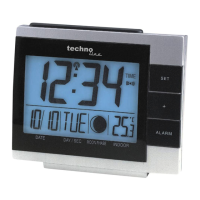
TIME SETTING
1. After entering into the time setting, the Hour digit in the time section starts flashing
2. Press the + key to set the hours of the current time and then followed by pressing
the SET key to move into the minutes mode.
3. Again, press the + key to set the minutes of the current time (by holding the key
down, the digits are incremented in steps of five).
4. Press the SET key to enter the “Calendar setting” mode or do not touch any buttons
for around 15 seconds to confirm the time setting. To exit the programming mode,
press the SNOOZE/LIGHT key anytime. The mode will return to normal.
CALENDAR SETTING
1. The year digit starts flashing (default setting “00”)
2. Press the + key to set the current year, (The range runs from 2000 to 2019, and only
last 2 digits of the year will be displayed. e.g. 2000=00) and then followed by
pressing the SET key to move into the month mode.
3. Again, press the + key to set the current month and then followed by pressing the
SET key to move into the date mode.
4. Press the + key to set the current date and then followed by pressing the SET key to
move into the weekday mode.
5. Once again, press the + key to set the current weekday.
6. Press the SET key to enter the “12/24 hour display setting” mode or do not touch
any buttons for around 15 seconds to confirm the calendar setting. To exit the
programming mode, press the SNOOZE /LIGHT key anytime. The mode will return
to normal.
12/24 HOUR DISPLAY SETTING
The default time display for the clock is 24 hour, to select 12 hour display:
1. “24” will start flashing on the LCD, press the + key to select “12”
2. Press the SET key to enter the “Celsius or Fahrenheit degree setting” mode or do
not touch any buttons for around 15 seconds to confirm the 12/24 hour display
setting. To exit the programming mode, press the SNOOZE/LIGHT key anytime. The
mode will return to normal.
CELSIUS OR FAHRENHEIT DEGREE INDOOR TEMPERATURE SETTING
Following from the 12/24 hour setting mode, the indoor temperature setting display can be
changed.
1. “°C” will appear on the LCD (default in “°C”). If “°C” is displayed then the current
temperature reading is set to Celsius. If “°F” is displayed then the current
temperature reading is set to Fahrenheit.
2. To select the temperature setting, simply press the + key.
3. Press SET key to confirm or do not touch any buttons for around 15 seconds or
press the SNOOZE/LIGHT key to exit the programming mode anytime. The mode
will return to normal.
 Loading...