14
8. Clean all metallic parts in carburetor cleaner. Do not
exceed 30 minutes soak time. Blow out all fuel
passages with compressed air. Do not use tag wire to
clean the orifice in the main mixture seat assembly.
The main mixture seat assembly contains a teflon disc
check valve. If the disc is damaged with tag wire, the
carburetor will not function properly.
CARBURETOR INSPECTION
Visually examine the throttle lever shaft and choke shaft
for wear at the bearing points in the carburetor body.
Inspect the pump and metering diaphragms for hardness,
fuel contamination, holes or tearing in the diaphragm.
Pump diaphragm flapper valves should appear flat with
no curling. Check the inlet screen and check valve screen
for contamination. Check the atmospheric vent hole in the
metering cover and clean if necessary.
Check the inlet needle for wear on the taper portion of the
needle. Replace as necessary.
CARBURETOR ASSEMBLY
1. Install new inlet screen(s) using a small flat punch
slightly smaller than the screen. Push in until the
screen contacts the seat.
2. If removed, install the high speed jet. Use a slightly
larger flat punch to install the brass welch plug over
the high speed jet. The closed, tapered end of the
plug goes toward the jet. Tap the brass welch plug in
until it is flush with the carburetor body. Apply sealant
like fingernail polish to the brass plug.
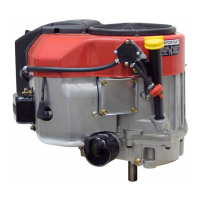
3. Install new welch plug(s) using a flat punch equal to
or slightly larger than the plug. The welch plug(s)
must be flattened by taps with a small hammer on
the installing punch. Sealant such as fingernail polish
is recommended to apply to an installed welch plug.
Use sparingly and wipe off excess immediately
(diag. 3-11).
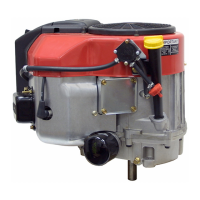
4. Install the inlet needle, spring, metering lever and
pin. The metering lever hooks on the inlet needle
and rests on the metering spring. Install as an
assembly and install the retaining screw
(diag. 3-12).
5. Check the metering lever tip height using a metering
lever gauge (part # 670325). The tip height should
be .060" to .070" (1.52 mm to 1.77 mm) from the
face of the carburetor body on Walbro carburetors.
On Tillotson carburetors the tip of the metering lever
should be flush with surface of the carburetor body.
6. Install the idle mixture screw and spring and back
the screw out from the closed position 1 - 1 1/8 turns
for Walbro, 1-1/4 - 1-3/8 turns for Tillotson
carburetors.
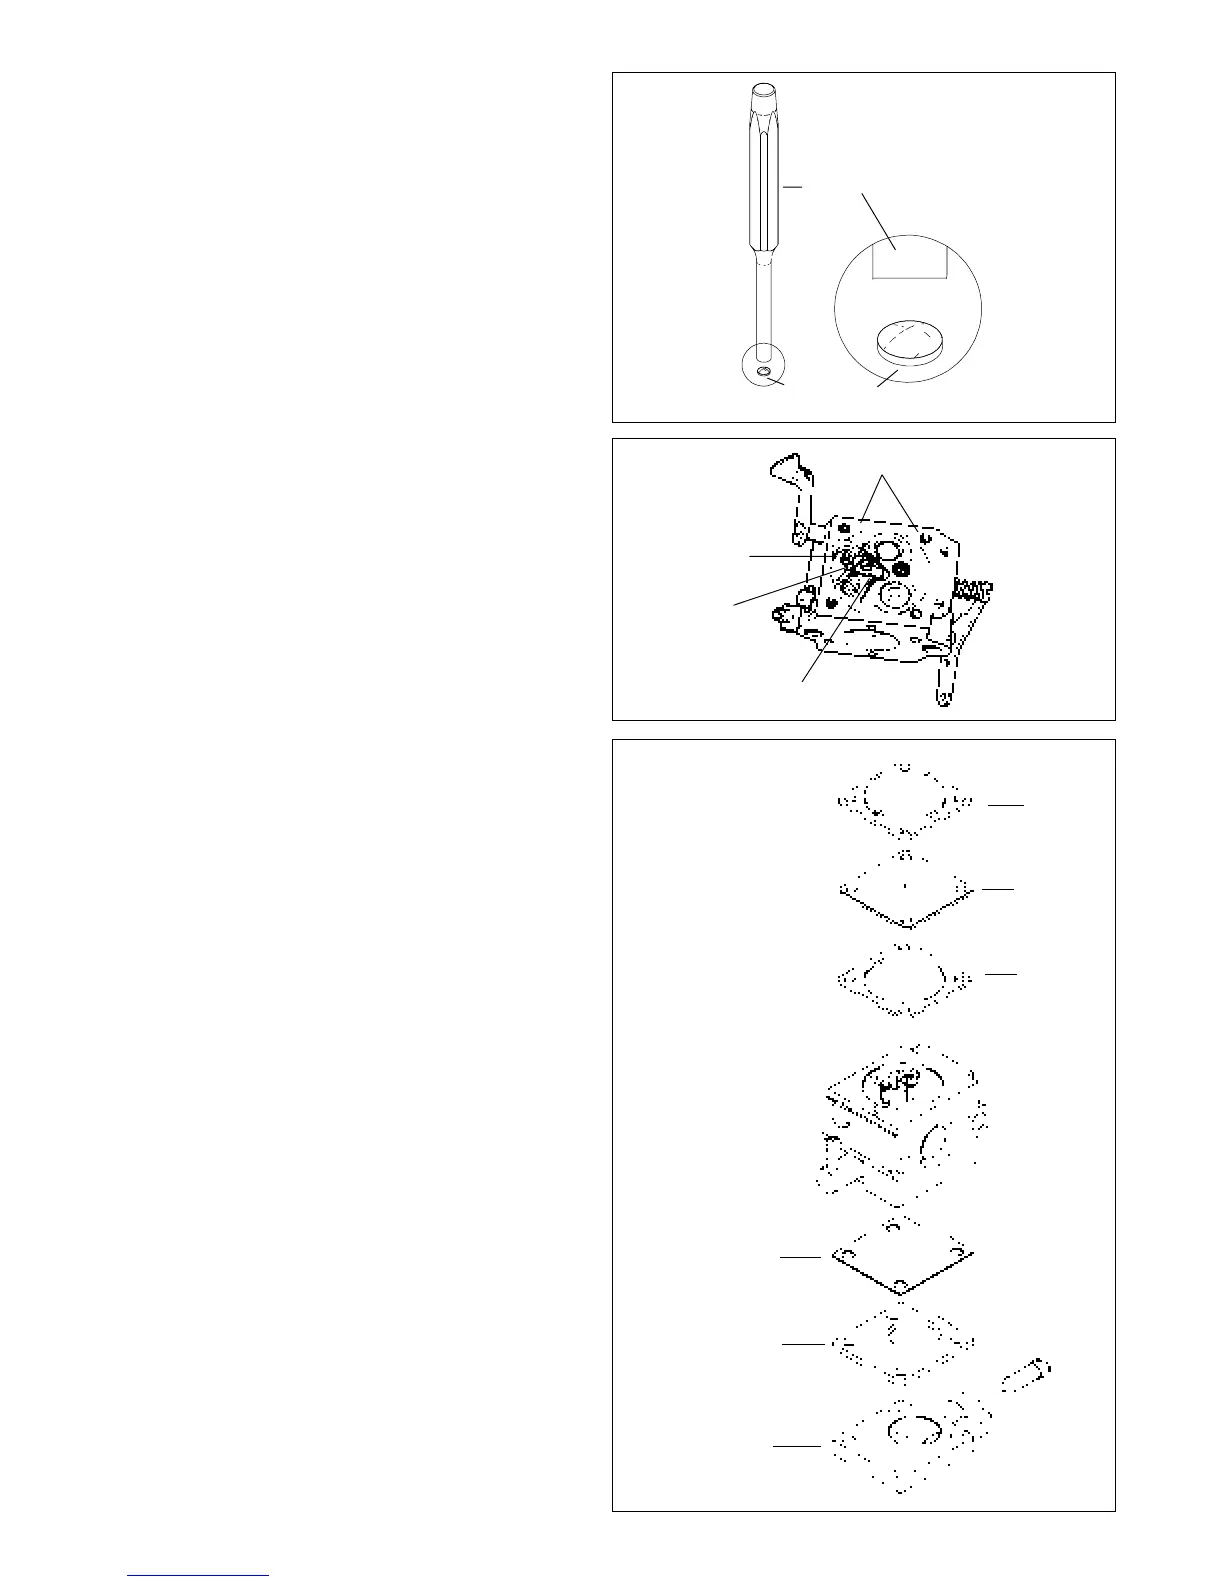
7. Install the metering diaphragm, cover gasket, and
cover. Place the cover gasket (over the locator pins
on Walbro only) on the carburetor body, add the
metering diaphragm with the long rivet head toward
the carburetor body on top of the gasket, add the
cover and fasten the four screws (diag. 3-13).
3-11
Flat End
Punch
New Welch
Plug
Note: Punch should be of the
same or larger diameter than
the welch plug.
3-12
3-13
1. Metering Diaphragm Cover
2. Diaphragm
3. Diaphragm Gasket
4. Pump Diaphragm
5. Pump Cover Gasket
6. Pump Cover
6
5
4
3
2
1
Metering Pin
Carburetor Face
Metering Lever Tip
Inlet Needle
Not For Resale
www.SmallEngineDiscount.com
 Loading...