Adjustment Procedure
Factory Adjustment Procedure
NOTE. Changing oscilloscope settings will abort the adjustment procedure. Do
not turn any kn
obs or push any oscilloscope buttons except those used to navigate
the procedure.
To perform the factory adjustment procedure, complete these steps:
1. Connect the oscilloscope and the calibrator to AC power. Be sure to follow
the instructions provided in Connecting the Equipment.(Seepage9,
Connecting the Equipment.) Failure to follow these instructions can invalidate
this procedure.
2. Power on the oscilloscope and the oscilloscope calibrator and allow them both
to warm up for 30 minutes.
3. Connect the Active Heads, following the instructions provided in Connecting
the Equipment. (Seepage9,Connecting the Equipment.)
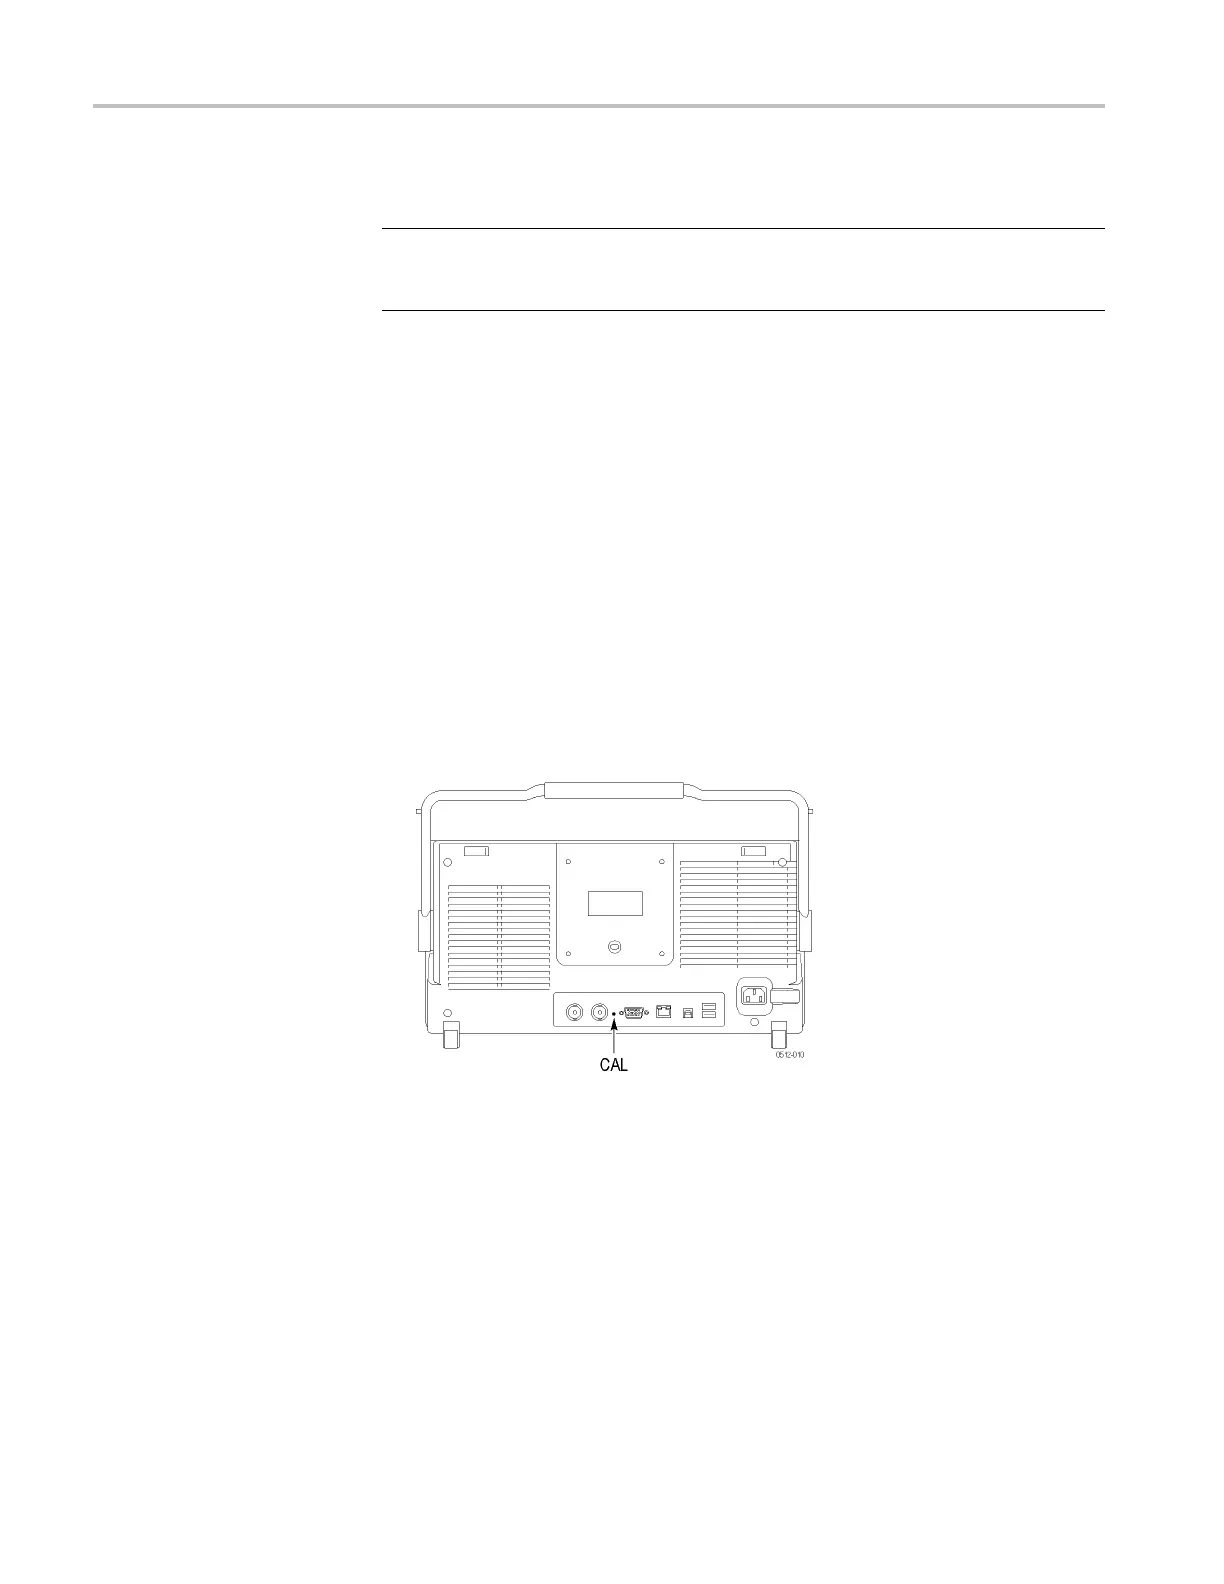
4. Put the oscilloscope into the service mode as follows (can take up to
a minute):
a. Power off the oscilloscope.
b. Locate the hole in the rear panel that provides access to the CAL switch.
c. Insert the adjustment tool into the CAL switch hole and power on the
oscilloscope while holding in the switch.
d. Continue to hold the switch until the oscilloscope s hows the "Power-on
self- passed" message with the oscilloscope graticule in the background.
5. Start the factory adjustment routine as follows:
a. Push the Default Setup button on the front panel of the oscilloscope.
b. Push the Utility button on the front panel of the oscilloscope.
c. Push the Utility Page lower-bezel button.
10 MSO4000B and DPO4000B Series Digital Phosphor Oscilloscopes Service Manual
 Loading...