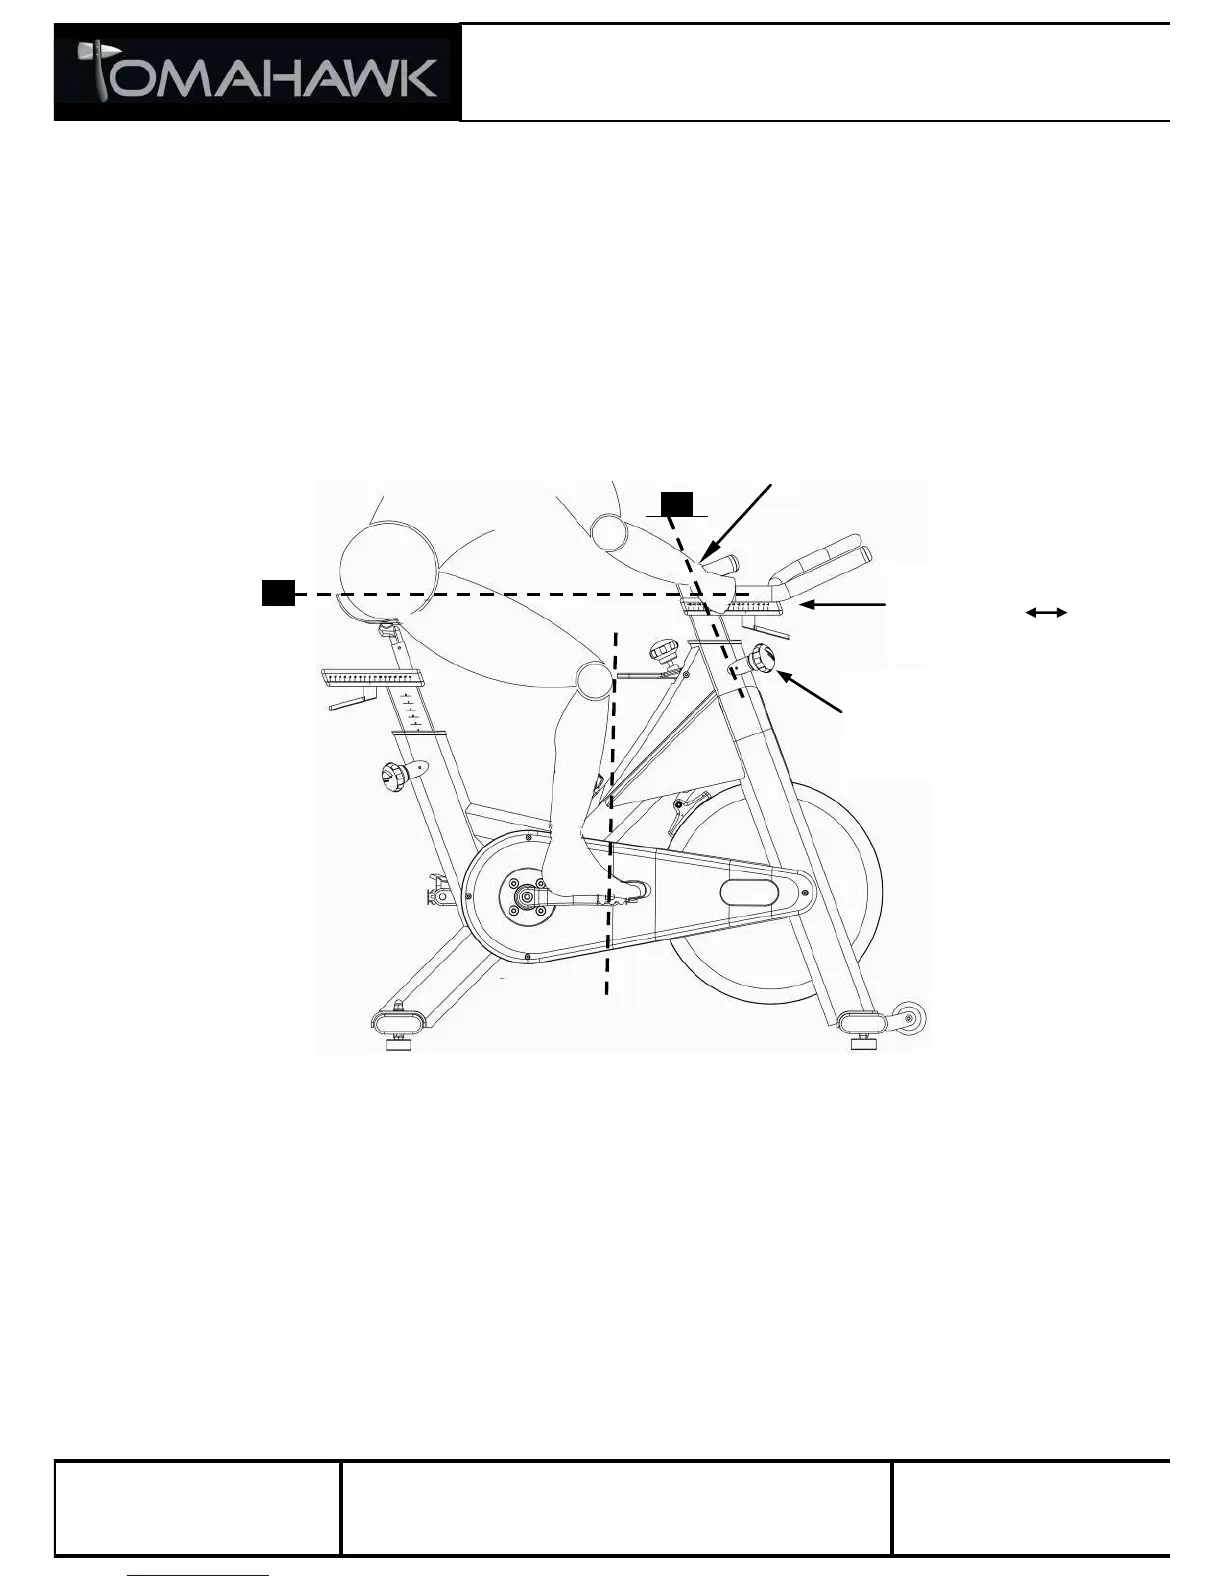
HANDLEBAR ADJUSTMENT
Begin with the top of the handlebar at relatively the same height or just slightly
higher than the top of the saddle (dotted horizontal line A in the drawing below) and
at a neutral fore/aft position (see dotted vertical line B in drawing below). If your
knees touch the handlebars or if you experience back discomfort while pedalling for
extended periods of time, the height of the handlebar can be adjusted. First,
dismount the indoor cycle. Next, turn the front adjustment knob counter clockwise,
slide the handlebar post up or down, and then retighten the adjustment knob.
Next, the horizontal position of the handlebars should be adjusted. If the
handlebars are too close to the saddle, your breathing may feel restricted; if the
handlebars are too far from the saddle, you may experience back discomfort. To
adjust the horizontal position of the handlebars, first dismount the indoor cycle.
Check for proper handlebar position by positioning your elbow so that it is touching
the front tip of the saddle at a 90 degree angle and checking that the fingertip of
your middle finger is touching the handlebar at the mid-point. If it is not as
described, then loosen the fore-aft adjustment knob and slide the handlebars
forward or backward until your middle finger is touching the handlebar at the mid-
point, and then retighten the handle.
The handlebar offers a wide variety of hand positions for personal preferences.
Changing your hand position can change the angle of your back, neck, and arms.
To minimize the stress on your muscles during your workouts, change your hand
position frequently.
 Loading...