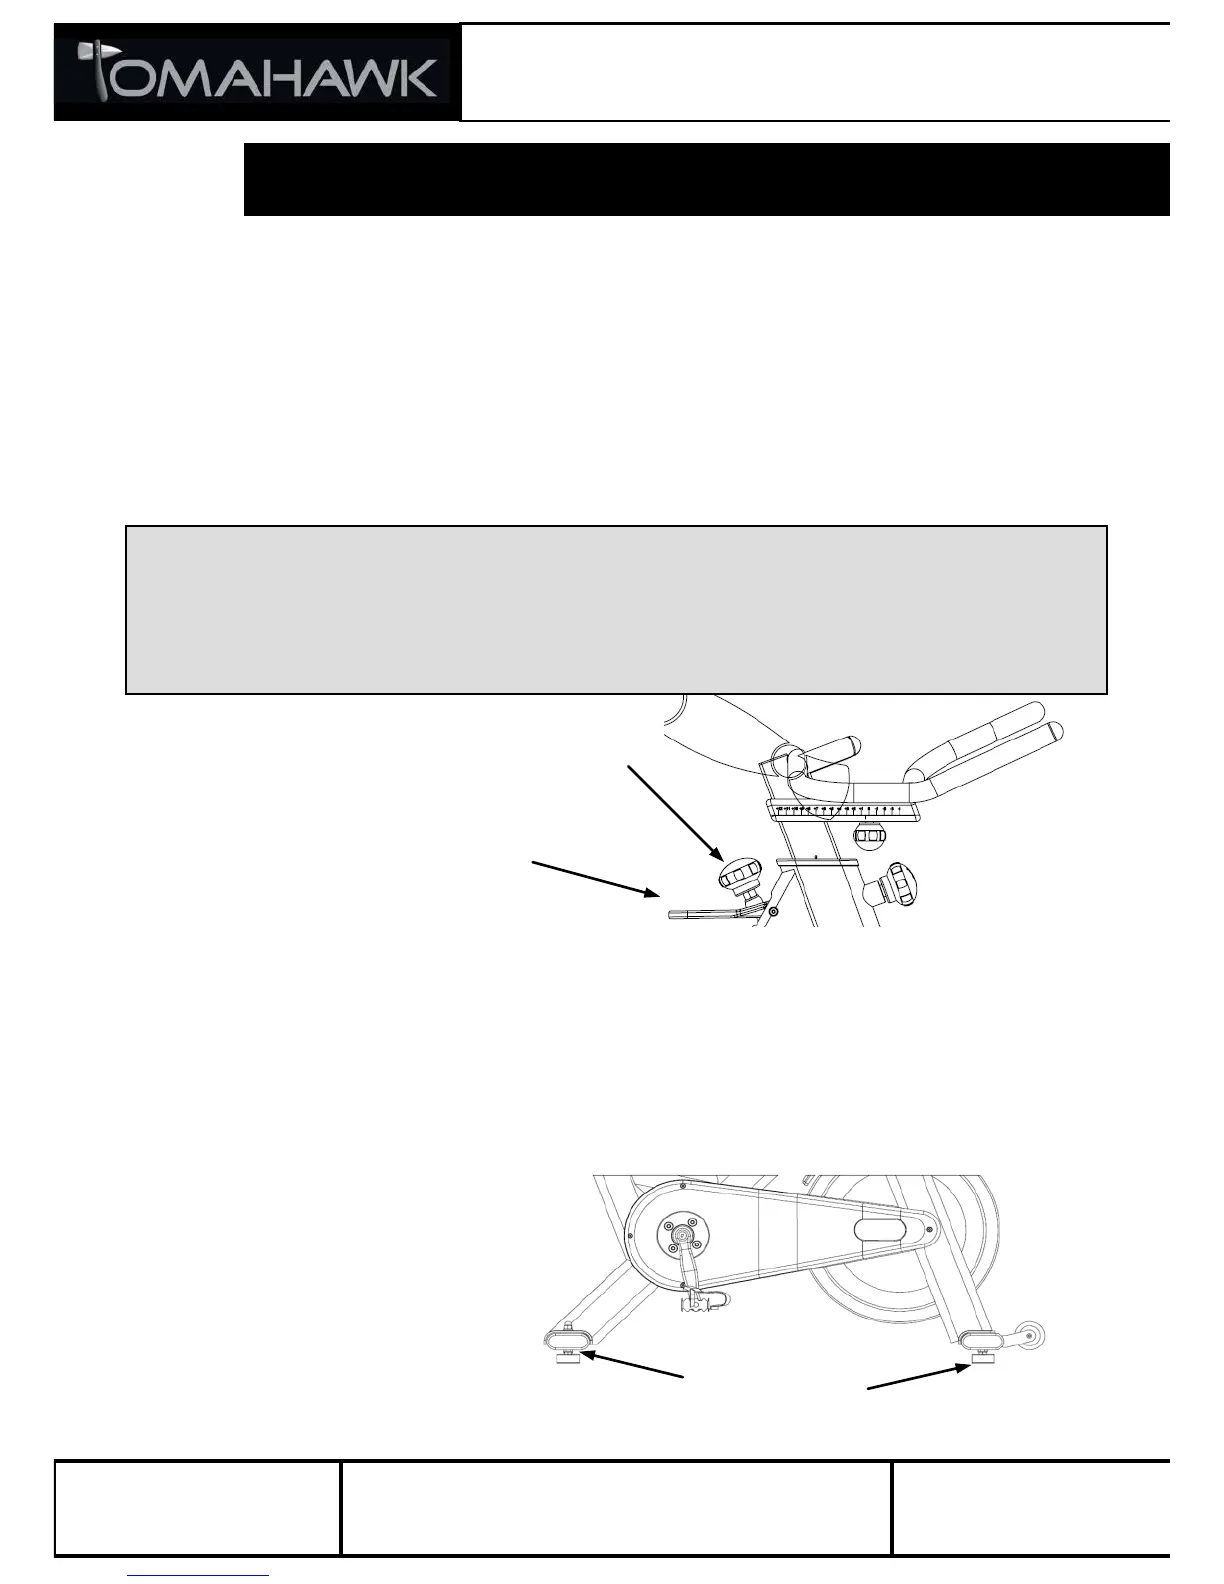
RESISTANCE ADJUSTMENT
The preferred level of difficulty in pedalling (resistance) can be regulated in fine
increments by use of the resistance knob. To increase the resistance, turn the
resistance knob clockwise. To decrease the resistance, turn the knob counter
clockwise.
IMPORTANT: To stop the flywheel (wheel) while pedalling, pull up the red
emergency handle. The flywheel should quickly come to a complete stop. Please
make sure your shoes are fixed into the toe clip or in case cycling shoes are used
your shoe cleat is connected to the pedal binding while riding.
HOW TO MOVE THE INDOOR CYCLE
Due to the weight of the indoor cycle, it is recommended that two persons
move it. While one person lifts the back of the indoor cycle, the second person
firmly holds the handlebar and tips the indoor cycle forward until it rolls on the
wheels. Carefully move the indoor studio cycle to the desired location and then lower
it. CAUTION: To reduce the risk of injury, use extreme caution while moving
the indoor studio cycle. Do not attempt to move it over uneven surfaces and
make sure a safety space of min 20 inch to the nearest equipment is
redeemed.
If the indoor cycle rocks
on the floor after being set
down, turn the levelling
feet (see diagram) underneath
the front or rear stabilizer until
the rocking motion is eliminated.
Important: Please do not unscrew
the levelling feet more than ½ inch !
WARNING: The indoor cycle does not have a free moving flywheel (wheel); the pedals
will continue to move together with the flywheel until the flywheel stops. Reducing speed in a
controlled manner is required. To stop the flywheel immediately, pull up the red emergency break
handle. Always pedal in a controlled manner and adjust your desired cadence according to your
own abilities. Pull the red emergency handle up = emergency stop
 Loading...