-17-
E-mail: support@tomlov.com
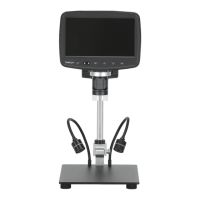
The microscope comes with an HDMI cable that connects of a normal
HDMI device. The control buttons and remote-control work when the
microscope is connected to an HDMI device. Images/photos can be
saved to the memory card.
8. HDMI Connection
(1) Work with Windows
Run “Windows Camera”
① Installation Steps (e.g. Windows 10)
Make sure your PC has“Windows Camera”installed. If not, download
it from Windows/Microsoft Store or search it on Google.
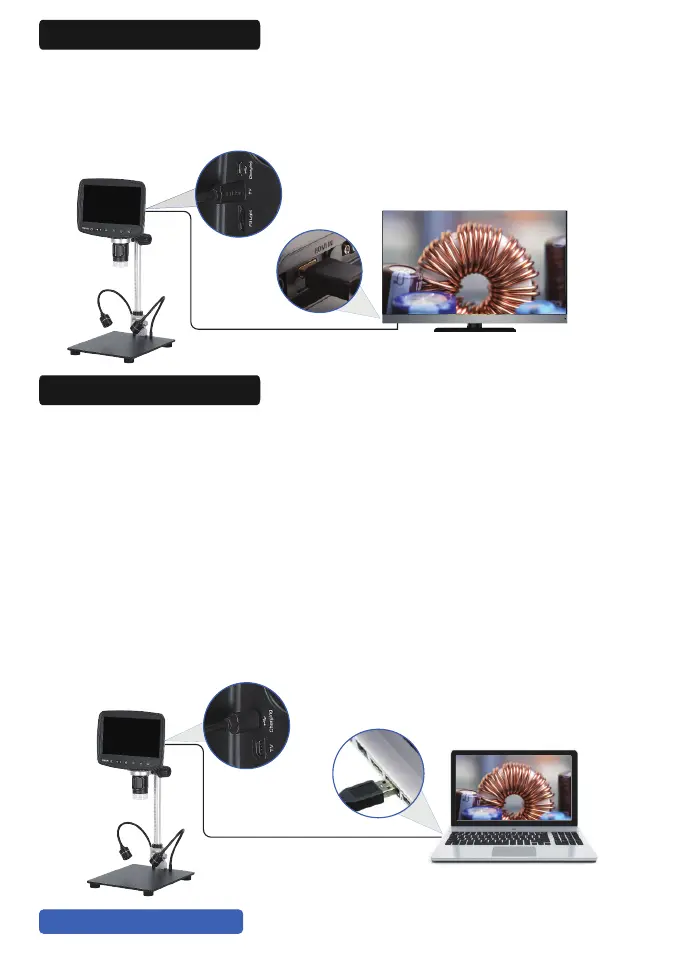
② Connect the digital microscope to the PC with the USB cable.
③ The microscope will display“Mass Storage”,“PC Camera”and
charging mode, select“PC Camera”and confirm.
④ Start“Windows Camera”and your PC will recognize the microscope
and display the real-time display. If not, an error occurs. Unplug the USB
cable andplug it in again.
9. Work with PC
 Loading...