CleaningtheChassis
ServiceInterval:Every100hours—Checkfordirt
build-upinthechassis.
Overtime,thechassisundertheenginecollectsdirt
anddebristhatmustberemoved.Usingaashlight,
openthehoodandinspecttheareaundertheengineon
aregularbasis.Whenthedebrisis1to2inchesdeep,
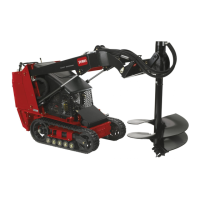
completethefollowingprocedure(refertoFigure57
throughoutthisprocedure):
Figure57
1.Sideweights
3.Fueltank
2.Rearpanel
4.Chassis
1.Liftandsupportthefrontofthetractionunit.
2.Stoptheengineandremovethekey.
3.Disconnectthenegativebatterycable.
4.Removethebolts,washers,andlockwashers
securingthetwosideweights,removingtheweights
(Figure57).
5.Opentherearaccesscover.
6.Removethe2carriageboltsandwashersfromthe
batterybase.
7.Removethesixnutsandboltssecuringtherear
panel,removingthepanel(Figure57).
8.Loosenthetankcaptorelievepressure.
9.Placeaclamponthefuelline,2inchesfromwhereit
comesoutofthefueltank.
10.Slidethefueltanktotherear(Figure57).
11.Disconnectthefuelline.
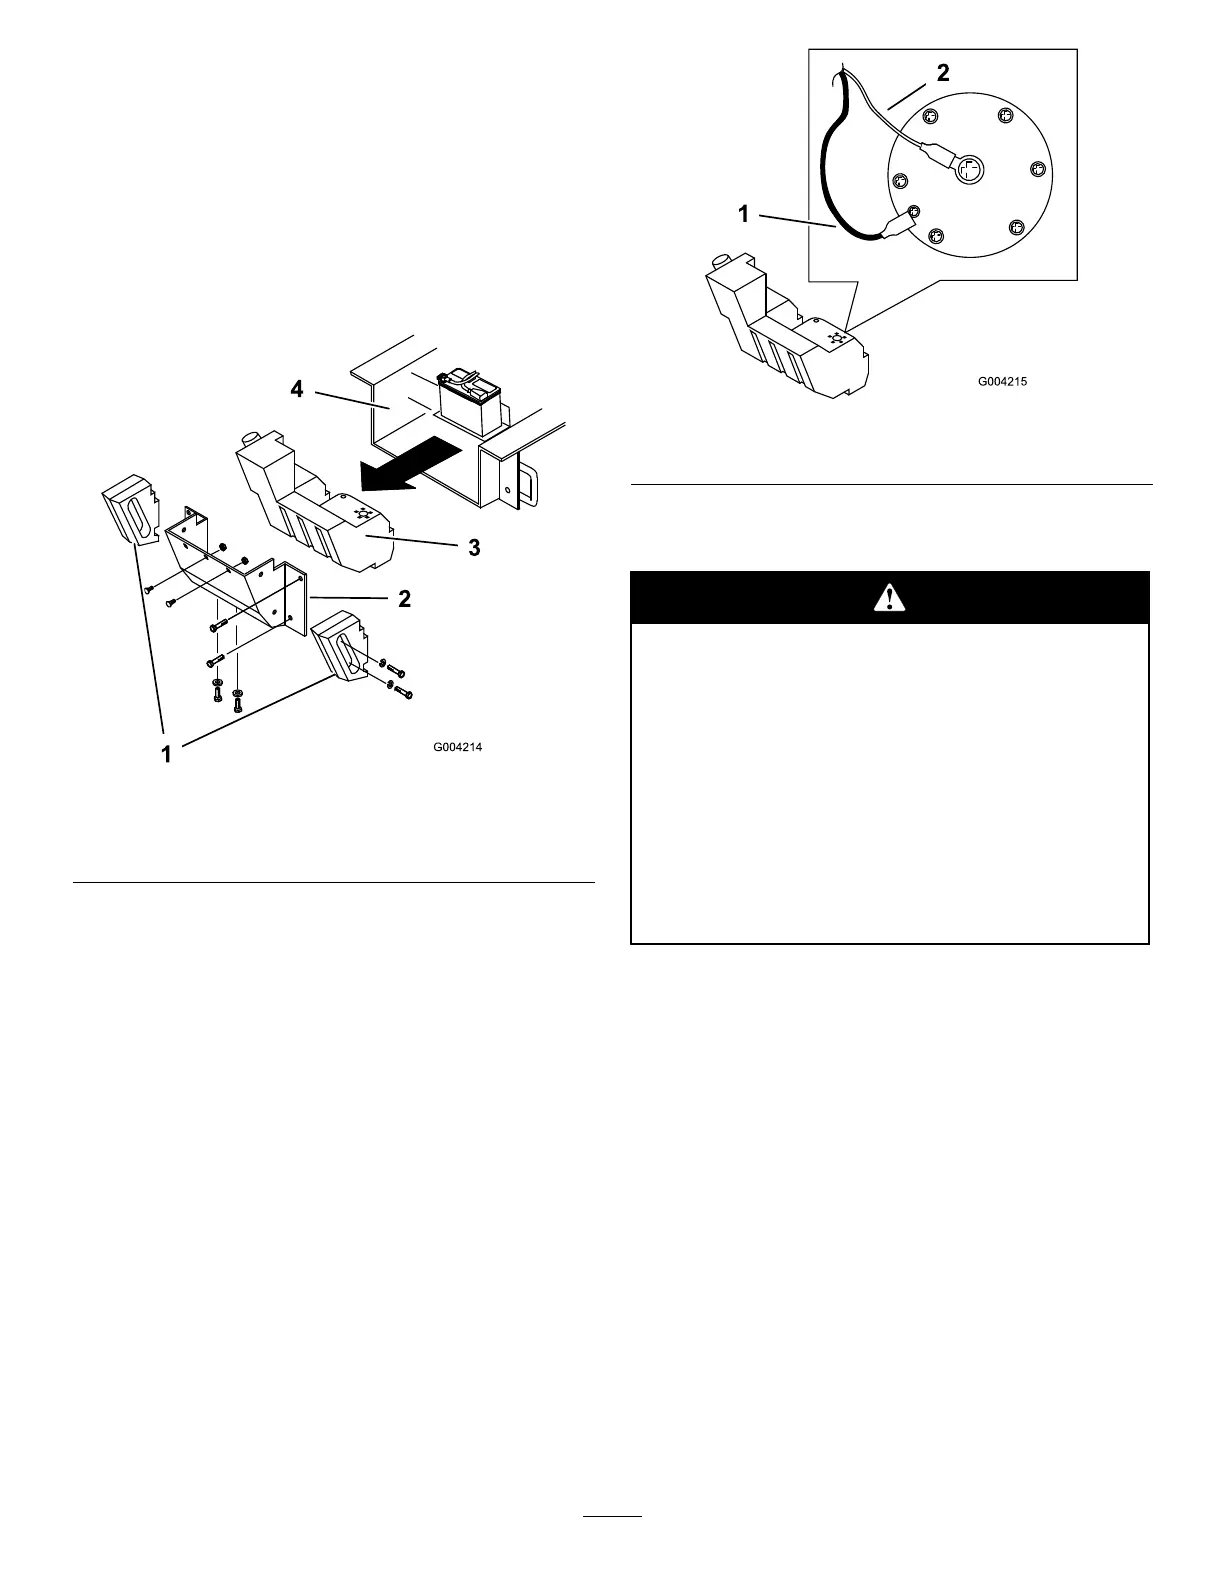
12.Disconnectthetwowiresleadingtotherightside
ofthetank(Figure58).
Figure58
1.Blackwire
2.Orangewire
13.Carefullyremovethetankandsetituprighttokeep
fromspillingthegasoline.
Incertainconditions,gasolineisextremely
ammableandhighlyexplosive.Areor
explosionfromgasolinecanburnyouand
othersandcandamageproperty.
•Removethefueltankoutdoorsinanopen
area.Wipeupanygasolinethatspills.
•Donotremovethefueltanknearanopen
ameorwheregasolinefumesmaybe
ignitedbyaspark.
•Donotsmokewhilehandlingthefueltank.
14.Removeanylargedepositsofdebris.
15.Washoutthechassiswithwateruntilthewater
runningoutthebackoftheunitisclear.
Important:Takecarenottogetwaterintothe
engineorelectricalcomponents.
16.Slidethefueltankpartwayintothechassis
(Figure57).
17.Connectthefuellineandremovetheclamp.
18.Securethetankcap.
19.Ontherightsideofthetank,connecttheorange
wiretothecenterpostandtheblackwiretothe
outsidepost(Figure58).
20.Slidethetankallthewayintothetractionunit.
Important:Thefuellineandwiresmustbe
awayfromtheenginepulleysandtheframe.
21.Replacetherearpanelandsecureitwiththesixbolts
andnutsremovedpreviously(Figure57).
41
 Loading...