MowerDeck
Maintenance
ServicingtheBlades
ServiceInterval:Beforeeachuseordaily
Note:Determinetheleftandrightsidesofthemachine
fromthenormaloperatingposition.
Toensureasuperiorqualityofcut,keepthebladessharp.For
convenientsharpeningandreplacement,keepextrablades.
DANGER
Wornordamagedbladescanbreakandapiece
ofthebladecouldbethrownintotheoperator’s
orbystander’sarea,resultinginseriouspersonal
injuryordeath.
•Inspectthebladesperiodicallyforwearor
damage.
•Replacewornordamagedblades.
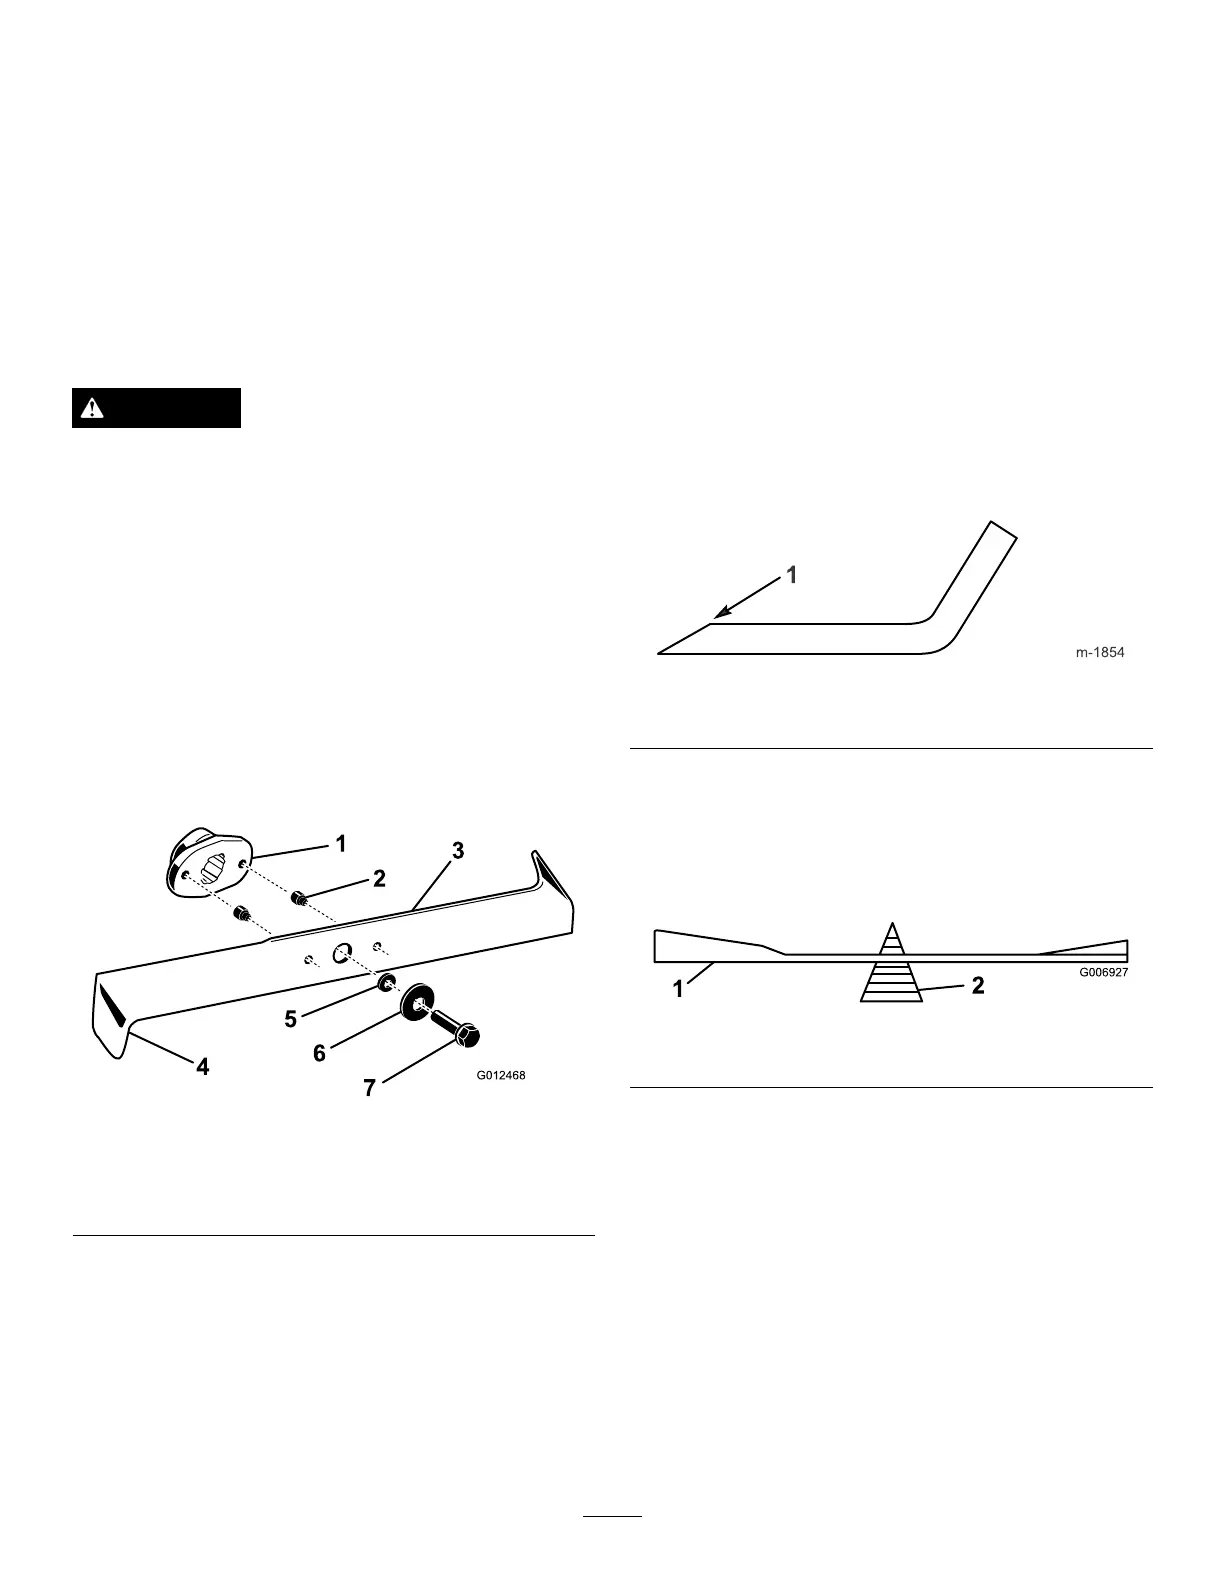
InspectingtheBlades
1.Removethemower;refertoRemovingtheMower.
2.Inspectthecuttingedges(
Figure39).Iftheedgesare
notsharporhavenicks,removethebladesandsharpen
them;refertoSharpeningtheBlades.
Figure39
1.Bladedriver4.Bentedge
2.Shearpin(2)
5.Washer
3.Blade6.Bolt
3.Inspecttheblades,especiallythebentedges(Figure39).
Ifyounoticeanywearordamageinthisarea,
immediatelyinstallnewblades.
4.Iftheshearpinsarebroken,replacethemimmediately
(
Figure39).
Important:Iftheshearpinsarebroken,themower
beltmaybedamaged.Inspectthebelt;ifthebeltis
damaged,contactanAuthorizedServiceDealer.
RemovingtheBlades
1.Removethemower;refertoRemovingtheMower.
2.Carefullytipthemowerover.
3.Removethebolts,washers,andblades(
Figure39).
Wedgeablockofwoodbetweeneachbladeandthe
mowertolockthebladewhenyouareremovingeach
bolt.
Note:Therightbladehasaleft-handthreadedbolt.
4.Inspectallparts;replaceanythatarewornordamaged.
SharpeningtheBlades
1.Usealetosharpenthecuttingedgeatbothendsof
eachblade(Figure40).Maintaintheoriginalangle.
Thebladeretainsitsbalanceifyouremovethesame
amountofmaterialfrombothcuttingedges.
Figure40
1.Sharpenatoriginalangle
2.Checkthebalanceofeachbladebyputtingitonablade
balancer(Figure41).Ifthebladestaysinahorizontal
position,thebladeisbalancedandcanbeused.Ifthe
bladeisnotbalanced,lesomemetalofftheback
sideoftheblade.Repeatthisstepuntileachbladeis
balanced.
Figure41
1.Blade2.Balancer
InstallingtheBlades
1.Installtheblades,washers,andbladebolts(Figure39).
Important:Thebentedgesofthebladesmustbe
pointingtowardthetopofthemowertoensure
propercutting.
2.Tightenthebladeboltsto37ft-lb(50N-m).
RemovingtheMower
1.Parkthemachineonalevelsurface.
2.Disengagetheblades(PTO).
29
 Loading...