%#/,!
$/( -,!1
/-. /+
""'!
%)# )/. 1%.$ #-&!.
%'.!, !'!(!).
%, '!)!, * 2
Clean the element by washing it in a solution of
filter cleaner (Toro Part No. 27Ć7220, available from
Toro) and water, or blow dirt out of filter by using
compressed air.
*.! Compressed air is recommended when element
must be used immediately after servicing because a
washed element must be dried before it is used. By
comparison, washing the element cleans better than
blowing dirt out with compressed air. Remember,
though, filter must be washed when exhaust soot is
lodged in the filter pores.
-$%)# !.$*
* )*. ,!(*0! +'-.% "%) --!('2
!/-! 1-$%)# ,!(*0!- /-. ",*( !)!.$ "%)-
A. Prepare a solution of filter cleaner and water
and soak filter element about 15 minutes. Refer to
directions on filter cleaner carton for complete
information.
B. After soaking filter for 15 minutes, rinse it with
clear water. Maximum water pressure must not
exceed 40 psi (276 kPa) to prevent damage to the
filter element.
C. Dry filter element using warm, flowing air
(160F (71C) max), or allow element to air-dry.
Do not use compressed air or a light bulb to dry the
filter element because damage could result.
*(+,!--! %, !.$*
* )*. ,!(*0! +'-.% "%) --!('2
!/-! &3'*1%)# 1%.$ *(+,!--! %,
,!(*0!- /-. ",*( !)!.$ "%)-
A. Blow compressed air from inside to the outside
of dry filter element. Do not exceed 100 psi
(689 kPa) to prevent damage to the element.
B. Keep air hose nozzle at least one inch (25 mm)
from pleated paper, and move nozzle up and
down while rotating the filter element. Inspect
element when dust and dirt are removed; refer to
Inspecting Filter Element.
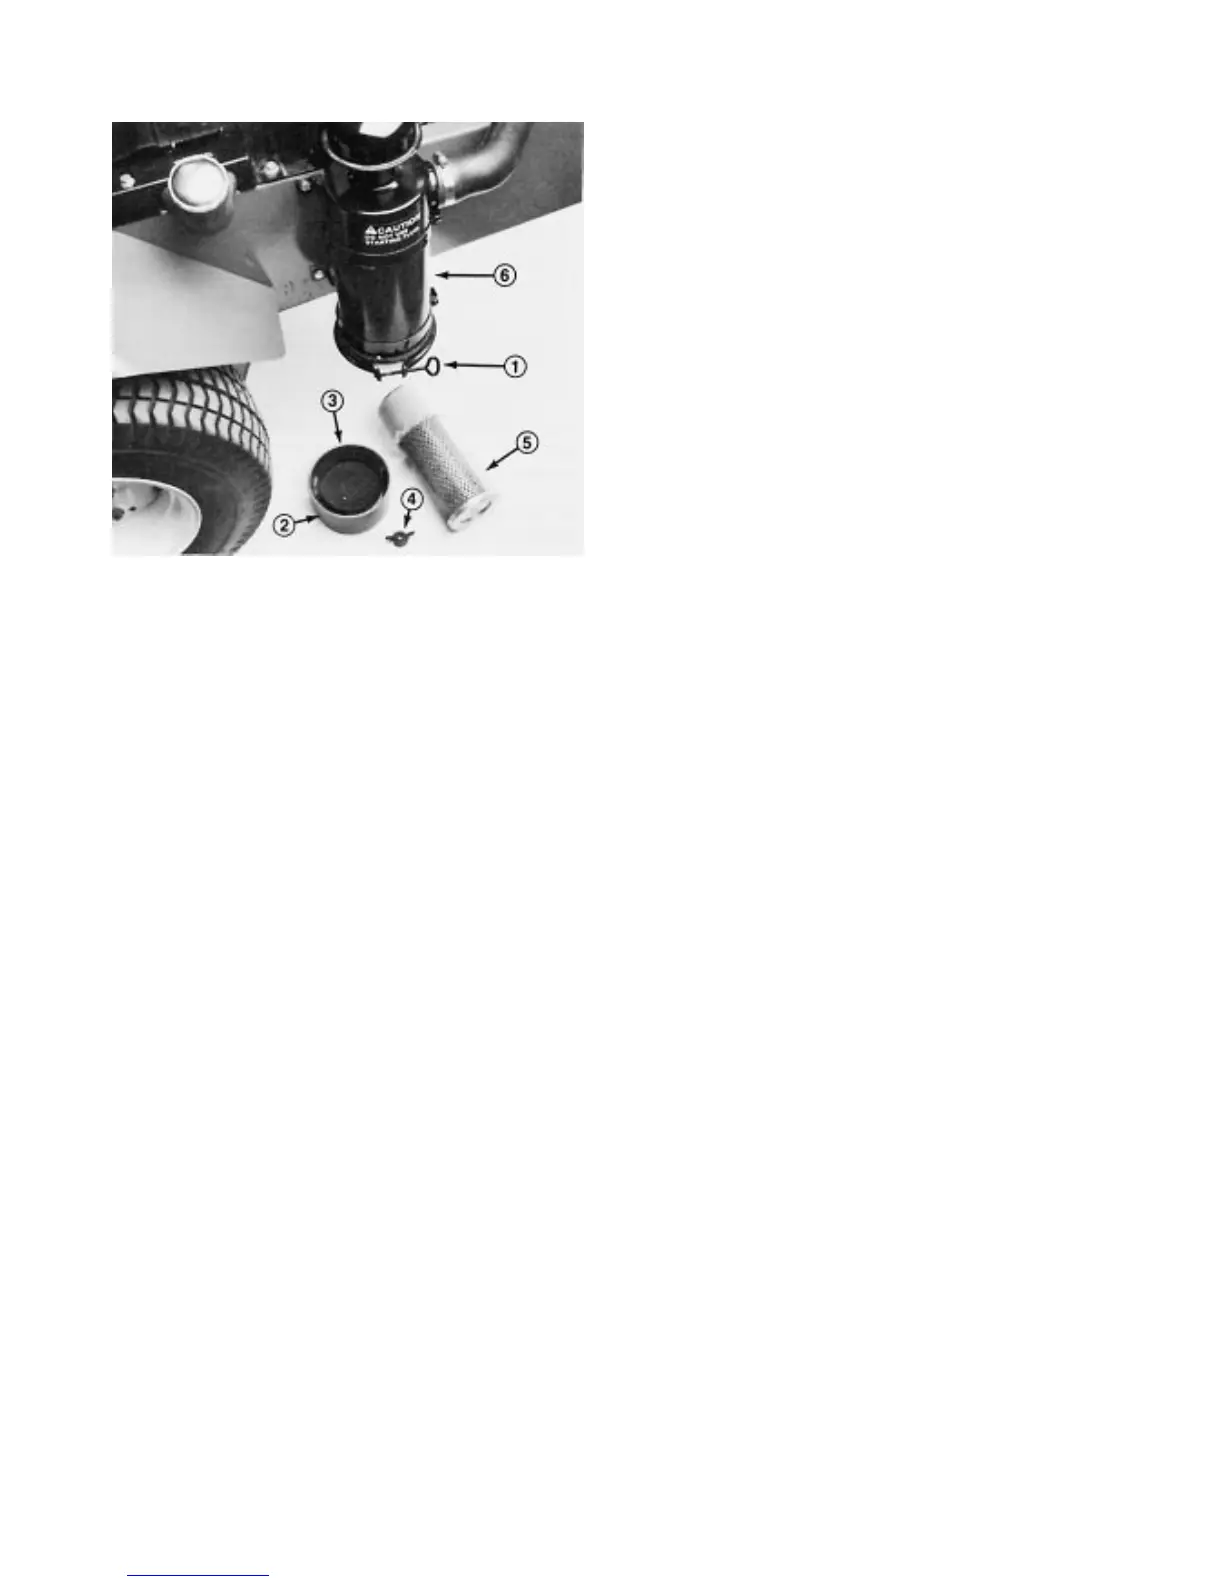
Wipe inside of air cleaner body with a damp cloth to
remove excess dust. Slide filter into air cleaner body
and secure it in place with wing nut and gasket.
Reinstall dust cup and baffle. Move thumb screw
behind air cleaner body and tighten it securely.
Place bright light inside filter.
Rotate filter slowly while checking for cleanliness,
ruptures, holes, and tears. Replace defective filter
element.
Check fin assembly, gasket, and screen for
damage. Replace filter if damage is evident.
To prevent the engine from overheating, the screen
and front of the radiator must be kept clean. Normally,
check the screen and front of radiator daily and, if
necessary, clean any debris off these parts. However, it
will be necessary to check and clean the screen and
radiator frequently in extremely dusty and dirty
conditions.
*.! If engine shuts off due to overheating, first check
the radiator and screen for excessive buildup of debris.
To thoroughly clean the radiator:
Remove the screen.
Working from the fan side of the radiator, either
spray the radiator with a water hose or blow with
compressed air.
After the radiator is thoroughly cleaned, clean out
debris that may have collected in the channel at the
radiator base.
Clean and install the screen.
Check oil level after each day's operation or each time
machine is used. Change oil after every 50 hours of
operation; change oil filter after first 50 hours and every
100 hours operation thereafter. If possible, run engine
just before changing oil because warm oil flows better
and carries more contaminants than cold oil.
Position machine on a level surface.
Open the hood. Set drain pan under the oil pan and
in line with drain plug (Fig. 31).