17
5. Install the instrument cover and lock the two latches.
Installing the Ball Joint and
Connecting the Lift Cylinder
Note: Ball joints are not required for all implements; refer
to implement operator’s manual for requirements.
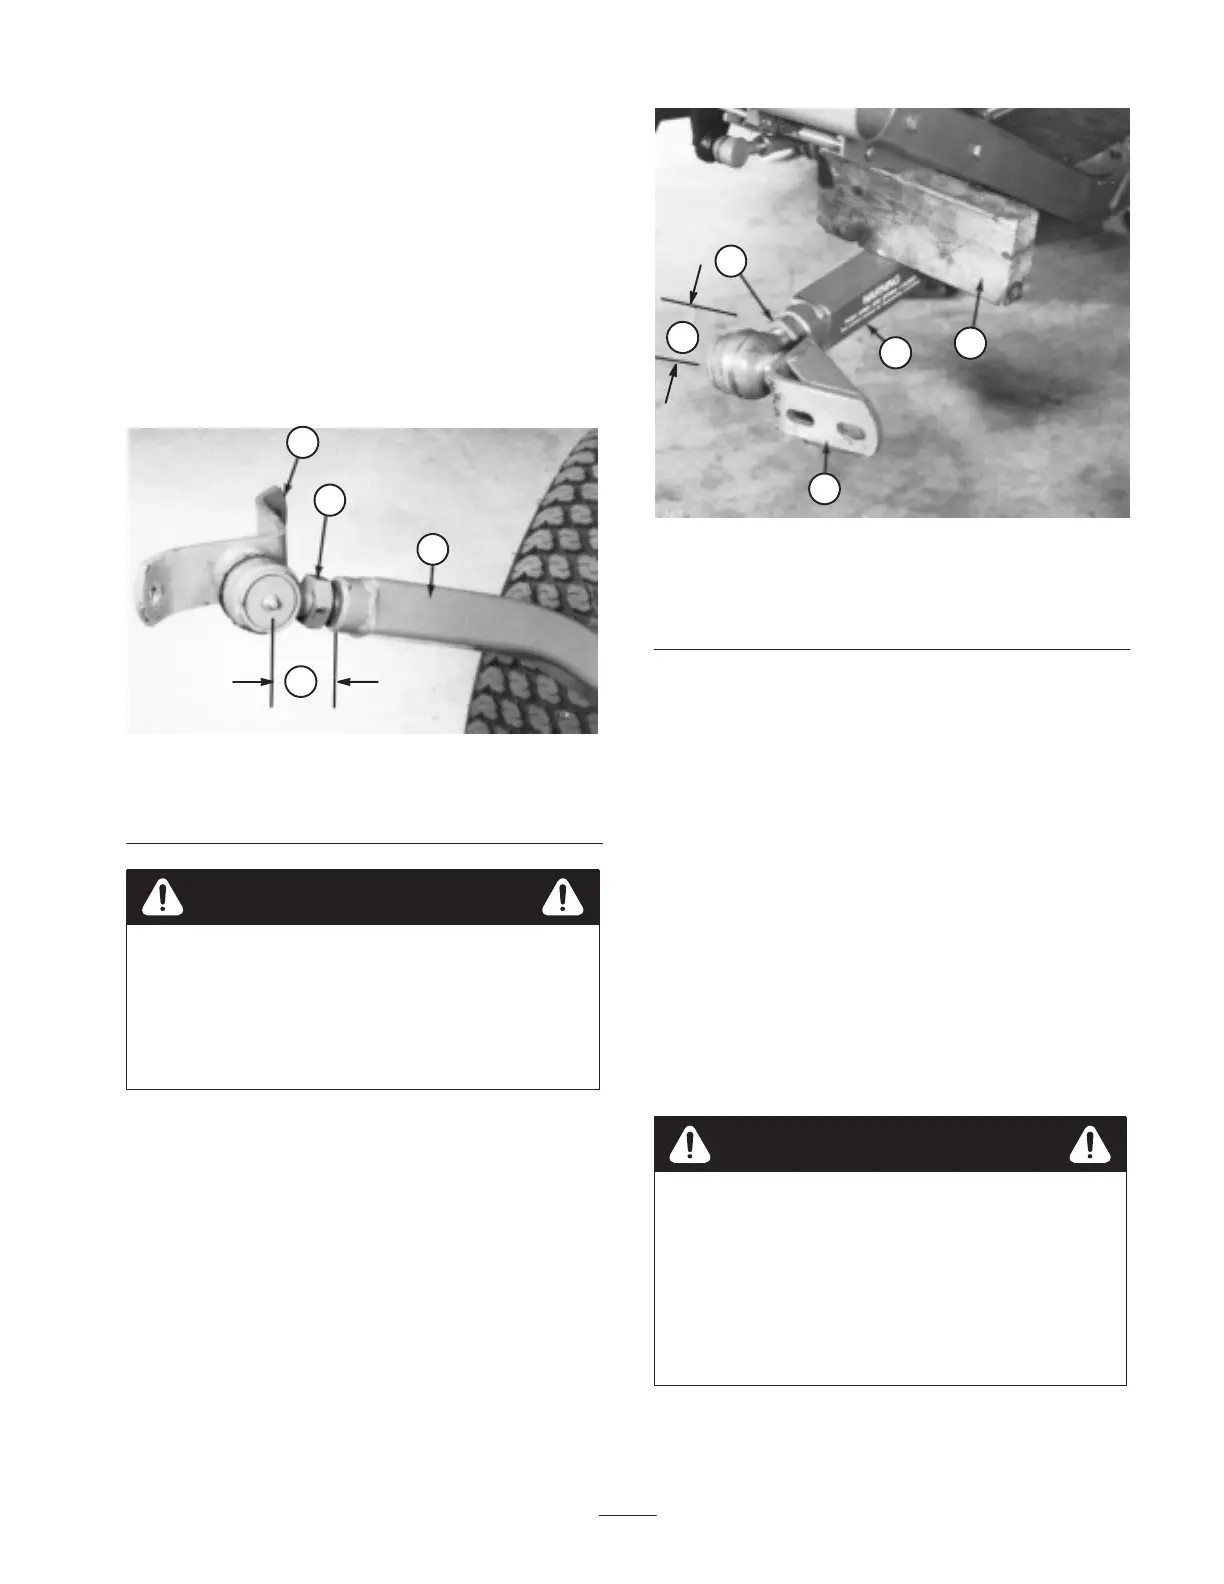
1. Thread jam nut fully onto right-hand ball joint.
2. Screw ball joint into right hand push arm until center of
ball joint is 2-3/8 in. (60 mm) away from front of push
arm (Fig. 10). Do not tighten jam nut.
1
2
4
4
Figure 10
1. Jam nut
2. Ball joint mount
3. 2-3/8 in. (60 mm)
4. Right-hand push arm
Sudden release of the spring-loaded push arms
could cause injury.
Acquire the help of another person to help push
the arms down during installation of the ball joints
or other implements.
Warning
3. Have a helper push down on the left push arm. Then
insert a 2 x 4 in. (51 x 102 mm) block of wood between
the frame and top of the push arm (Fig. 11). Screw ball
joint into left hand push arm until center of ball joint is
2-3/8 in. (60 mm) away from front of push arm
(Fig. 11). Do not tighten jam nut.
4. Carefully remove 2 x 4 in. (51 x 102 mm) block of
wood from between frame and push arm.
5. Remove spring pin from cylinder pin and slide cylinder
pin out of cylinder.
1
2
3
4
5
Figure 11
1. Jam nut
2. 2 x 4 in. (51 x 102 mm)
block
3. Left-hand push arm
4. Ball joint mount
5. 2-3/8 in. (60 mm)
6. Raise front of lift arm until hole in movable end of
cylinder lines up with holes in lift arm brackets. Use
caution as lift arm is spring-loaded. Hold parts together
with cylinder pin, spring pin, and cotter pin. Cotter pin
must be to the outside.
7. Install implement; refer to implement Operator’s
Manual for proper installation procedures.
Checking the Tire Pressure
The tires are over-inflated for shipping. Therefore, release
some of the air to reduce the pressure. Correct air pressure
in the front and rear tires is 21 psi (145 kPa).
Checking the Torque of the
Front Wheel Nuts
Failure to maintain proper torque of the front
wheel nuts could result in failure, loss of wheel, or
personal injury.
Torque the front wheel nuts to 45–55 ft.-lb.
(61–75 Nm) after 1–4 hours of operation and
again after 10 hours of operation. Torque every
250 hours thereafter.
Warning

 Loading...