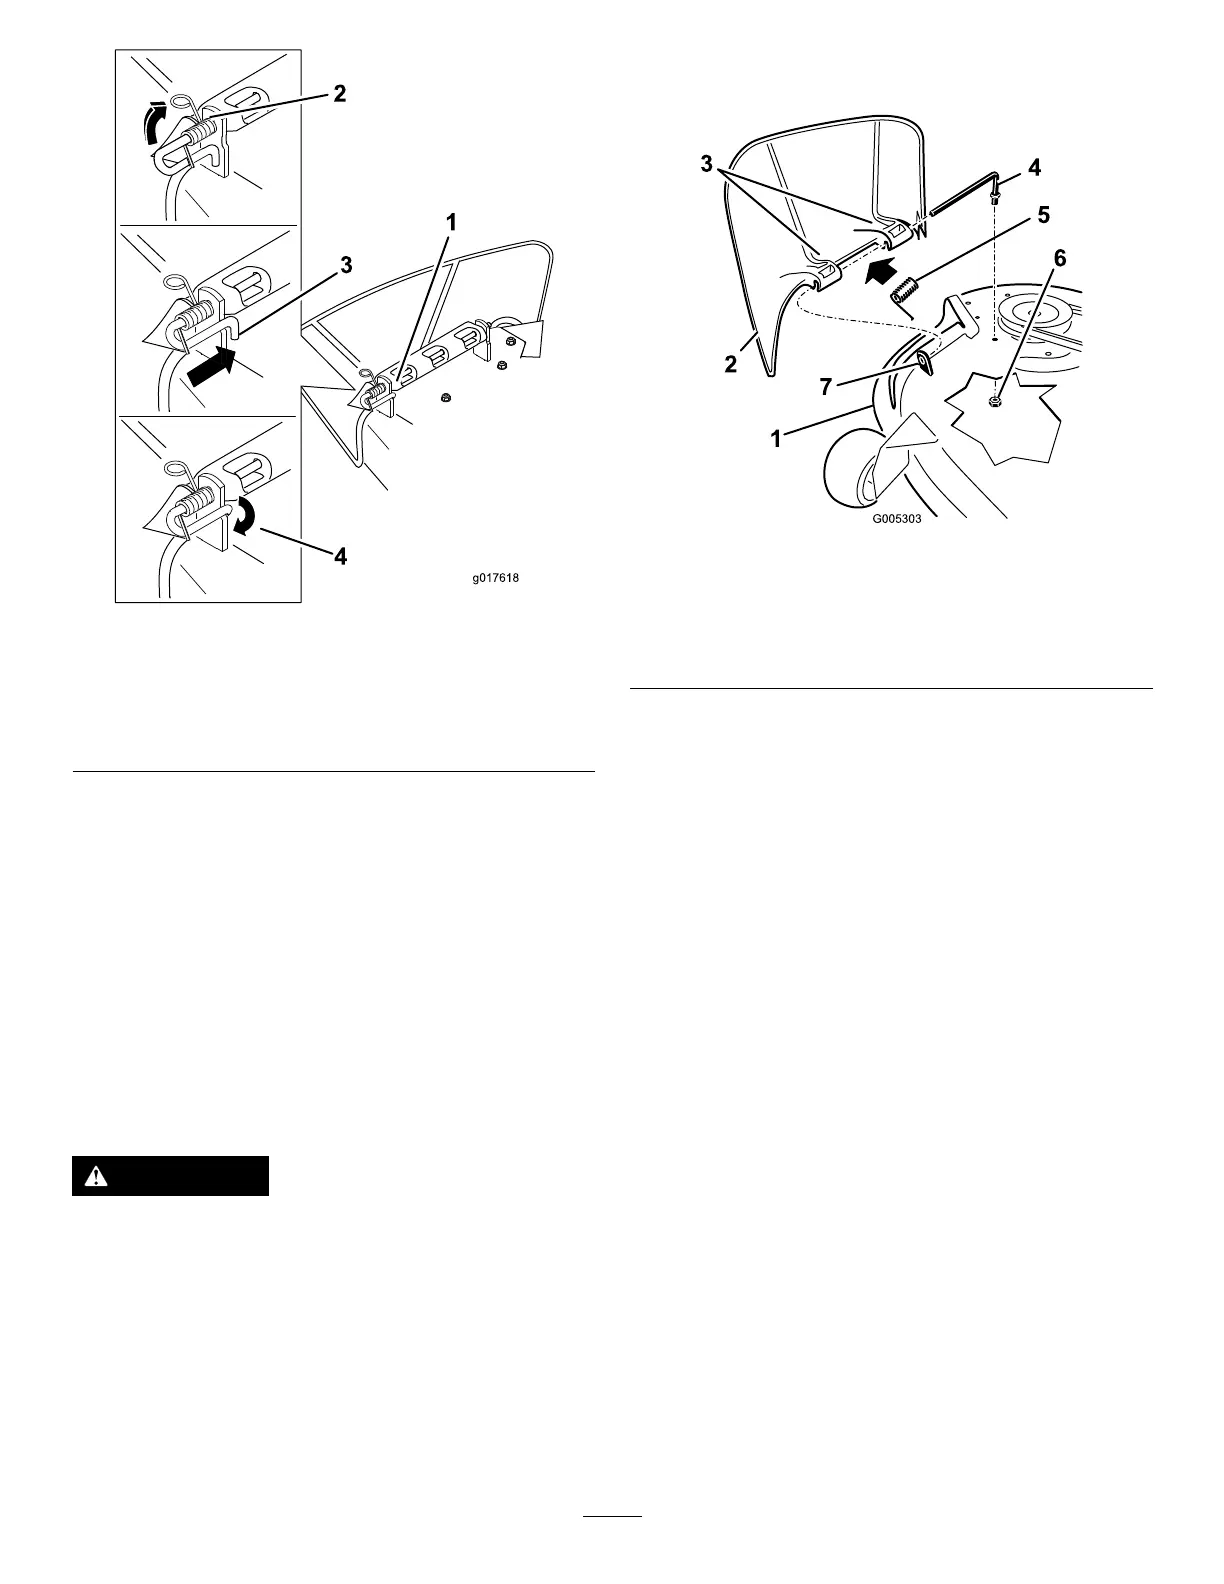
Figure63
1.Rodandspringassembly
installed
3.Rod,shortend,moved
behindmowerbracket
2.Loopendofthespring
installedintothenotchin
thedeectorbracket
4.Shortend,retainedby
mowerbracket.
5.Securetherodandspringassemblybytwistingitso
thattheshortendoftherodcanbeplacedbehindthe
frontbracketweldedtothedeck(Figure58).
Important:Thegrassdeectormustbespring
loadedinthedownposition.Liftthedeectorup
totestthatitsnapstothefulldownposition.
ReplacingtheGrassDeector
Model74793Only
ServiceInterval:Beforeeachuseordaily—Inspectthegrass
deectorfordamage.
WARNING
Anuncovereddischargeopeningcouldallowthe
lawnmowertothrowobjectsatyouorbystanders,
resultinginseriousinjury.Also,contactwiththe
bladecouldoccur.
Neveroperatethemachinewithoutthegrass
deector,thedischargecover,orthegrass-collection
systeminplace.
Inspectthegrassdeectorfordamagebeforeeachuse.
Replaceanydamagedpartsbeforeuse.
1.Removethenut(3/8inch)fromtherodunderthe
mower(Figure64).
Figure64
1.Mowerdeck
5.Spring
2.Grassdeector6.Nut(3/8inch)
3.Grass-deectorbracket7.Shortstandoff
4.Rod
2.Slidetherodoutoftheshortstandoff,spring,and
grassdeector(Figure64).
3.Removethedamagedorworngrassdeector.
4.Replacethegrassdeector(Figure64).
5.Slidetherod(straightend),throughtherear
grass-deectorbracket.
6.Placethespringontherod,withtheendwiresdown
andbetweenthegrass-deectorbrackets.
7.Sliderodthroughthesecondgrass-deectorbracket
(Figure64).
8.Inserttherodatthefrontofthegrassdeectorinto
theshortstandoffonthedeck.
9.Securetherearendoftherodintothemowerwitha
nut(3/8inch)asshowninFigure64.
Important:Thegrassdeectormustbe
spring-loadedandinthedownposition.Liftthe
deectoruptotestthatitsnapstothefulldown
position.
46
 Loading...