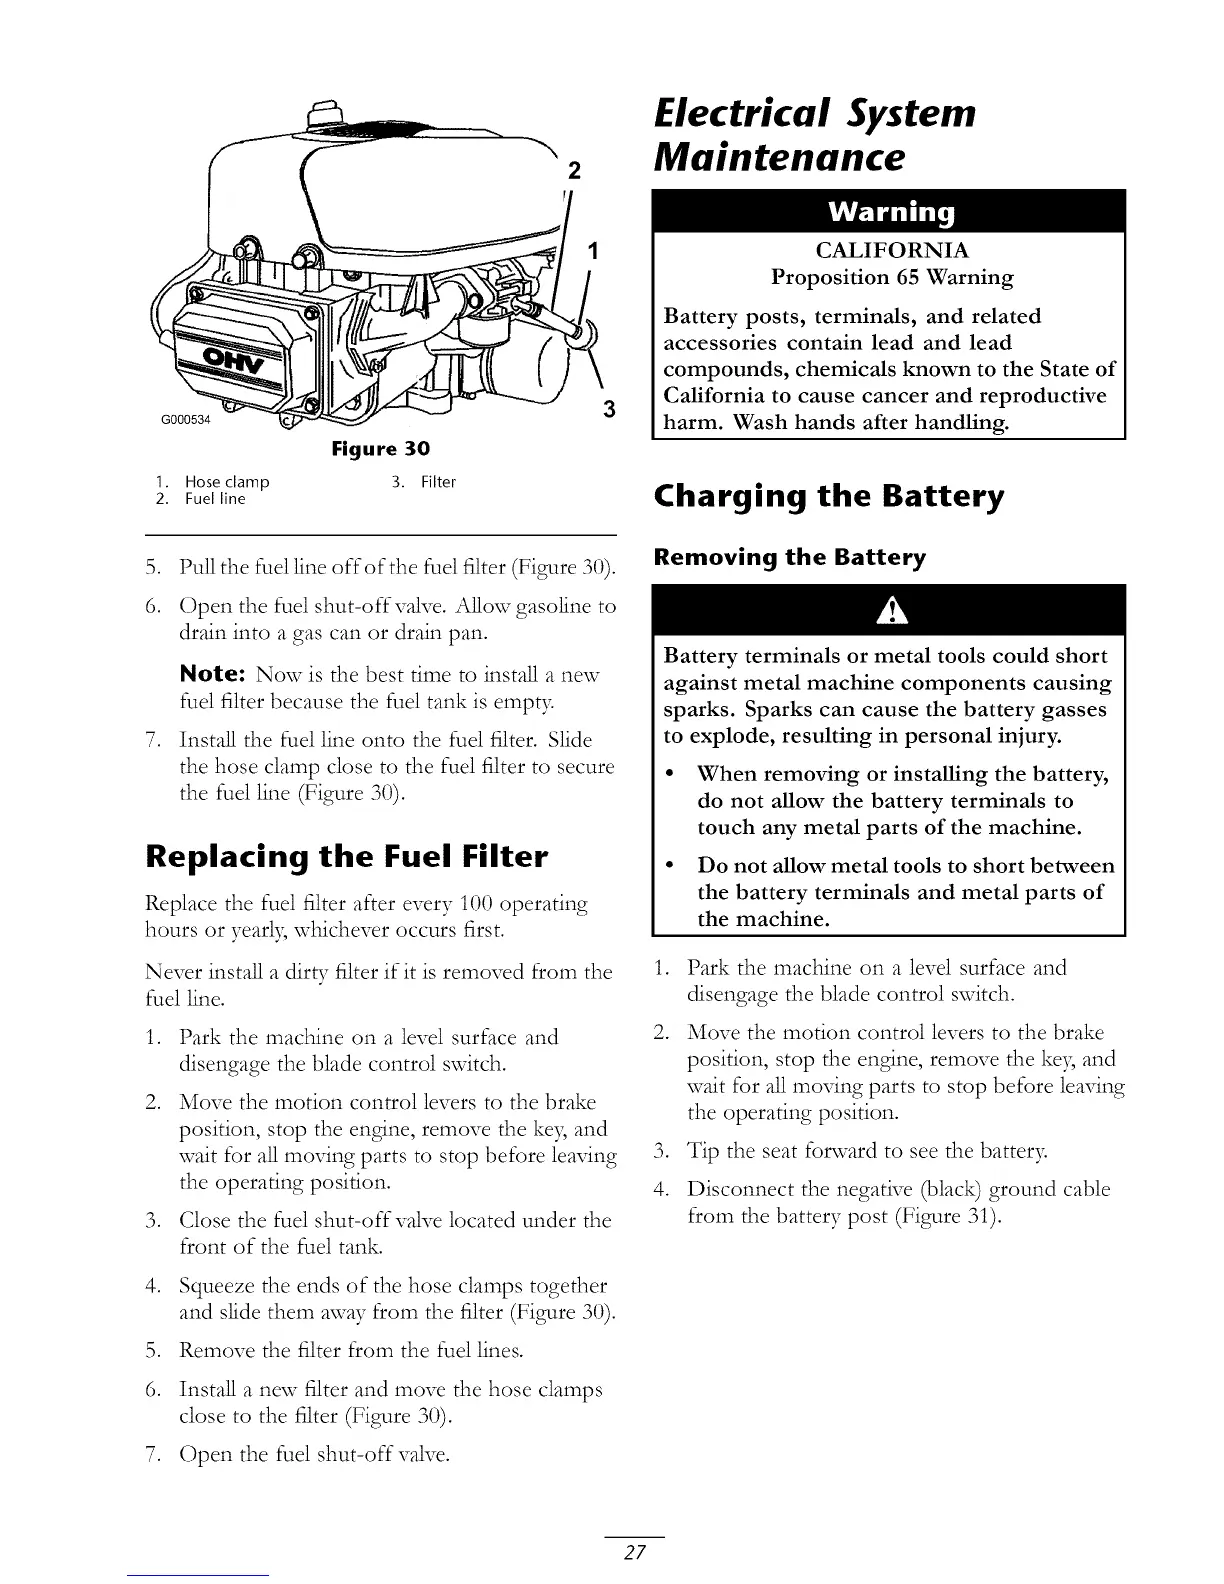
G000534
1. Hose clamp
2. Fuel line
Figure 30
3. Filter
3
5. Pull the fuel line off of the fuel filter (Figure 30).
6. Open the fuel shut-off valve. Allow gasoline to
drain into a gas can or drain pan.
Note: Now is the best time to install a new
fuel filter because the fuel tank is empt>
7. Install the fuel line onto the fuel filter. Slide
the hose clamp close to the fuel filter to secure
the fuel line (Figure 30).
Replacing the Fuel Filter
Replace the fuel filter after every 100 operating
hours or yearly whichever occurs first.
Never install a dirty filter if it is removed from the
fuel line.
1. Park the machine on a level surface and
disengage the blade control switch.
2. Move the motion control levers to the brake
position, stop the engine, remove the ke5 and
wait for all moving parts to stop before leaving
the operating position.
3. Close the fuel shut-off valve located under the
front of the fuel tank.
,
Squeeze the ends of the hose clamps together
and slide them away from the filter (Figure 30).
5. Remove the filter from the fuel lines.
,
Install a new filter and move the hose clamps
close to the filter (Figure 30).
7. Open the fuel shut-off valve.
Electrical System
Maintenance
CALIFORNIA
Proposition 65 Warning
Battery posts, terminals, and related
accessories contain lead and lead
compounds, chemicals known to the State of
California to cause cancer and reproductive
harm. Wash hands after handling.
Charging the Battery
Removing the Battery
Battery terminals or metal tools could short
against metal machine components causing
sparks. Sparks can cause the battery gasses
to explode, resulting in personal injury.
• When removing or installing the battery,
do not allow the battery terminals to
touch any metal parts of the machine.
• Do not allow metal tools to short between
the battery terminals and metal parts of
the machine.
1. Park the machine on a level surface and
disengage the blade control switch.
2. Move the motion control levers to the brake
position, stop the engine, remove the keB and
wait for all moving parts to stop before leaving
the operating position.
3. Tip the seat forward to see the batter>
4. Disconnect the negative (black) ground cable
from the battery post (Figure 31).
27