36
Replacing the Headlights
Specification: GE Headlight #H7610
1. Set the parking brake, turn the ignition off, and remove
the key.
2. Reach beneath the dash and push the headlight out of
the hood.
3. Remove the screws attaching the wire harness to the
headlight.
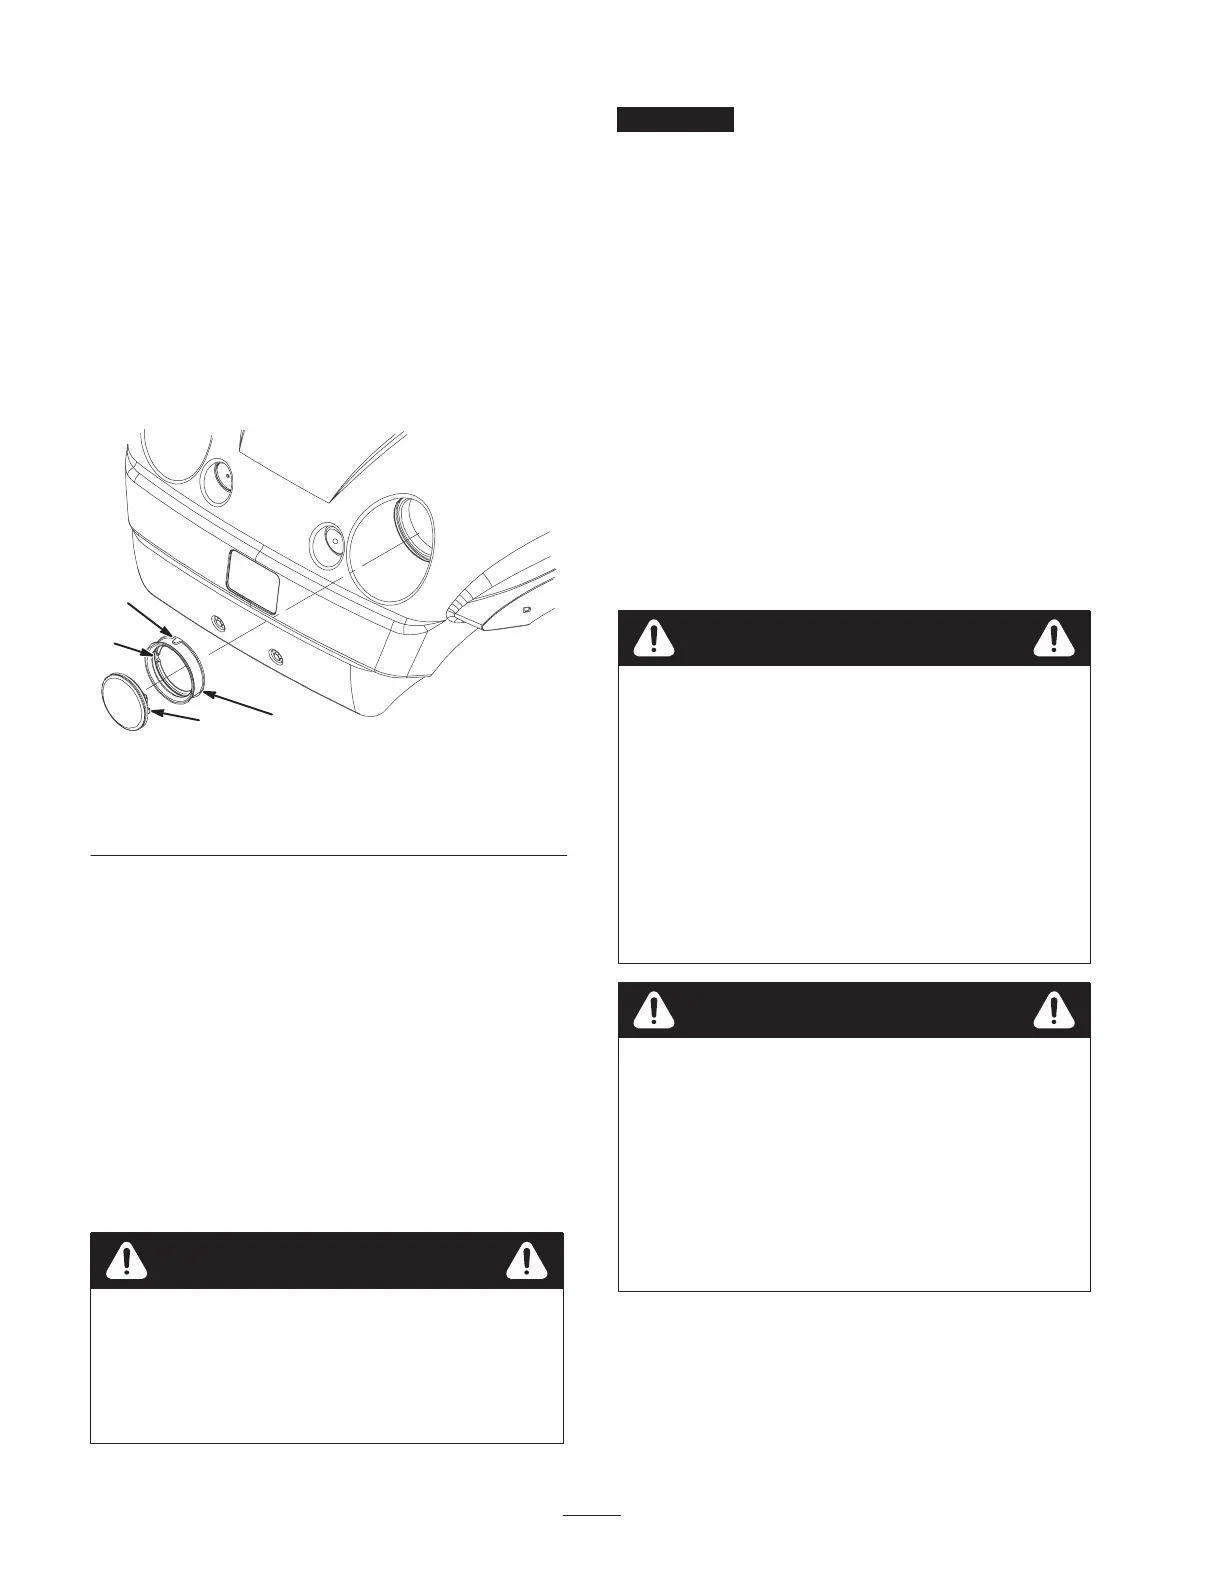
4. Remove the rubber seal from around the headlight
(Fig. 44). Discard the headlight.
1
2
3
4
Figure 44
1. Rubber seal
2. Inside notch—align with
the notch on the headlight
3. Outside notch—align with
notch in hood
4. Headlight
5. Align the notch on the inside of the seal with the notch
on the new headlight (Fig. 44). Slide the seal onto the
headlight until the seal is firmly in place.
6. Attach the headlight to the wire harness using the
previously removed screws.
7. Align the notch on the outside of the seal with the notch
in the hood. Push the headlight and seal into the hood
until it is firmly in place.
Note: Applying soapy water to the outside of the seal may
aid in sliding the seal into the hood.
Servicing the Battery
Battery posts, terminals, and related accessories
contain lead and lead compounds, chemicals
known to the State of California to cause cancer
and reproductive harm. Wash hands after
handling.
Warning
Important Do not jump start the vehicle.
Always keep the battery clean and fully charged. Use a
paper towel to clean the battery and battery box. If the
battery terminals are corroded, clean them with a solution
of four parts water and one part baking soda. Apply a light
coating of grease to the battery terminals to prevent
corrosion.
Voltage: 12 volt with 280 cold cranking Amps @ 0° F
(–18° C).
Removing the Battery
1. Position the vehicle on a level surface, set the parking
brake, turn the ignition off, and remove the key.
2. Raise the bed and secure it with the prop rod.
3. Unhook the battery strap.
4. Disconnect the negative (black) ground cable from the
battery post.
Incorrect battery cable routing could damage the
vehicle and cables, causing sparks. Sparks can
cause the battery gasses to explode, resulting in
personal injury.
• Always disconnect the negative (black) battery
cable before disconnecting the positive (red)
cable.
• Always reconnect the positive (red) battery cable
before reconnecting the negative (black) cable.
• Always keep the battery strap in place to protect
and secure the battery.
Warning
Battery terminals or metal tools could short
against metal vehicle components, causing sparks.
Sparks can cause the battery gasses to explode,
resulting in personal injury.
• When removing or installing the battery, do not
allow the battery terminals to touch any metal
parts of the vehicle.
• Do not allow metal tools to short between the
battery terminals and metal parts of the vehicle.
Warning
5. Disconnect the positive (red) cable from the battery
post.
6. Remove the battery from the chassis.

 Loading...