Workman GTX Electric Page 5 -- 47 Chassis
Disassembly
1. Park vehicle on a level surface, turn key switch OFF,
apply parking brake and remove key from the key
switch.
2. Make sure that cargo bed is empty.
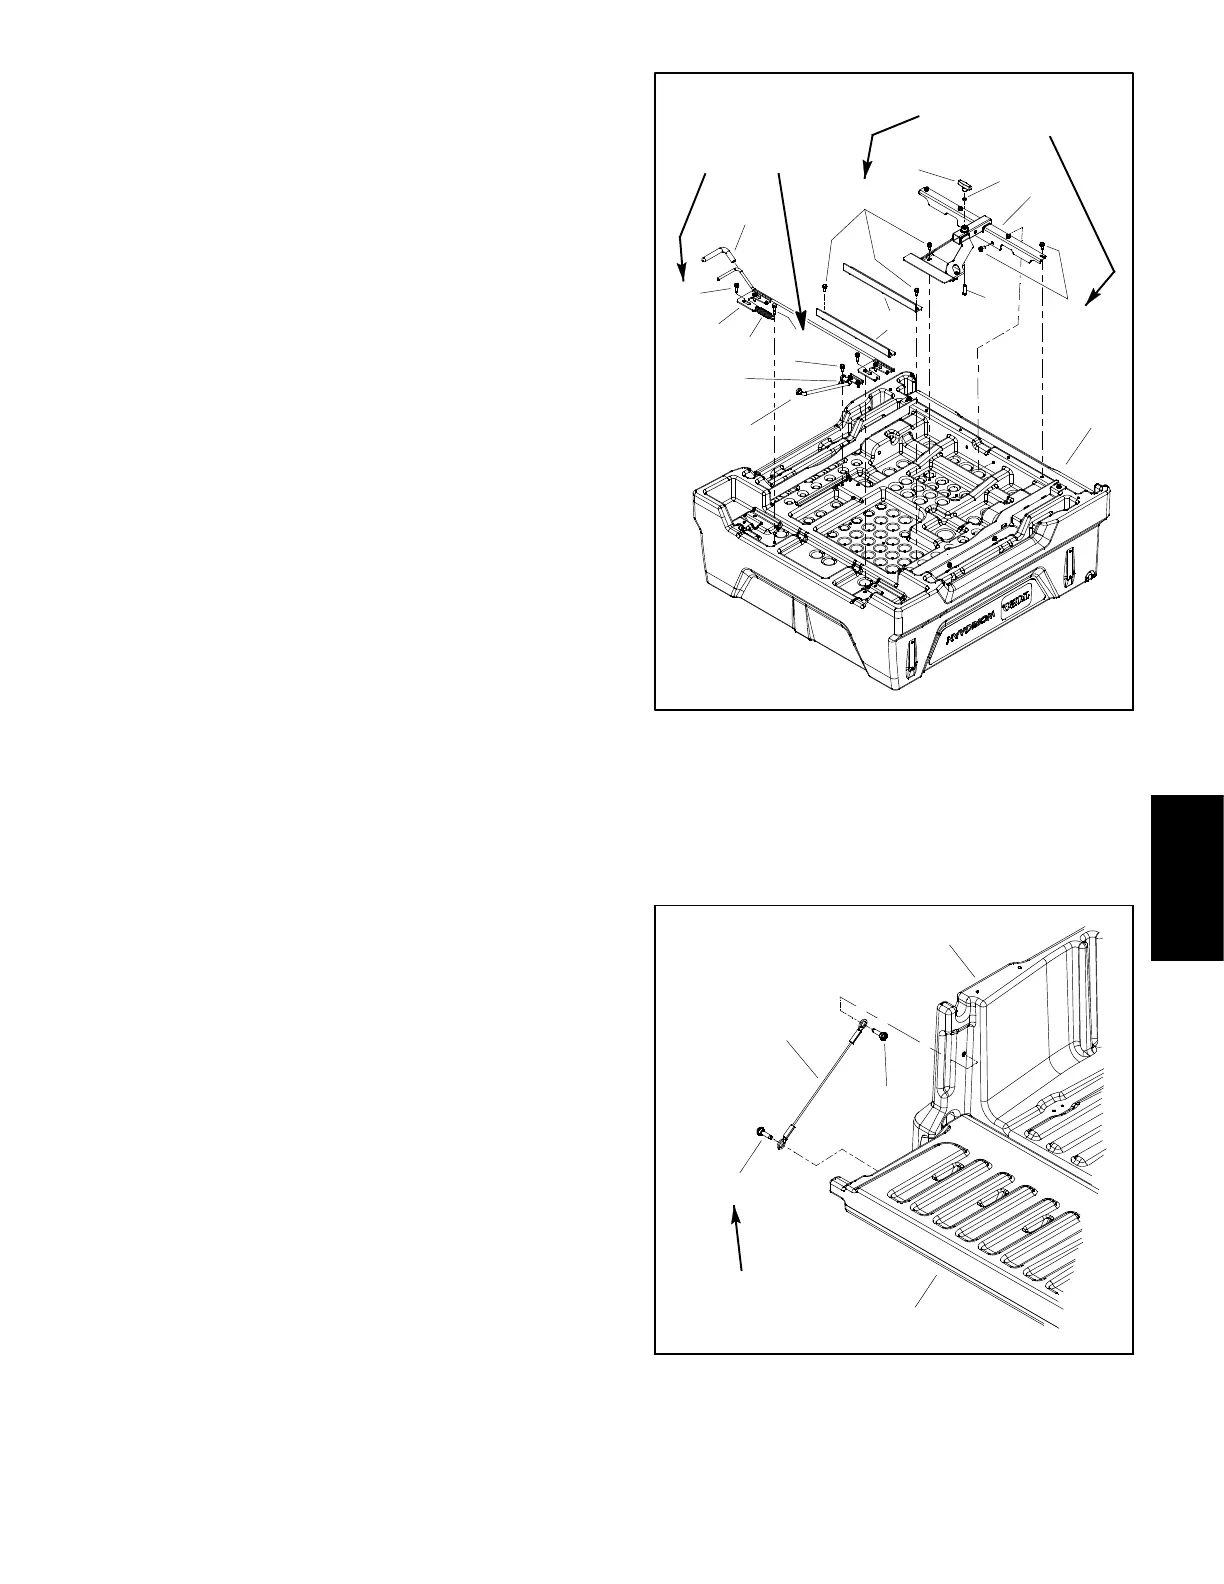
3. If necessary, remove cargo bed from vehicle (Fig.
42):
A. Raise cargo bed and support bed so that prop rod
assembly can be removed from bottom of bed.
B. Remove three (3) flange head screws that secure
prop rod U--bracket (item 12) to bed and remove
bracket and prop rod (item 5).
C. Lower cargo bed to vehicle frame.
D. Remove two (2) cap screws (item 1) and lock nuts
(item 10) that secure cargo bed assembly to frame.
E. Lift cargo bed assembly from vehicle.
4. Disassemble cargo bed as necessary using Figures
42, 43 and 44 as guides.
Assembly
1. Assemble cargo bed using Figures 42, 43 and 44 as
guides.
A. Use torque specifications that are identified in the
illustrations when assembling cargo bed.
2. If removed, secure cargo bed to vehicle (Fig. 42):
A. Position cargo bed assembly to vehicle.
B. Secure cargo bed assembly to frame with two (2)
cap screws (item 1) and lock nuts. Torque cap
screws from 140 to 170 in--lb (16 to 19 N--m).
C. Raise cargo bed and support bed so that prop rod
assembly can be secured to bottom of bed.
D. Make sure that end of prop rod (item 5) is installed
into slot in prop rod bracket (item 11) attached to
frame.
E. Secure prop rod U--bracket (item 12) and prop
rod to bed with three (3) flange head screws. Torque
screws from 133 to 147 in--lb (15 to 16 N--m).
F. Lower cargo bed to vehicle frame.
3. Adjust bed latch strikers (item 4 in Fig. 42) so that
cargo bed closes completely and is latched at both
sides. Strikers can be raised or lowered to latch bed.
1. Cargo bed
2. Quick attachment
3. Jam nut
4. T handle
5. Screw
6. Flange head screw
7. Bed brace (2 used)
8. Latch
9. Grip
10. Shoulder screw (4 used)
11. Extension spring
12. Shoulder screw
13. Prop rod
14. Prop rod U--bracket
Figure 43
2
3
8
9
10
11
13
1
5
7
12
14
4
6
6
6
133 to 147 in--lb
(15 to 16 N--m)
90 to 110 in--lb
(10.2 to 12.4 N--m)
1. Tailgate lanyard
2. Shoulder screw (2 used)
3. Tailgate
4. Cargo bed
Figure 44
2
1
2
3
4
133 to 147 in--lb
(15to16N--m)
Chassis
 Loading...