24
Using the TV’s features (General)
Blue Screen
When Blue Screen is selected, the screen will turn blue
and the sound will be muted when no signal is received.
1. In the PICTURE menu, press ▲ or ▼ to highlight
Advanced Video, press ► or
to select.
2. Press ▲ or ▼ to highlight Blue Screen and use ◄ or
► to select On or Off.
Note: The Blue Screen will be grayed out in DTV and PC
mode.
3D Colour Management
When 3D Colour Management is selected, it allows the
'Base Colour Adjustment' feature to become available.
1. In the PICTURE menu, press ▲ or ▼ to highlight
Advanced Video and press ► or OK to select.
2. Press ▲ or ▼ to highlight 3D Colour Management.
3. Press ◄ or ► to select On or Off.
Base Colour Adjustment
The Base Colour Adjustment feature allows the
adjustment of individual colours to suit personal
preference. This can be useful when using an
external source. It can only be adjusted when Colour
Management is set to On.
1. Highlight the Advanced Video in the PICTURE
menu, press ▲ or ▼ to highlight 3D Colour
Management and press ◄ or ► to select On.
2. Press ▲ or ▼ to highlight Base Colour Adjustment
and then press ► or .
3. Press ▲ or ▼ to select an option, then press to
enter the adjustment setting window.
4. Press ◄ or ► to select Hue, Saturation, or
Brightness, then press ▲ or ▼ to adjust the
settings as required.
Red
Hue
Saturation Brightness
0 0 0
0 0 0
0 0 0
0 0 0
0 0 0
0 0 0
Green
Blue
Yellow
Magenta
Cyan
Base Colour Adjustment
Select Back Exit
EXIT
Enter
OK RETURN
Reset
Note: To return to the original factory settings, select
Reset and press .
ClearFrame 100Hz
The new ClearFrame 100Hz anti-blur technology doubles
the frame rate from 50 frames per second to 100 frames
per second, virtually eliminating motion blur without
adding flicker or reducing image brightness.
7
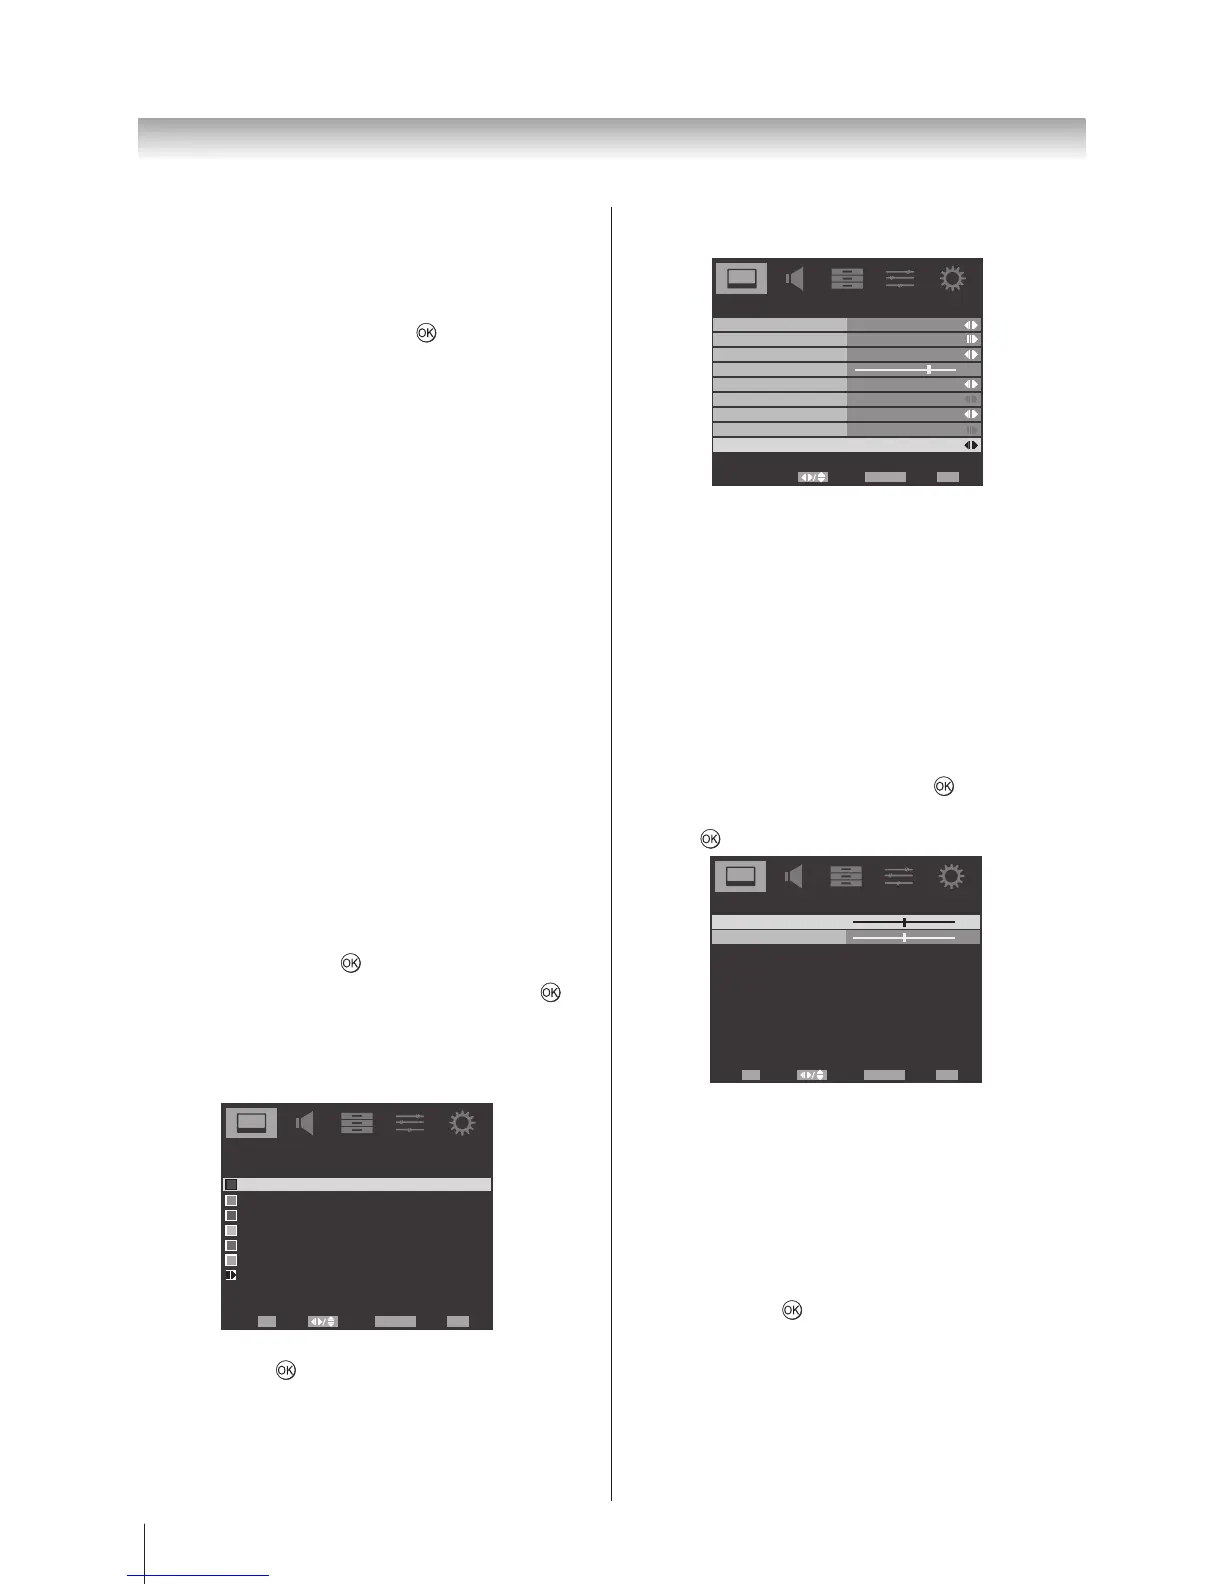
Advanced Video
Select Back Exit
EXITRETURN
OnCinema Mode
Auto
Off
Off
Low
NR
CTI
Adaptive Luma Control
OnActive Backlight
Blue Screen
3D Colour Management
Base Colour Adjustment
ClearFrame 100Hz
1. In the PICTURE menu, press ▲ or ▼ to highlight
Advanced Video and press ► or OK to select.
2. Press ▲ or ▼ to highlight ClearFrame.
3. Press ◄ or ► to select Off, Low, Middle, or High.
Note: This ClearFrame 100Hz function is available for
model 42SL700A only.
H./V. Position
Adjust the horizontal and vertical position of the picture.
1. In the PICTURE menu, press ▲ or ▼ to highlight
Advanced Video and press ► or
to select.
2. Press ▲ or ▼ to highlight H./V. Position and press
► or
to select.
H./V. Position
Select Back Exit
EXIT
Adjust
OK RETURN
0
0
H.Position
V.Position
3. Press ▲ or ▼ to select H. Position or V. Position,
and press◄ or ► to adjust.
PC
This option only shows and is available in PC mode,
which provides several items for the PC display fine
tunings.
1. In the PICTURE menu, press ▲ or ▼ to select PC
and then press
.
2. Press ▲ or ▼ to select Auto Adjust for adjusting
the settings automatically, or select H. Position, V.
Position, Phase or Clock and use ◄ or ► to adjust
your preference.
 Loading...