2. MAJOR UNIT REPLACEMENT
EO18-33032
(Revision date: Aug., 2017)
2.2 Replacing the LCD Unit
2-10
2.2 Replacing the LCD Unit
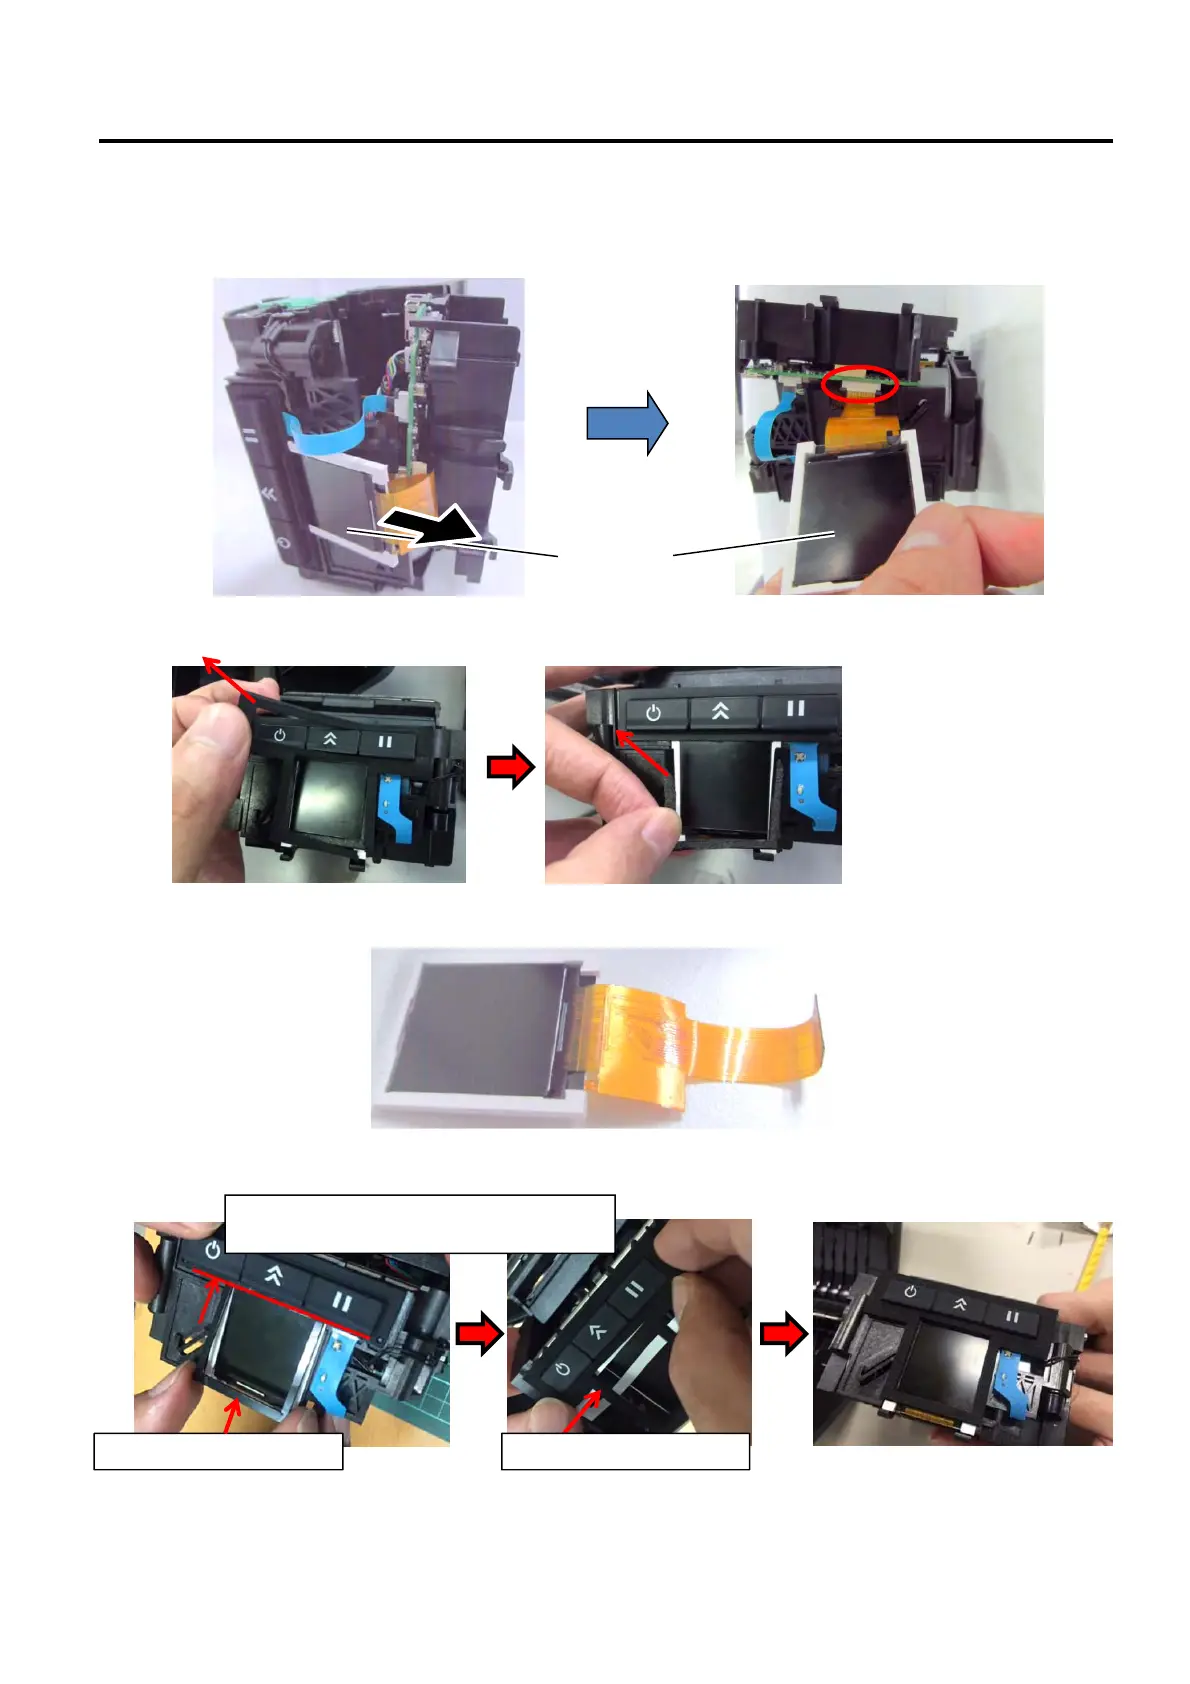
1) Remove the Function Unit and Thermal head. (Refer to Section 2.1 Replacing the CPU PC Board.)
2) Pull slightly the LCD unit and then remove the flex cable from the CPU PC Board.
For the GH model, remove the IP54 water resisting materials.
3) Replace the LCD Unit with a new one and then perform reassembly in the reverse order of removal.
For the GH model, attach the IP54 water resisting materials to the LCD unit. After attaching the FP3D-KEY-
LCD-CUSHION, push and firmly fit it with a tool like tweezers.
LCD Unit
FP3D-LCD-FRAME-GUIDE
Align the edge of the FP3D-LCD-FRAME-
GUIDE with the edge of the KEY-RUBEER.
FP3D-KEY-LCD-CUSHION
 Loading...