Installer's
Guide
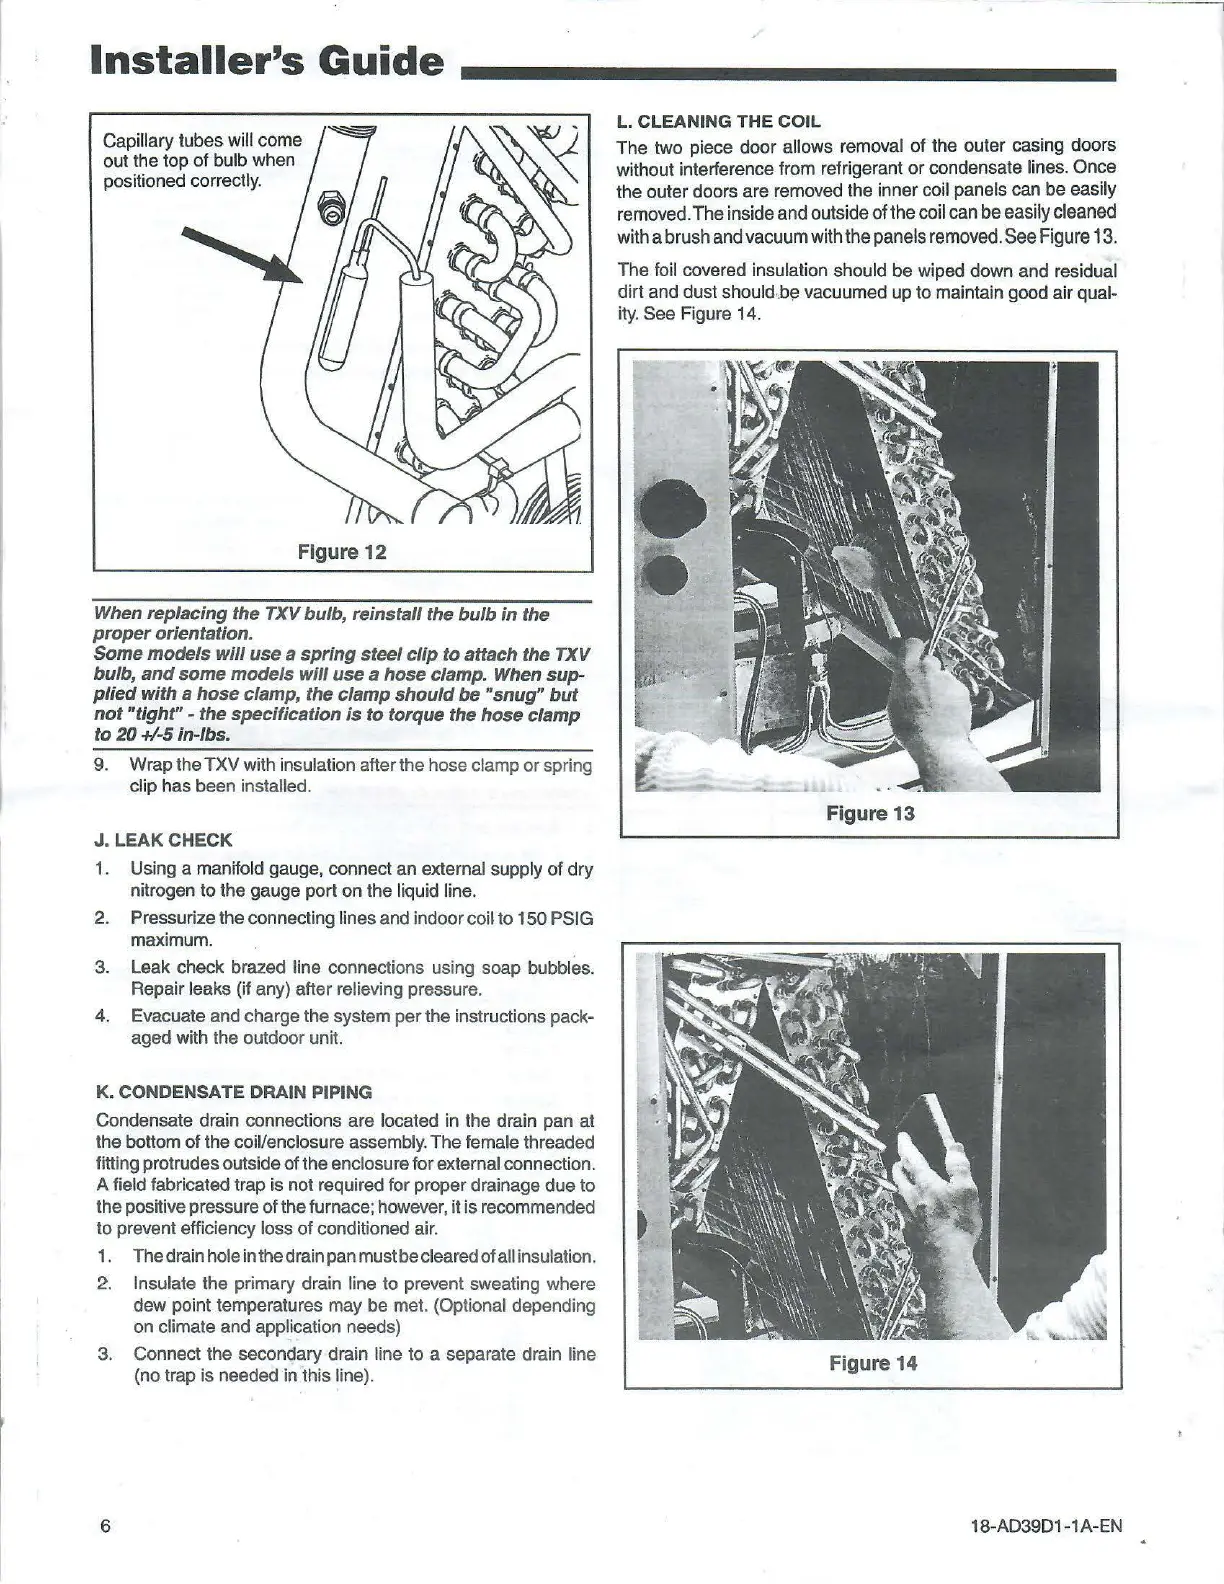
Capillary tubes will come
out the top
of
bulb when
positioned
correctly.
Figure
12
When replacing the
TXV
bulb, reinstall the bulb in the
proper
orientation.
Some models will
use
a spring steel clip
to
attach the
TXV
bulb,
and
some models will
use
a
hose
clamp. When sup-
plied
with a
hose
clamp, the clamp should
be
"snug"
but
not
"tight" - the specification is to torque the
hose
clamp
to
20
+1-5
in-lbs.
9. Wrap the
TXV
with insulation after the hose clamp
or
spring
clip
has
been installed.
J. LEAK CHECK
1. Using a manifold gauge, connect an external supply
of
dry
nitrogen to the gauge port on
the
liquid line.
2. Pressurize the connecting lines and indoor coil
to
150 PSIG
maximum.
3. Leak check brazed line connections using soap bubbles.
Repair leaks (if any) after relieving pressure.
4. Evacuate and charge the system per the instructions
pack-
aged with the outdoor unit.
K. CONDENSATE DRAIN PIPING
Condensate drain connections are located in the drain pan at
the
bottom
of
the coil/enclosure assembly.
The
female threaded
fitting protrudes outside
of
the enclosure for external connection.
A
field fabricated trap is not required for proper drainage
due
to
the positive pressure
of
the furnace; however, it
is
recommended
to
prevent efficiency loss
of
conditioned air.
1. The drain
hole in the drain pan must
be
cleared
of
all insulation.
2. Insulate the primary drain line
to
prevent sweating where
dew
point temperatures may
be
met. (Optional depending
on
climate and application needs)
3. Connect the secondary drain line
to
a separate drain line
(no trap
is
needed in this line).
6
L. CLEANING THE COIL
The
two piece
door
allows removal
of
the
outer casing doors
without interference from refrigerant
or
condensate lines.
Once
the outer doors are removed the inner coil panels can
be
easily
removed.
The
inside and outside
of
the
coil can be easily cleaned
with a brush and vacuum with
the
panels removed. See Figure 13.
The
foil covered insulation should
be
wiped down and residual
dirt
and dust should·.be vacuumed up
to
maintain good air qual-
ity.
See Figure 14.
Figure 13
Figure 14
18-AD39D1-1A-EN
 Loading...