Introduction 17
© 2015 Vision Engraving & Routing Systems
1.4 Using a Router or Hub - ONLY
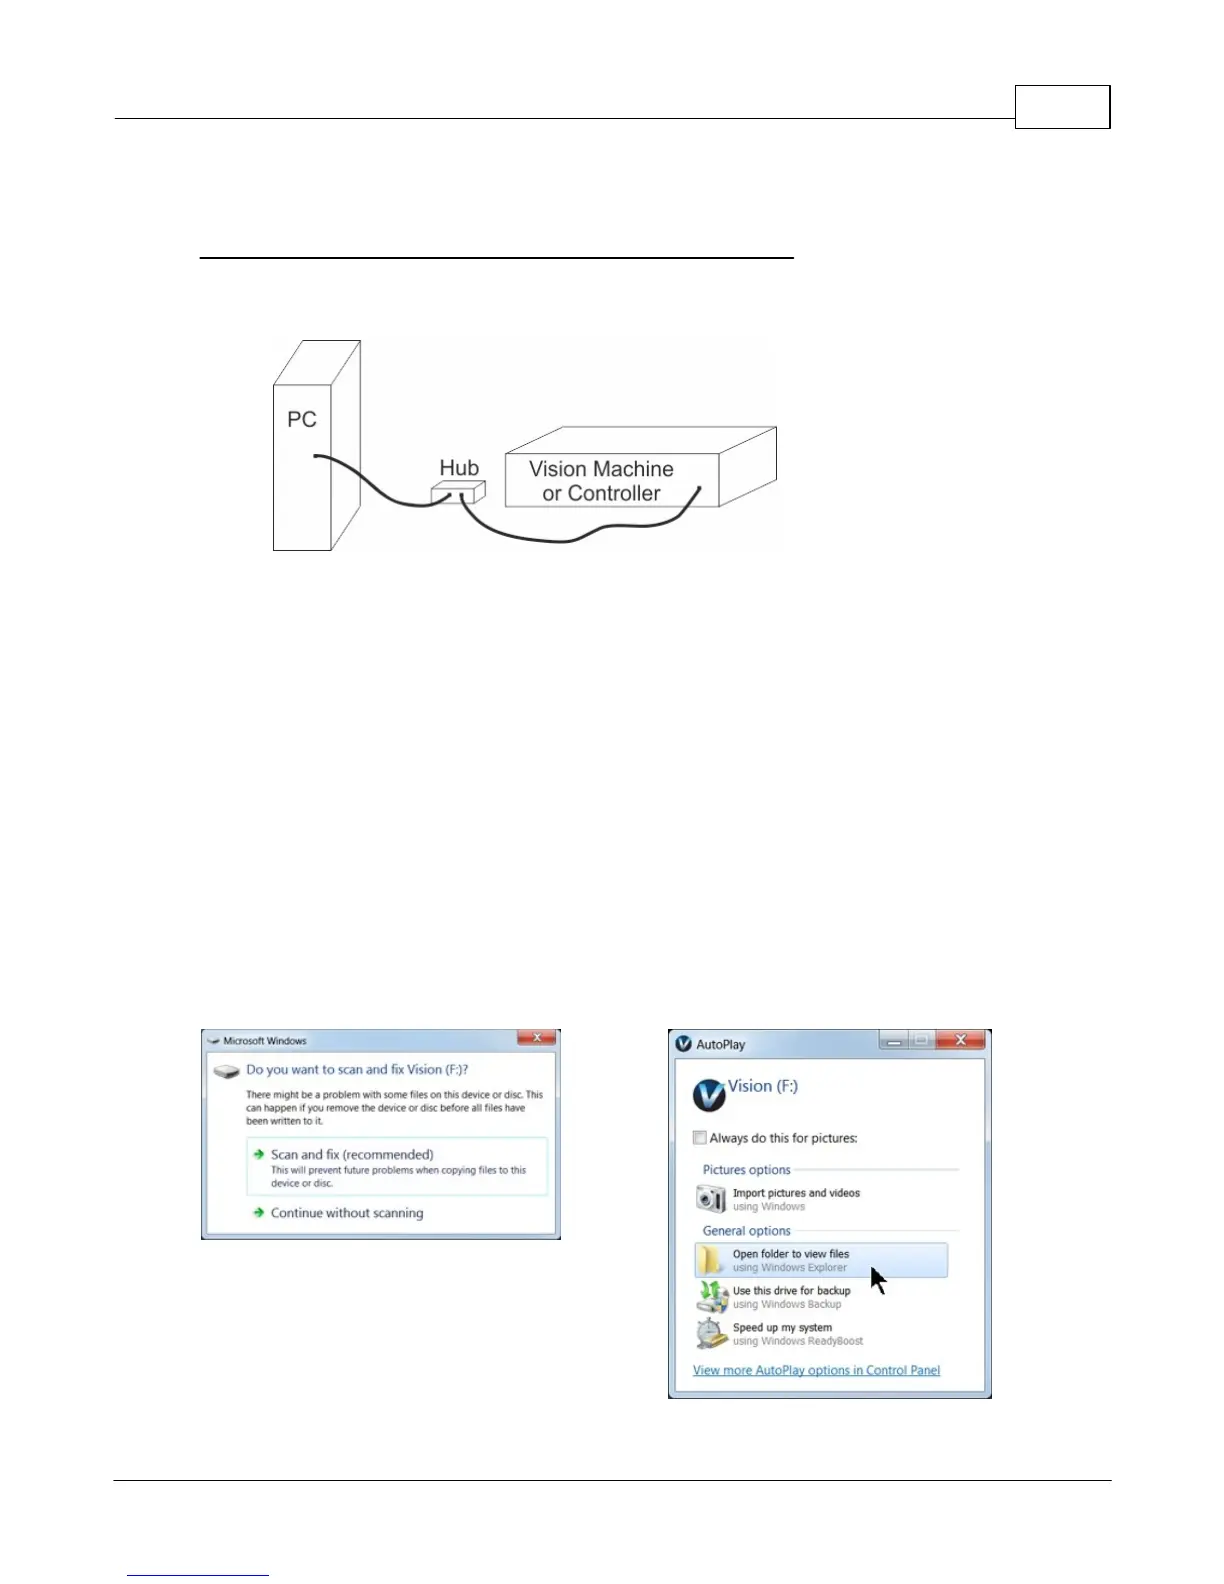
Connection from PC to Hub or Router to Machine or Controller
Once the machine is connected to a hub or router, and the hub or router is connected to your
computer's network port, turn the machine or controller on. The power switch for the Vision Express is
located on the power supply box for the machine. The power switch for the VE810 is located below the
LCD screen on the front of the machine. The power switch for the Vision Series 4 Controller is located
on the front left of the Controller. Once the machine or controller has initialized, plug the supplied
Vision USB drive (or white/blue or orange USB Dongle) into an available USB port on your computer.
NOTE - This installation is performed on a Windows 7 PC. For Windows XP, Windows 8, Windows 8.1
or Windows 10, the screens are slightly different.
The computer will recognize the USB drive
and the following screen will appear.
Select Continue without scanning.
Select Open folder to view files.
 Loading...