Pendant Holder Installation 37
© 2015 Vision Engraving & Routing Systems
4 Phoenix 1212
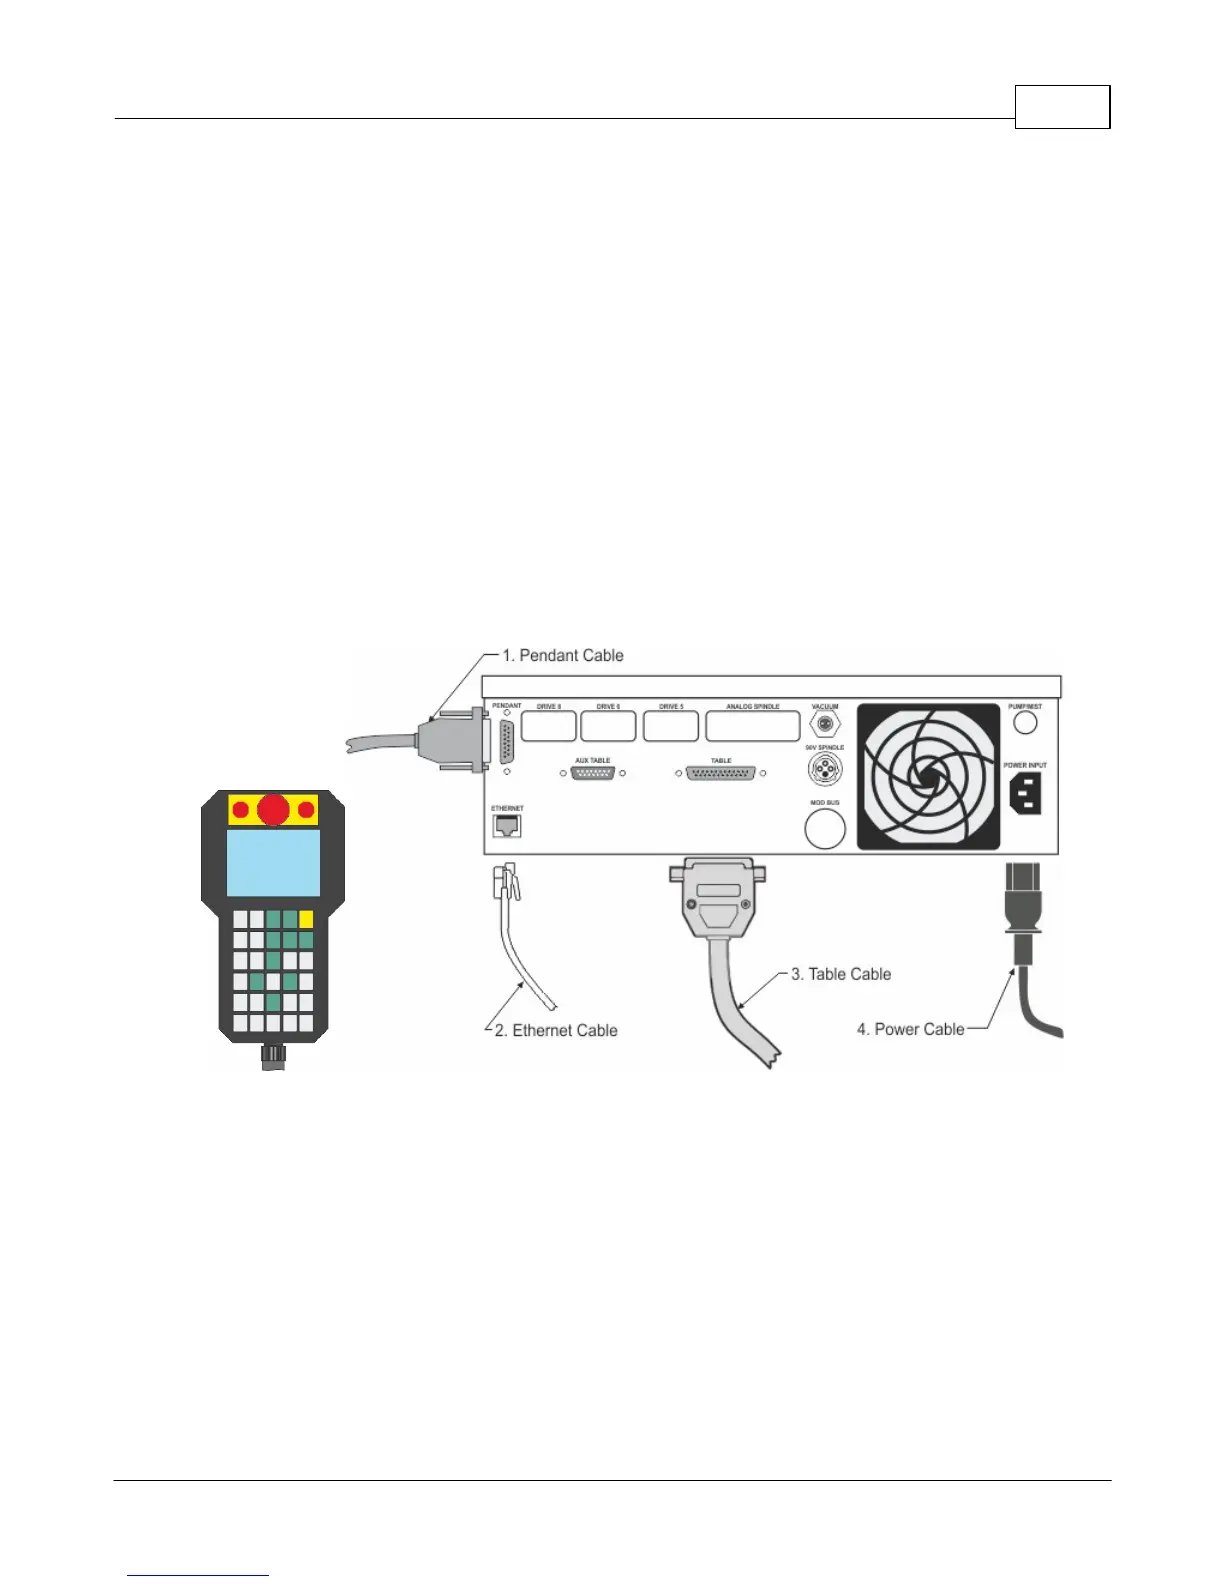
Phoenix 1212 Engraver/Series 4 Controller Connections
There is only one connection port on the Phoenix 1212. It is a 25 pin Table Cable port on the left side
of the machine. All other connections on the machine's controller are listed below.
1. The engraver's Pendant is connected to the Pendant cable port.
2. The Ethernet Cable from your computer, hub or network is connected to the Ethernet port.
3. The Table Cable connects from 25 pin connector on the engraver to the Table port.
4. The Power Cable connects a 110 - 220 VAC electrical source to the controller and powers the
controller, table and spindle.
Note: If your machine is equipped with the optional Vacuum Chip Removal System, a remote On/Off
cable is connected to the controller to automatically turn the vacuum pump on and off when the job is
being run.
 Loading...