86
259. Install the main bearing caps.
NOTE! The main bearing caps are numbered 1 to 5,
counted from the timing gear end. Oil the threads of
the screws. Tighten with a torque wrench. Tightening
torque: 110 Nm (11.0 kpm/79.5 ft.lbs).
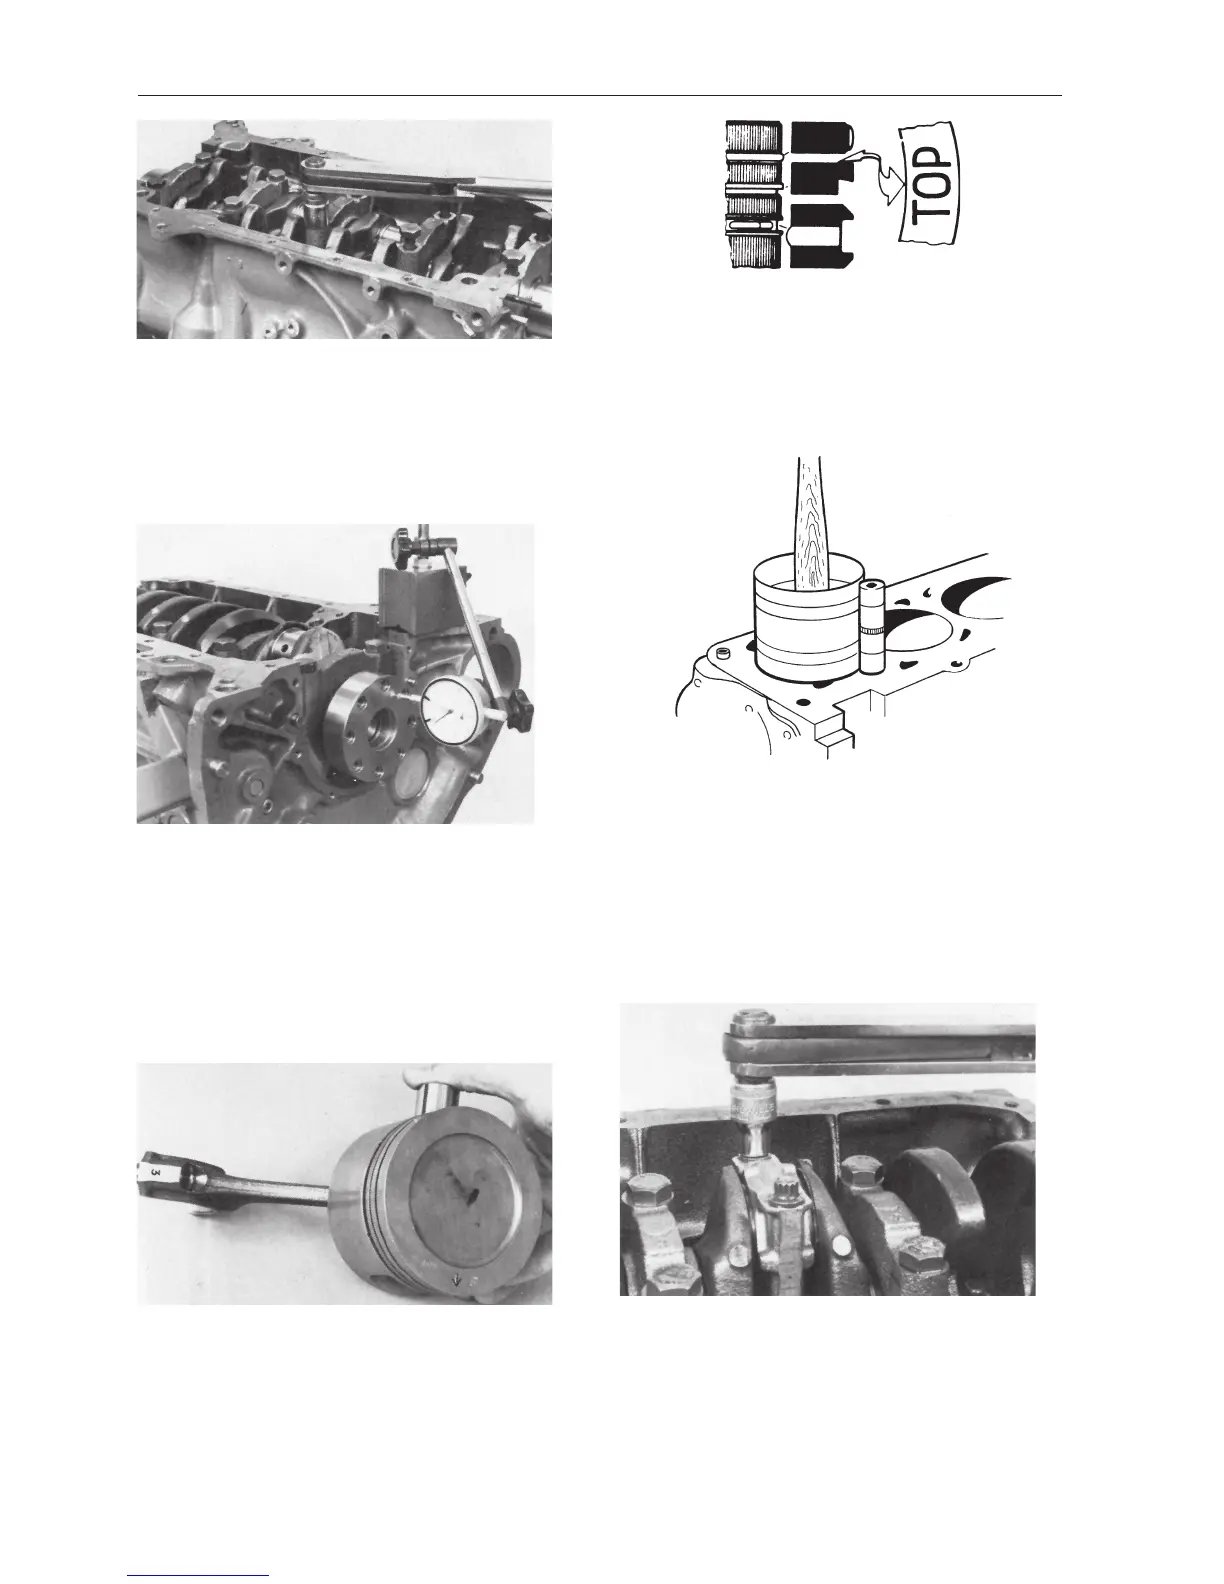
260. Check the axial clearance, which should be
0.080–0.270 mm (0.00315–0.01063").
261. Assemble the pistons and connecting rods so
that the marking on the piston points forwards when
the number marking on the connecting rod is turned
towards the starboard side of the engine (the oil filter
side). Install the locking rings in the piston pins.
262. Use piston ring pliers to install the piston rings.
Install the piston rings in accordance with the pic-
ture. The upper ring is chromium plated. The lower
compression ring is marked ‘Top’. Turn the piston
rings on the piston so that the gaps are 120° apart
from each other.
263. Install the bearing shells in the connecting rod
and in the caps. Oil the cylinder bore, piston and the
rod bearing. Check to make sure that the marking on
the piston is facing the timing gear cover when the
piston is installed in the cylinder. Use a piston ring
compressor to facilitate the installation.
NOTE! Turn the crankshaft so that the crank journal
for number 1 cylinder points straight downwards.
Push down the piston using a hammer handle.
264. Install the crank bearing caps so that the mark-
ing matches with the one on the connecting rod. Oil
the threads and use a torque wrench to tighten.
Tighten in 2 steps. Step 1: 20 Nm (2.0 kpm/15
ft.lbs). Step 2: Angle tighten 90°.
NOTE! Use new bolts should the length of the bolts
exceed 55.5 mm (2.185").
 Loading...