Congratulations
on purchasing your new VTech product. Before
using this product, please read Important
safety instructions.
This manual has all the feature operations
and troubleshooting necessary to install and
operate your new VTech product. Please
review this manual thoroughly to ensure proper
installation and operation of this innovative and
feature rich VTech product.
For support, shopping, and everything new at
VTech, visit our website at
www.vtechphones.com.
What’s in the box
Install the battery
The parent unit runs on rechargeable battery
or AC power. To continuously monitor your
baby, make sure you use both battery and
AC power at the same time. With the battery
alone, the parent unit can cordlessly run for a
short time only.
NOTE
• Use only the battery supplied with this product.
• If the parent unit will not be used for a long time,
disconnect and remove the battery to prevent
possible leakage.
Install the battery as shown below.
• Press down on the battery compartment cover to
pull it out.
• Make sure the label THIS SIDE UP is facing up
while inserting the battery.
Replace the battery
To replace the battery, press down on the
battery compartment cover and pull it out,
then follow the steps above to install the
batter y.
NOTE
• Use only the power adapters supplied with this
product.
• Make sure the electrical outlets are not controlled
by wall switches.
• The power adapters are intended to be correctly
oriented in a vertical or floor mount position. The
prongs are not designed to hold the plug in place if
they are plugged into a ceiling, under-the-table or
cabinet outlet.
• Make sure the parent unit, the baby unit and the
power adapter cords are out of reach of children.
Connect the baby monitor
Charge the parent unit battery
When you have connected the parent unit
and installed its battery for the first time or
after power outage, the parent unit powers on
automatically. The battery icon indicates the
battery status (see the following table).
NOTE
• The parent unit battery is fully charged after
3 hours of continuous charging.
• It takes longer to charge the battery when the
parent unit is turned on. To shorten the charging
time, turn the parent unit off while charging.
• The standby time varies depending on the
sensitivity level you set, your actual use and the
age of the battery.
Battery
indicators
Battery
status
Action
The battery
icon is off
and
displays.
No battery
is installed
but operates
using AC
power, or the
battery has
been installed
incorrectly.
Install the
parent unit
battery.
Charge
without
interruption
(at least 30
minutes).
The screen
displays
Battery low
at Parent
Unit and
.
The
light flashes.
The battery
has very little
charge and
may be used
for only a
short time.
Charge
without
interruption
(about 30
minutes).
The battery
icon
becomes
solid .
The battery is
fully charged.
To keep
the battery
charged,
connect it to
AC power
when not in
use.
Before use
• This baby monitor is intended as an aid. It is not a
substitute for proper adult supervision, and should
not be used as such.
Test your baby monitor
You may test the baby monitor before initial
use, and at regular times thereafter.
• For hearing protection, make sure the parent
unit is more than 3 feet (1 meter) away from
the baby unit. If you hear any high-pitched
noise, move the parent unit further until the
noise stops. You can also press
on the
parent unit to lower or mute the noise.
1. Make sure your baby units and parent unit
are on.
2. The parent unit displays images from the
baby unit.
• Speak towards the baby unit microphone.
You will hear the sound at the parent
unit.
3. If you have two baby units, press VIEW on
your parent unit. The screen switches to
other baby units. Then, repeat step 2.
• When the parent unit displays and then No link
to CAM # (# represents the baby unit number),
and the LINK LED light flashes, move the parent
unit closer to the baby unit (observe the minimum
distance of 3 feet/ 1 meter). You can also check
if the baby monitor is connected to a live power
socket and switched on.
• Increase the parent unit speaker volume if you
cannot hear the sounds transmitted from the baby
unit.
Positioning the baby monitor
• Keep the baby units out of the reach of your baby.
Never place or mount the baby units inside the
baby’s crib or playpen.
• To avoid interference from other electronic
devices, place your baby monitor far away from
devices such as wireless routers, microwaves, cell
phones and computers.
1. Place the baby units more than 3 feet
(1 meter) away from your baby.
2. Adjust the angle of the baby unit camera to
aim at your baby.
3. Bend down the temperature sensor so
that it stays away from baby unit to avoid
deviation of temperature detection.
4. Place the parent unit more than 3 feet
(1 meter) away from the baby units.
CAUTION
• The default volume of your parent unit is
level 4, and the maximum volume is level 7. If you
experience high-pitched screeching noise from
your baby monitor while positioning:
- Make sure your baby units and parent unit are
more than 3 feet (1 meter) apart, OR
- Turn down the volume of your parent unit.
Operating range
The operating range of the baby monitor is up
to 1,000 feet (300 meters) outdoors or 160 feet
(50 meters) indoors. The actual operating range
may vary depending on the environmental
conditions and other interferences such as
walls, doors and other obstructions.
Install the lens (optional)
The wide-angle lens (VM101) provided allows
you to view more of your baby’s room from the
parent unit screen. Install the wide-angle lens
onto the baby unit camera as shown below.
Remove the lens
NOTE
• When the lens is not in use, cover both sides of the
lens with the lens covers provided to avoid scratches.
• You can purchase and install an extra new wide-
angle lens (VM101) onto your baby unit if necessary.
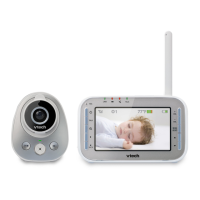
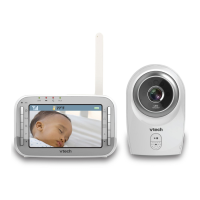
Overview
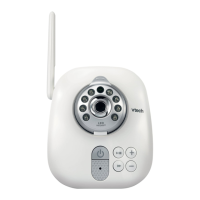
Baby unit overview
1
Light sensor
2
Camera
3
Infrared LEDs
4
ON/OFF light
• On when the baby unit is turned on.
• Flashes when the baby unit is not
being viewed; or when the link to the
parent unit is lost.
5
Play/Stop
• Press to play or stop lullaby on the
baby unit.
6
Microphone
7
Skip
• Press to play the next lullaby.
8
+
VOLUME
-
• Press to adjust the speaker volume.
It determines the lullaby volume and
talkback volume transmitted from
parent unit.
9
ON/OFF switch
• Slide to turn on or off the baby unit.
10
Speaker
11
Temperature sensor
12 Threaded socket
• For wall mount installation use.
13
PAI R
• Your baby units and parent unit
provided are already paired.
14
Power jack
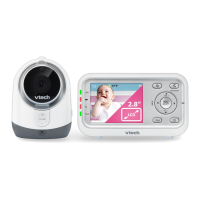
Parent unit overview
1
LED lights
• Indicate the different statuses of
the parent unit. For details, refer to
Parent unit lights.
2
Microphone
3
On/off
• Press and hold to power on.
• Press and hold again to power off.
4
TAL K
• Press and hold to talk to the selected
baby unit in SINGLE- CAM or
PATROL mode.
5
Zoom
• Press to zoom in or out while viewing
image in SINGLE- CAM or PATROL
mode.
6
• While in a menu, press to choose an
item.
• While viewing zoomed image,
press and hold to move the zoomed
image rightward.
• While in SPLIT mode, press to move
the selection box rightward.
7
BACK
• While in a menu, press to return to
the main menu or idle screen.
• While viewing zoomed image,
press and hold to move the zoomed
image leftward.
• While in SPLIT mode, press to move
the selection box leftward.
8
VIEW / LCD ON/OFF
• Press and hold to turn off the parent
unit screen.
• Press to view the image of the
next baby unit in SINGLE-CAM or
PATROL mode.
PATROL
• Press to turn on or off the PATROL
mode.
SPLIT
• Press to turn on or off the SPLIT
mode.
9
• Press to increase the parent unit
speaker volume.
10
• Press to decrease the parent unit
speaker volume.
11
MENU/SELECT
• Press to enter the menu.
• While in a menu, press to choose an
item, or save a setting.
12
• While in a menu, press to scroll up.
• While viewing zoomed image,
press and hold to move the zoomed
image upward.
• While in SPLIT mode, press to move
the selection box upward.
13
• While in a menu, press to scroll
down.
• While viewing zoomed image,
press and hold to move the zoomed
image downward.
• While in SPLIT mode, press to move
the selection box downward.
14
Antenna
15
Stand
16
Speaker
17
Power jack
18
Battery compartment cover
Parent unit lights
LINK
• On when the parent unit is linked to
the baby unit.
• Flashes when the link to the baby
unit being viewed in SINGLE-CAM
or PATROL mode is lost; or when
the link to at least one baby unit
being viewed in SPLIT mode is
lost.
• On when the parent unit is
connected to AC power, or the
battery is charging.
• Flashes when the parent unit
battery is low and needs charging.
• Off when the parent unit is
disconnected from AC power.
It turns on:
• When the speaker volume of the
parent unit is turned off; or
• When the parent unit is in SPLIT
mode; or
• When the parent unit is talking to
the baby unit.
TAL K
• On when the parent unit is talking
to the baby unit.
Parent unit status icons
Connection status
•
displays when strong signal
strength is detected between
the baby unit and the parent unit.
•
or displays when moderate
or low signal strength is
detected between the baby unit
and the parent unit.
•
displays when the link between
the baby unit and the parent unit
is lost.
Lullaby
• Displays when the baby unit being
viewed is playing lullaby.
or
or
or
Current view status
• Displays the baby unit number of
the baby unit that is being viewed
when in SINGLE-CAM and
PATROL mode.
• Displays the baby unit number of
the selected baby unit when in
SPLIT mode.
PATROL mode
• Displays when the parent unit is in
PATROL mode.
• For VM342-2 only
SPLIT mode
• Displays when the parent unit is in
SPLIT mode.
• For VM342-2 only
Night vision
• Displays when the baby unit being
viewed has activated the night
vision feature.
Zoom
• Displays when the current image
on the parent unit has zoomed in.
Temperature alert tone
• Displays when the temperature
alert tone is set on.
o
F or
o
C
Real-time temperature
• Displays the real-time temperature
detected by the baby unit in
Fahrenheit (
o
F) or Celsius (
o
C)
(e.g. 57
o
F or 14
o
C).
Mute alert
• Displays when the parent unit
speaker volume is set to off.
• Displays when SPLIT mode is
turned on.
9-level sound indicator
•
(1 to 3 bars) indicates low
sound level detected by the baby
unit.
•
(4 to 6 bars) indicates
moderate sound level detected by
the baby unit.
•
(7 to 9 bars) indicates high
sound level detected by the baby
unit (e.g. baby crying loudly).
Speaker volume
• Displays the parent unit speaker
volume level while adjusting.
Battery status
•
animates
when the battery is charging.
•
displays solid when the battery
is fully charged.
•
displays when the battery is
low and needs charging.
AC power without battery
• Displays when the parent unit is
connected to AC power without
the battery.
Parent unit main menu icons
Alert Tone
You can set the parent unit to beep
when
• the parent unit operates in low
battery condition;
• the link between the parent unit
and the baby unit is lost; or
• the baby unit detects sounds
while in SPLIT mode.
Language
You can select a language (English,
French or Spanish) to be used in all
screen displays.
LCD
You can change the brightness of
the parent unit screen, or turn on
the Dim Mode to save power.
Pair/Unpair CAM
The baby unit and parent unit
provided are already paired.
Rename
You can choose a specific name
for the baby unit from a pre-defined
name list.
Sensitivity
With this feature, you can choose
to hear sounds from the baby unit
all the time, or to hear sounds that
exceed a certain level. You can
use the parent unit to adjust the
microphone sensitivity of your baby
unit. The higher the sensitivity level,
the more sensitive the baby unit is
in detecting sounds for transmitting
to the parent unit.
Sound-activated Screen
When the baby unit detects no
sound, the parent unit screen stays
off to save power. Once a sound
is detected, the parent unit screen
turns on automatically. It will then
turn off again after 50 seconds of
no sound detection.
Temperature
You can choose to set the
maximum/ minimum temperature
and turn on the Temperature alert
tone, so that the parent unit beeps
whenever the room temperature
detected by the baby unit falls
outside of the desired temperature
range.
You can choose to display the
temperature in Fahrenheit (
o
F) or
Celsius (
o
C) on your parent unit.
Vibration
You can turn on the vibration alert so
that the parent unit vibrates when it
receives No link alert, Sound alert
in split-view or Temperature alert
tone after turning on the respective
alert tones.
Parent unit display messages
No link to
CAM # *
The selected baby unit is
out of range or is turned
off.
Battery low at
Parent Unit
The battery level of the
parent unit is very low and
needs to be recharged.
Battery empty.
Powering off ...
The battery is empty and
needs to be recharged.
Sound
detected at CAM #
The sound level exceeds
the threshold at CAM # in
SPLIT mode.
Temperature
too high at CAM #
or
Temperature
too low at
CAM #
The temperature detected
by the baby unit is higher/
lower than the desired
temperature alert range.
Powering on...
The parent unit is turning
on.
The parent unit is
searching for baby units.
* # represents the baby unit number.
Using the baby monitor
Power on or off the baby unit
• Slide ON/OFF switch upward to turn on
the baby unit. The ON/OFF LED light
turns on.
• Slide
ON/OFF switch downward to turn
off the baby unit. The ON/OFF LED light
turns off.
Power on or off the parent unit
• Press and hold to turn on the parent unit.
The screen turns on.
• Press and hold
again to turn off the
parent unit. The screen turns off.
Turn on or off the parent unit
screen
You can turn on or off the parent unit screen
without powering off the parent unit. You can
still hear sound from the baby units.
• Press and hold LCD ON/OFF on the parent
unit to turn off the screen.
• Press any keys on the parent unit to turn on
the screen again.
Adjust speaker volume
To adjust parent unit speaker volume:
• Press or on the parent unit at any
time when viewing images
.
• When the parent unit speaker volume is set to
zero, appears on the screen and the light
turns on.
To adjust baby unit speaker volume:
The baby unit speaker volume determines
the lullaby volume and talkback volume
transmitted from parent unit.
• Press + VOLUME - on the baby unit to
adjust the speaker volume.
Play lullaby on the baby unit
The baby monitor has five lullabies and four
soothing sounds for you to comfort your baby.
To play lullaby or soothing sound on the
baby unit:
You can play lullaby or soothing sound on the
baby unit. You can also control the volume level.
• Press
/
on the baby unit to play lullaby.
• Press
on the baby unit to play the next
lullaby.
• Press
/
again to stop the lullaby.
• Press + VOLUME - to adjust the volume
level of the lullaby on the baby unit.
TIP
• When the lullaby stops, press /
again to replay.
Set the language
You can select a language (English, French or
Spanish) to be used in all screen displays.
1. Press MENU when the parent unit is idle.
2. Press
or to choose Language, then
press SELECT.
3. Press
or to choose English, Français
or Español, then press SELECT to confirm
your selection.
Adjust LCD brightness
You can change the brightness of the parent
unit screen from Level 1 to Level 5. The LCD
brightness is preset to Level 3.
1. Press MENU when the parent unit is idle.
2. Press
or to choose LCD, then press
SELECT.
3. Press SELECT again to choose Brightness.
4. Press
or to choose the desired level of
brightness, then press SELECT to confirm
your selection.
Turn on or off the dim mode
The dim mode is preset to on to help you save
the parent unit power. Your parent unit display
will dim automatically after 10 minutes of
inactivity, in which there is neither key pressed
nor alert received from the baby unit.
1. Press MENU when the parent unit is idle.
2. Press
or to choose LCD, then press
SELECT.
3. Press
or to choose Dim Mode, then
press SELECT.
4. Press
or to choose On or Off, then
press SELECT to confirm your selection.
• While the screen is dimmed, any keypress or
alert message will trigger the screen to return to
the preset brightness level. After 10 minutes of
inactivity, it will be dimmed again.
Adjust the sound sensitivity of
the baby unit
You can choose to hear sounds from the baby
unit all the time, or to hear sounds that exceed
a certain level. You can use the parent unit
to adjust the microphone sensitivity of your
baby unit. The higher the sensitivity level, the
more sensitive the baby unit is in detecting
sounds for transmitting to the parent unit. The
sensitivity level is preset to HIGHEST.
Sensitivity
Level
Description
Highest
Highest sensitivity level
The parent unit speaker is
constantly on, and you will
hear all sounds (including
background noises) from
your baby’s room.
High
High sensitivity level
The parent unit speaker
turns on for soft babbling
and louder sounds from your
baby. It remains quiet when
your baby sleeps soundly.
Medium
Medium sensitivity level
The parent unit speaker
turns on for loud babbling
and louder sounds from
your baby. It remains quiet
when your baby makes soft
sounds.
Low
Low sensitivity level
The parent unit speaker
turns on for crying and
louder sounds from your
baby. It remains quiet when
your baby makes soft
sounds.
Lowest
Lowest sensitivity level
The parent unit speaker
turns on for loud crying or
screeching sounds from
your baby. It remains quiet
when your baby makes soft
sounds.
1. Press MENU when the parent unit is idle.
2. Press
or to choose Sensitivity, then
press SELECT.
• If you have two baby units, the system
prompts you to choose both baby units
or the desired baby unit, press
or to
choose ALL CAM or CAM #, then press
SELECT.
3. Press
or to choose the desired
sensitivity level, then press SELECT
to
confirm your selection.
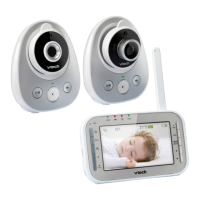
VM342
VM342-2
Full Color Video Monitor
with Wide-Angle Lens
1 set for VM342
2 sets for VM342-2
1 set for both VM342 and VM342-2
Connect and charge the
battery
Strangulation
Hazard
Keep this cord out of reach of children.
The cord needs to be at least three feet
away from the child at all times. Do not
use with an extension cord. Do not
remove this tag.
Éloignez ce cordon des enfants. Le
cordon doit se trouver à au moins trois
pieds d’un enfant et ce, en tout temps.
N’utilisez pas de rallonge. Ne retirez pas
cette étiquette.
Mantenga este cable fuera de la alcance
de los niños. Este cable debe estar por
lo menos tres pies fuera de la alcance
del niño en todo momento. No lo use
con una extensión inalámbrica. No quite
esta etiqueta.
Risque
d’étranglement
Riesgo de
estrangulación
User’s manual
Go to www.vtechphones.com
for the latest VTech product news.
Strangula
tion
Hazard
Keep
th
is
cord
o
ut of re
ach
o
f
ch
il
dren.
The
co
rd nee
d
s t
o
b
e
at
l
e
as
t
three
feet
away fro
m the
ch
il
d
at all ti
mes.
Do no
t
us
e
with
an exte
n
sio
n co
rd
.
D
o
n
ot
re
move t
h
is
tag.
Élo
i
g
nez ce
co
rdo
n des enfan
ts. Le
cord
on
d
oit
s
e
trou
ver
à au m
oin
s trois
pie
d
s d’un
en
fant e
t ce,
en
to
ut te
mps.
N’
u
ti
li
se
z
p
as de
ral
l
o
ng
e
. Ne
retirez pas
cette
éti
q
uette
.
Ma
n
te
n
ga este
cab
le
fuera
de la alcanc
e
de
l
os
n
iñ
os.
Este ca
b
le debe
es
ta
r por
lo
meno
s t
res
p
ies fu
era de
l
a
al
cance
del ni
ño
en tod
o m
o
me
n
to.
No
lo us
e
con
u
na e
xtens
ió
n i
n
alámbrica.
No
q
uit
e
esta
etiq
ueta.
Risque
d’étranglement
Riesgo de
est
rangulación
W
I
D
E
A
N
G
L
E
L
E
N
S
W
I
D
E
A
N
G
L
E
L
E
N
S
W
I
D
E
A
N
G
L
E
L
E
N
S
W
I
D
E
A
N
G
L
E
L
E
N
S
W
I
D
E
A
N
G
L
E
L
E
N
S
W
I
D
E
A
N
G
L
E
L
E
N
S
W
I
D
E
A
N
G
L
E
L
E
N
S
W
I
D
E
A
N
G
L
E
L
E
N
S
h
i
Low
sensitivity
High
sensitivity