11
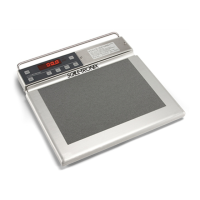
TEST CALIBRATION WEIGHTS ARE AVAILABLE FROM WELCH ALLYN.
THREE (3) 25 KILOGRAM TEST WEIGHTS ARE RECOMMENDED.
ORDER PART NO. 20021W. (25 KG TEST WEIGHTS)
Large changes in calibration often indicate a damaged load cell or faulty readout component. It is generally
recommended that if calibration is necessary for your scale it should be returned to the factory. Calibration should
not be attempted by those not having the proper tools or knowledge of electronic systems and their attendant shock
hazards.
Calibration Procedure
Enter the “calibration mode” by following exactly the procedure outlined below:
1. Verify serial number labels on Readout Assembly, & Base Assembly match.
2. Be sure scale is off.
3. Press and hold in the “RE WEIGH” pushbutton.
4. While pressing the “RE WEIGH” pushbutton, press and release the “ON” pushbutton.
5. NOTE: The “ST” pushbutton is a special hidden programming and test pushbutton located under the WELCH
ALLYN logo (“ST”) on the left side of the front panel between the “ZERO” and “RE CALL” pushbuttons. After
the scale displays the test pattern of “888888” release the “RE WEIGH” button and press the “ST”
pushbutton five (5) times. This will cause the readout to enter the calibration mode. The display will
indicate “CAL”.
6. Press the “ST” pushbutton once more; the display will indicate “A/D ”. This indicates the start of the “raw”
analog-to-digital converter data being inputted to the microprocessor.
7. Press the “ST” pushbutton one more time. The number displayed is now the raw analog to digital data.
8. The automatic turn-off timer has also been programmed for an extended “on” period to give you time to
calibrate the scale. This time period is three minutes. The scale may be turned off before this time period
by simply pressing and holding the “ON” pushbutton. Hold it in for several seconds until the power shuts
off. If additional time is needed to complete the calibration procedure, press the “ON” pushbutton briefly.
This will reset the timer for an additional three minutes.
The readout is displaying a number, which represents the ZERO offset value of the platform and load cell transducers,
in tenths of pounds (0.1 pound). Note and record this value. (Even though your scale may be “kilograms only” in
operation, pounds are used internally because of their finer resolution.) Units conversion is as follows:
1.0 kilogram = 2.2 (2.2046) pounds
5.0 kilograms = 11.0 (11.0231) pounds
10.0 kilograms = 22.0 (22.0462) pounds
25.0 kilograms = 55.1 (55.1156) pounds
50.0 kilograms = 110.2 (110.231) pounds
75.0 kilograms = 165.3 (165.347) pounds
100 kilograms = 220.4 (220.462) pounds
Add the specified test weight to the platform. Note the new number displayed. Subtract the original ZERO offset
value from this new number to obtain the scale’s displayed value of the calibration weight.
NOTE: Early versions of the software did not display the decimal point in the A/D mode, i.e.: 11.7 pounds is
displayed as “117”.

 Loading...